A long time ago, I saw this interesting little gadget sitting in the used equipment case at my local camera store. It was a panorama adapter for Rolleiflex cameras that enabled you to shoot up to a 360-degree panorama on a single roll. It has a built-in bubble level (which is absolutely critical). You put the camera on top, then focus and compose as normal. Once you have the focus and exposure set, you don’t change them (this is also critical). Take the first exposure, then push in the little locking lever, rotate the camera to the next increment on the dial, and take the next picture, and so on until you have shot as many frames as you want to shoot. It is critical to maintain focus and exposure as set on the original frame because changing focus will mean that things in one frame will not be in exactly the same proportion as they were in the previous frame,therefore they will not blend seamlessly. Ditto for exposure – if you change the exposure from frame to frame, ESPECIALLY if you are shooting color film, you’ll never be able to match the frames.
Done right, you get this:
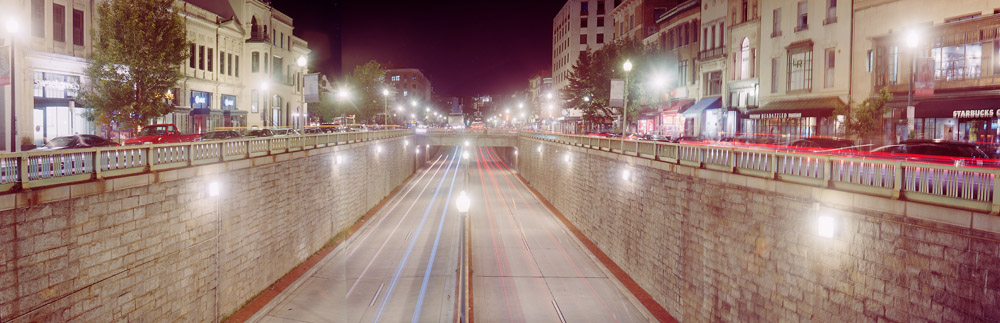
It isn’t perfect because with the long exposures (45-90 seconds each – I forget which I used, but as you can see they’re all exactly the same) traffic patterns don’t flow through the underpass during all three exposures, and the lens flare from the street light in the middle picture doesn’t carry over to the same degree in the left picture, thanks to the lens hood. But you have to look at it to see the three frames separately.
If things aren’t perfect, then you end up with:

While the alignment is pretty close, the color is off a bit on each frame. This took quite a bit of Photoshoppery to get it to match as well as it does. I kind of expected this outcome when trying this shot because I knew the traffic patterns wouldn’t line up from frame to frame, and wanted to see how it would turn out. I think it worked well enough as an effect, but I’m on the fence as to whether I’d try it again.
If you don’t have everything perfectly level, you get:
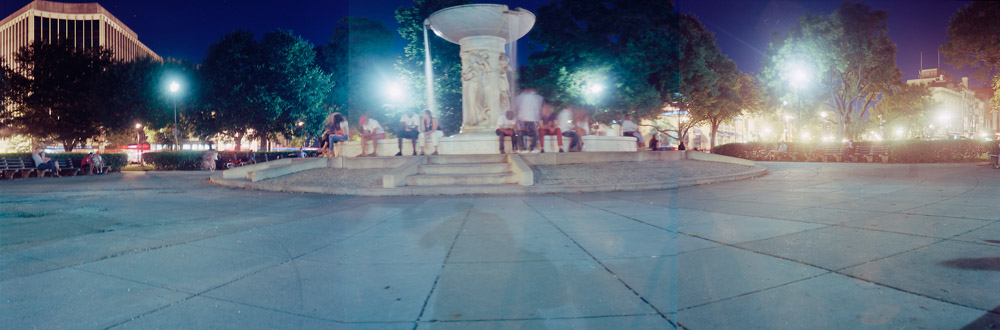
Also lots of Photoshoppery went into getting the colors and density to match from frame to frame. This one has been rotated and cropped to get it MORE level, but you can see between the oval of the fountain and the overall tilt, it wasn’t level and square enough.
And last but not least, another experiment with disjointed traffic flow around Dupont Circle.
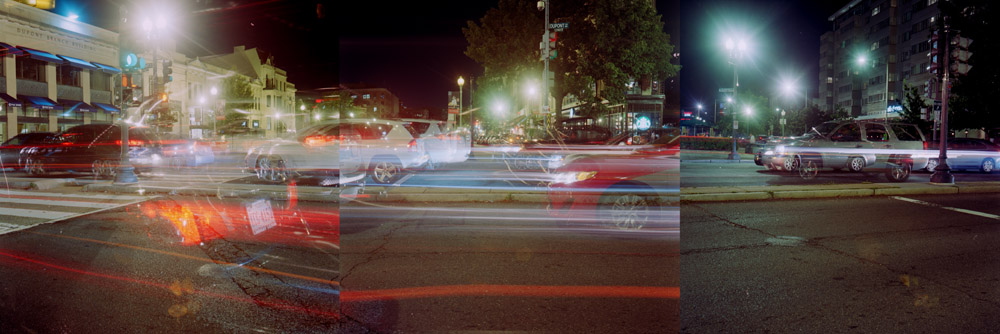
Another part of this experiment was to see how Kodak Ektar 100 does with long night exposures. My previous (and still) favorite for night photos is Portra 160. While Ektar hasn’t dethroned Portra for this purpose, it proves it can stand on its own and I don’t need to carry multiple emulsions with me when I travel to cover every scenario. I can bring a few rolls of Portra 800 for when I need to shoot hand-held in low light, and the Ektar 100 for everything else.
