Category Archives: Taking Photographs

Portraits of Photographers

Being a photographer who teaches, I have a lot of friends who are themselves photographers. It gives me lots of opportunities to photograph them, often with their cameras. It can get rather meta-referential, but that’s part of the fun.

This is Mari Calai, one of the members of the Handmade Photography Group at Glen Echo Photoworks. She’s also the current Artist-In-Residence at Photoworks.

Colin Gore waiting around for one of the other photographers in the Handmade group to do his portrait in Wet Plate Collodion. The group did an outing in February to the National Gallery of Art and then brunch afterwards.

Paige Billin-Frye, another group member and fellow instructor – she does amazing hand-colored and toned cyanotype work. It was interesting to see how many of the group members were using small (meaning medium format film or smaller) cameras on that outing. I was the only one shooting 6×7 (my new-to-me Pentax 67) – everyone else was shooting 6×6 square (mostly Rolleiflexes) or 35mm/full frame digital, except Mac who was shooting 5×7 wet plate.

Speaking of, there Mac is in action, shooting his portrait of Mari.

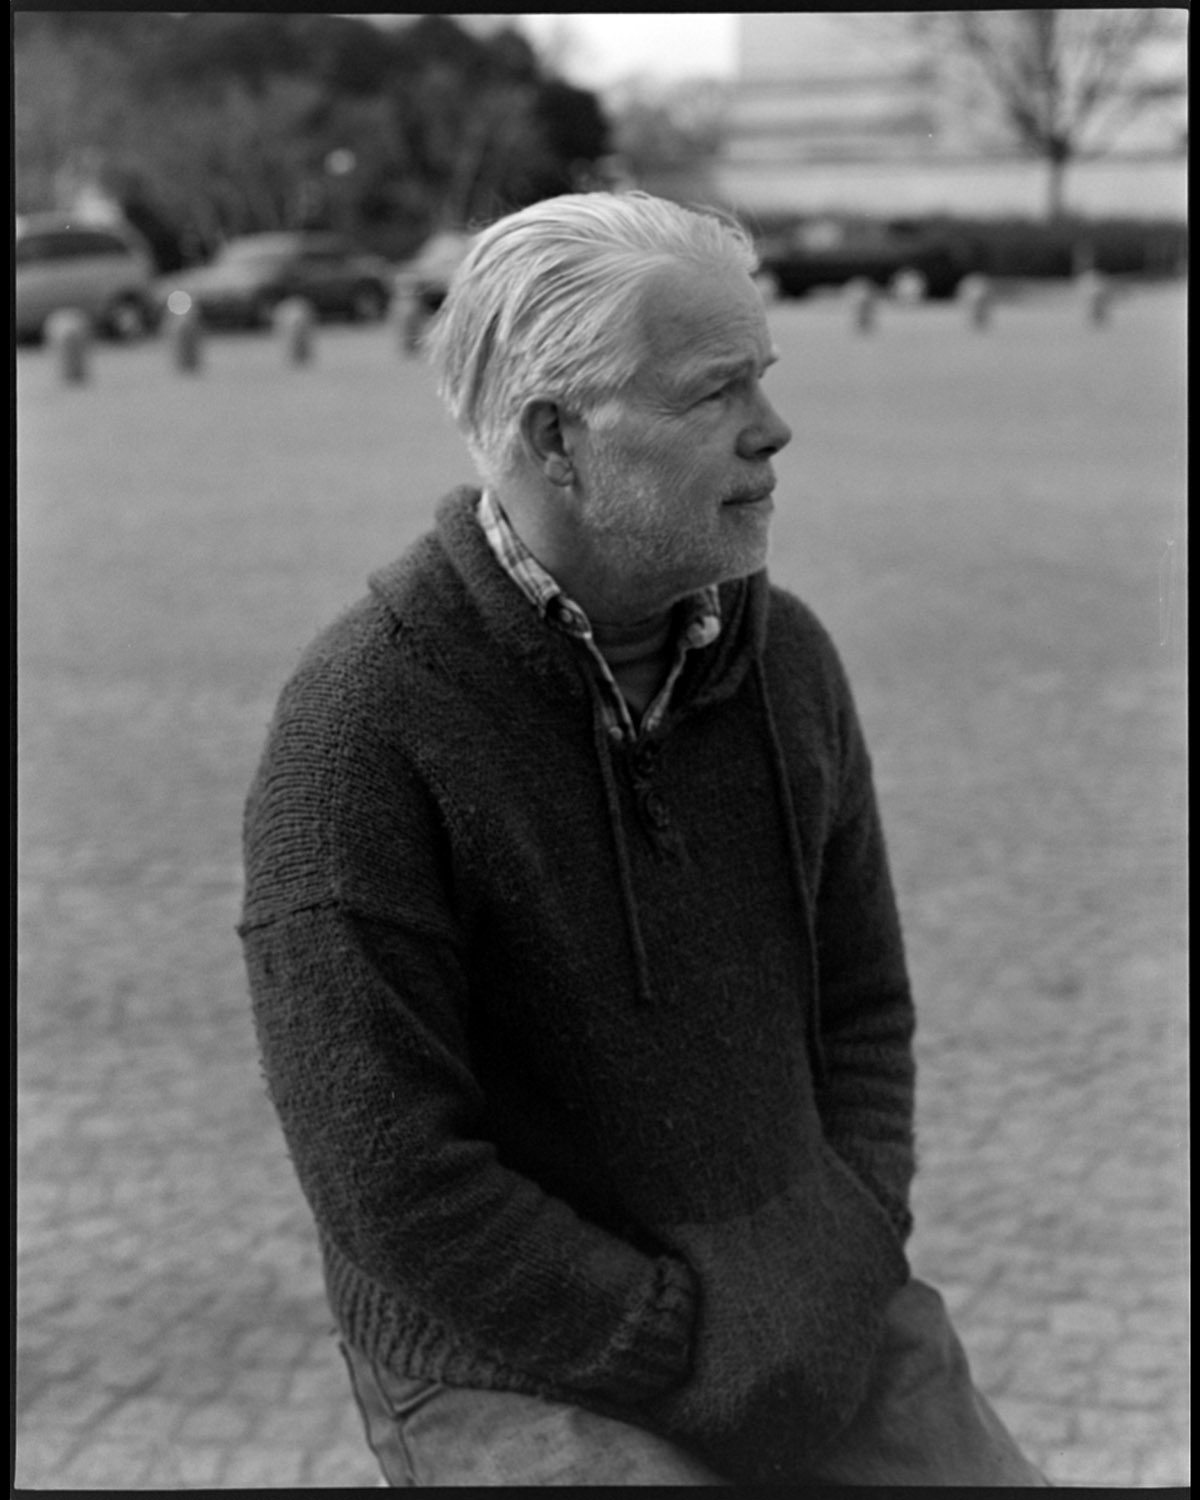
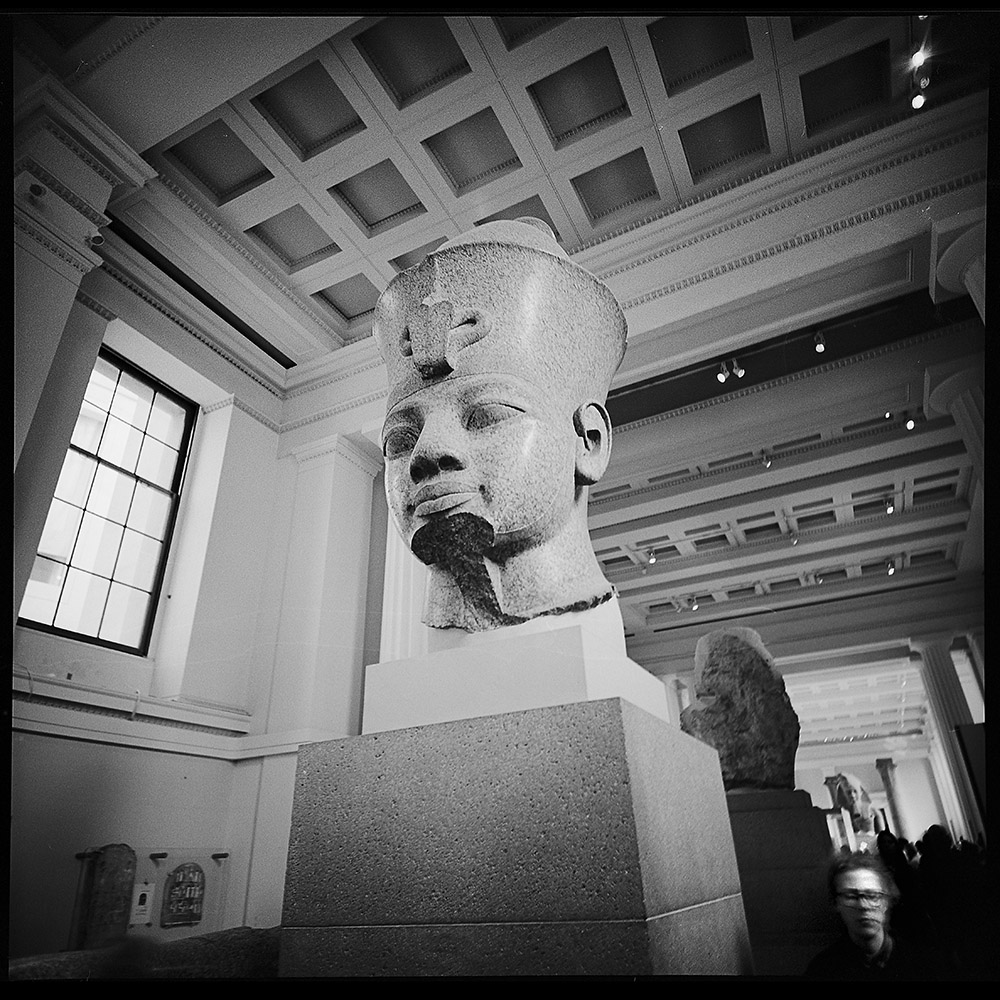
The man, the myth, the legend, not buried under a barkcloth. It was February, it was 45 degrees farenheit, and he was wearing sandals without socks.

Chris Gumm, who coincidentally practices gum bichromate printing, posing with his Rolleiflex.

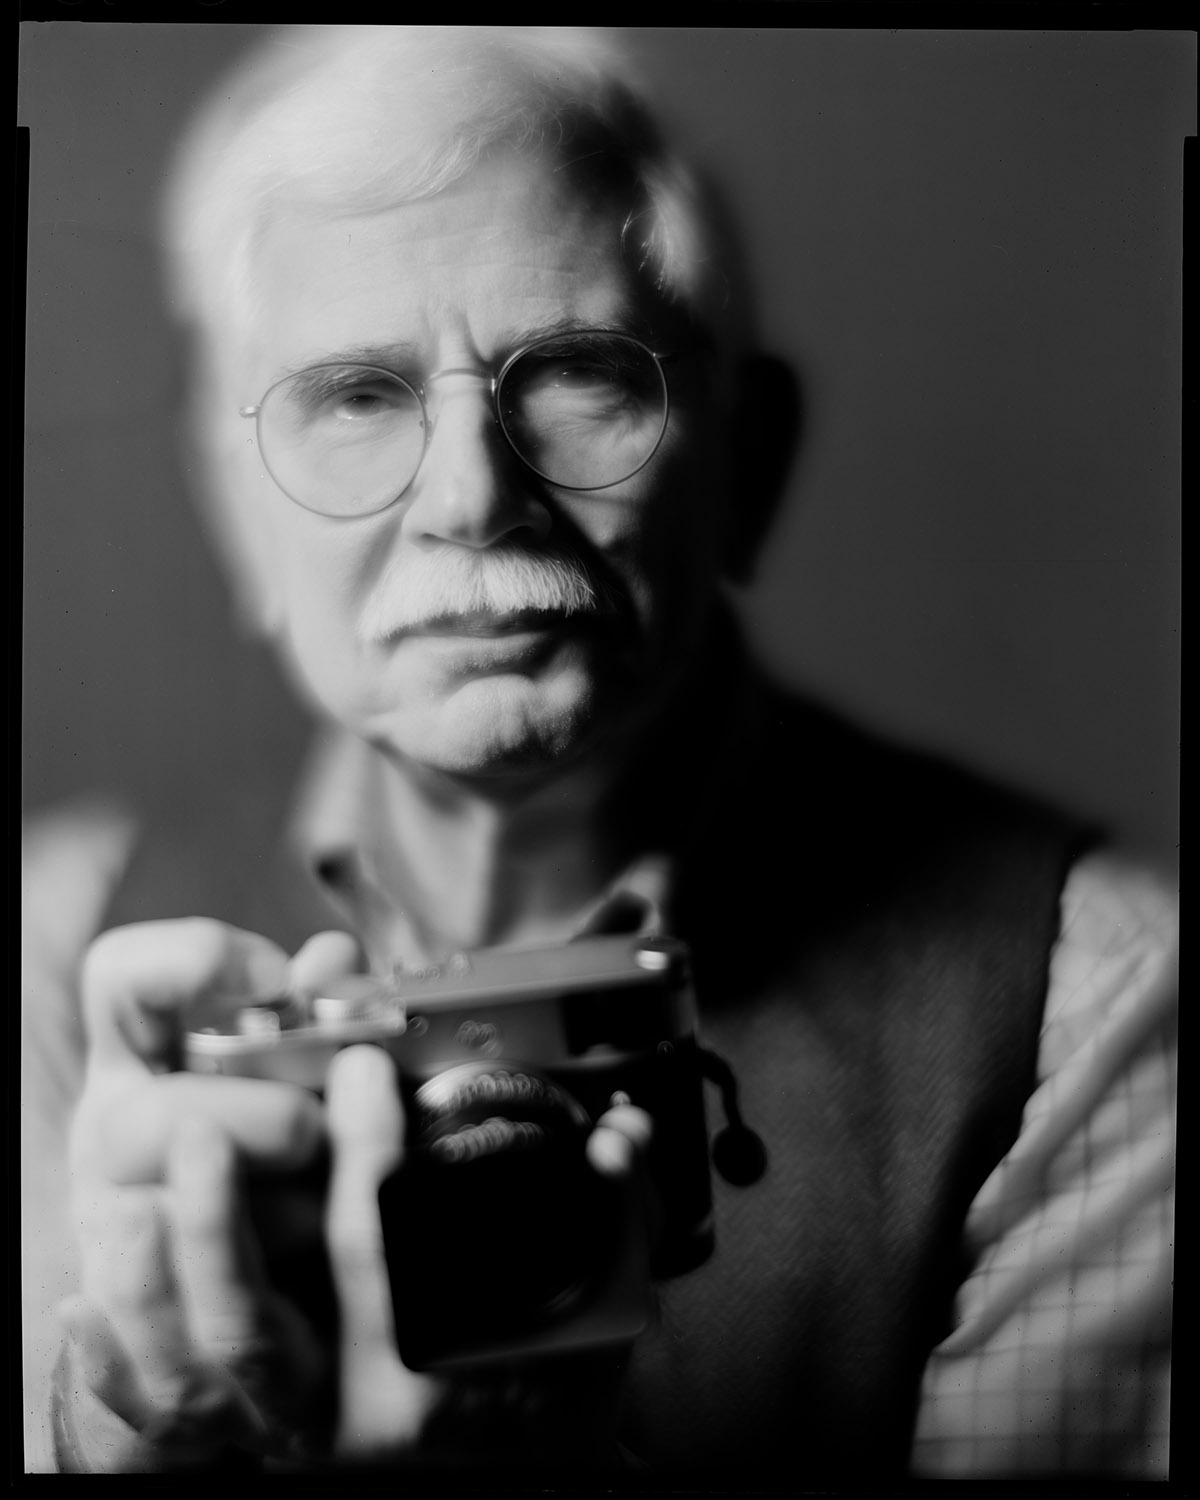
Switching gears somewhat, Steve Greenberg is another one of the Photoworks people, but not part of the Handmade group. This was from a commissioned portrait sitting we did, this time with my 8×10 Century Master studio portrait camera and the Kodak 405mm Portrait lens.

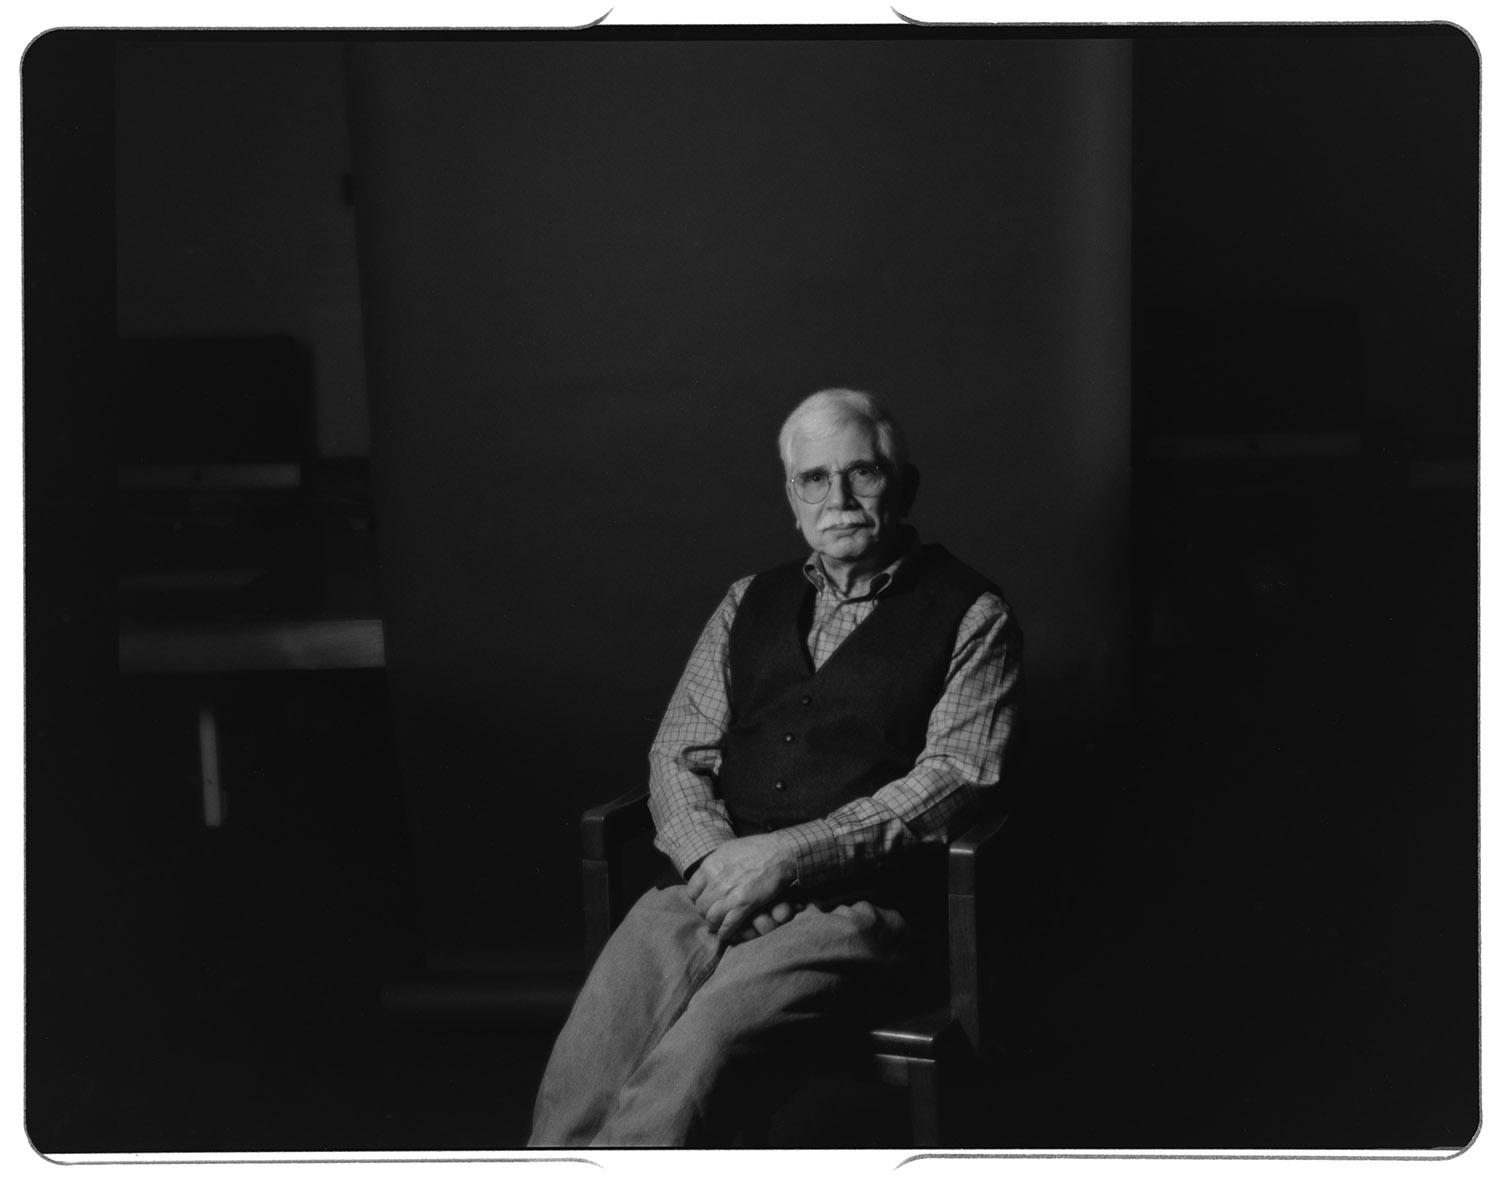
A different take on Steve, with a different camera and lens – still a soft focus portrait lens, but this time the Pentax 67 120mm soft focus portrait lens. It’s a lens that surprised me – I picked it up because I liked the soft focus effect I was getting on the Kodak Portrait and with some of the smaller soft-focus lenses I have (the Hermagis Eidoscope, a Seneca Whole Plate aka Wollensak Vesta, and my Cooke Series II, which isn’t technically a soft focus lens but has really creamy out-of-focus rendering especially wide open). I wanted to see how good it would be for this effect on a small format. It’s going to stay in my arsenal of lenses, and actually stay in my camera bag unless I KNOW I won’t need it for a particular trip. It requires careful use to get the best out of it – you control the soft focus through the use of the aperture, where wide open is the fuzziest/glowiest, and once you get below f/8, it’s mostly tack sharp. Best used in the studio, where you can control the amount of light you feed it, especially with how relatively fast modern films are.

One parting shot, very meta-referential, as it’s a photographer in a photo studio, showing the fact that it’s a photo studio.

Behind the Scenes – Still Life

I thought it might be fun to show a behind-the-scenes look at doing a still life shoot, particularly showing my lighting scheme. Studio lighting is something that mystifies many people, but it doesn’t need to be complex or intimidating. Here is the finished image, at least the iPhone version thereof. How do you think it was lit?

Answer: one light. Yes, it’s a somewhat specialized light, a 10” focusable Fresnel, but that’s it. No fill, no reflector, no background light, just the main. After all, there is only one sun.

I’m using a single LED continuous light source (a GVM 80s LED lamp). Continuous lights are great because they let you see exactly what you’re getting, and they allow you the luxury of playing with time as a component of the exposure.

Pay attention when photographing in the studio to how close or far away things are to the background, and how close or far your light is to that background. You can shoot a subject on a white background but have it appear dark just by withholding light from that background, or if needed, you can do the opposite and take a black background white by pumping enough light at it.

Here’s a prime example – same setup, same light, same camera, same backdrop (light gray seamless paper). The only difference is that I blocked light from the backdrop with the barn doors on the Fresnel. Amazing, isn’t it?

London Images – British Museum – Egypt

A moment of serendipity as I was photographing the red granite pharaoh’s head in the British Museum caught the face of a passer-by in the lower right corner breaking through a beam of light, an equally enigmatic expression on their face as on the Pharaoh’s. In the far background, a second Pharaoh looks on.

EgyptianBustBritishMuseum
Three Faces, British Museum

Shot on Kodak Tri-X in a Lomo LC-A.


Protests In Washington DC

Given the polarizing nature of the current president’s personality and demeanor, it should be no surprise that he attracts a LOT of protestors. There are always protestors outside the White House – for as long as I can remember, there was a 24/7 anti-nuclear weapons vigil in Lafayette Square, going back to at least the Reagan administration. The woman who spearheaded that protest has since died, so now the round-the-clock vigil encampment is immigration themed, if I recall correctly.

I don’t usually attend protest rallies or photograph them, given that they can be very sensitive events and I don’t want to be associated with anything that might go wrong when two opposing groups confront each other. Fortunately this is a rare thing in DC, but it does happen.

I was out playing tourist/tourguide with some out-of-town friends over the Martin Luther King Birthday holiday. We walked from the Air and Space Museum up Pennsylvania Avenue past the White House, then on to the Washington and Lincoln Memorials before finishing at the MLK Memorial. Outside the Renwick Gallery there was this character:

MeForDictator
Me for Dictator

Inside his white box, he was playing the harmonica through a portable amplifier. There was no discernible connection between his song choices and the overall theme of his demonstration, so I don’t know to what extent he was consciously protesting, making social commentary, or just serendipitously expressing the zeitgeist because his meds were wearing off.

Outside the White House was a different matter, and a much more pointed display of discontent. This was right after the president had made his “shithole countries” comment, so much of the signage centered around that.

ShitholePrez
Shithole Prez

I chose this image because of the profoundly ironic juxtaposition of the happy tourists posing for a family photo in front of the White House with the protesting woman in front. This is something you will experience here in Washington that I don’t think you see many other places – the cognitive dissonance of “oh look, we’re jazzed to be here!” immediately adjacent to “I’m righteously indignant and I’m not going to take it any more!” expressed over the exact same subject.

ResistRacistWH
Resist This Racist White House

One good thing about photographing protestors is that if you want to get better at “street” photography, they’re a great subject to practice on, because they absolutely want their pictures taken to get their message out to the larger world.


Palacio De Bellas Artes, Mexico City

PalacioBellasArtesSol

The last time I wanted to photograph the Palace of Fine Arts, the weather was not so accommodating and the skies were hazy and smoggy every day. This trip, the weather cooperated and you can see the glory that is the Palacio. The domes of the Palacio are so iconic a symbol of Mexico City, they’re even on the Starbucks mug! Next time I’m back, I’ll have to go in the Sears across the street and see if I can get a good shot out one of the third or fourth floor windows.

The interior is every bit as spectacular – The entrance lobby is a glory of Deco Mexicano – very much Art Deco, but with a distinct Mexican cultural twist – you can feel the stirrings of pride in indigenous Mexican heritage that were finding expression in stylized Aztec and Mayan motifs and the murals of Diego Rivera, David Alfaro Siquieros and Jose Orozco that adorn the walls of the lobby.

BellasArtesDomeInteriorUp

I feel lucky to have pulled off this shot, as I had to point the camera straight up, and hold it still for 1/15th of a second (I think it was a 1/15h, might have been 1/8th). No small feat when your camera is as big and heavy a brick as my Mamiya RZ67. I must say it has an extremely well-damped mirror that doesn’t cause camera shake – while it isn’t quite as smooth as my Rolleiflex, which has no mirror movement at all, I can hand-hold it down to 1/15th or 1/8th regularly (the Rollei I feel pretty confident to 1/4 second, and have been known to pull off 1 second exposures hand held).

Working with the Vermeer Pinhole – a review

Ok- now I’ve had a chance to put some film through the camera and give it a solid go. Here are some preliminary images from the camera.

GW617Sunset1

This first one worked out amazingly well. I did something like this before with my 4×5 Travelwide pinhole.

Foggy Bottom Metro, Waiting

Different days, different cameras, different feels. I haven’t decided yet which I like better. The 4×5 is a sharper image, but the panoramic has a definite late-afternoon fall rush hour feel to it the other one doesn’t.

GTownFountainDouble617

This was a happy accident – a double-exposure of two scenes in Georgetown, the historic and very scenic neighborhood in Washington DC home to the eponymous university and the Potomac River waterfront. The fountain that dominates the above exposure is a new water feature in the riverfront park built in the last few years to reclaim that space and make it appealing to people. The skyline you can see is the iconic intersection of Wisconsin and M Streets, with the famous bank building in the center.

PumpkinsWholeFoodsGW617

I took this shot to test out how much linear distortion I would get from the pinhole’s curved film plane. As you can see, very little. The nearest pumpkins in the foreground were maybe a foot from the camera, and the ones in the background over a dozen feet away. Yet the shelf they’re sitting on which goes into the background remains sharp and rectilinear.


img_6515GtownWiscMNight617

Here’s the comparison I suspect you’ve all been waiting for. The trial run iPhone panorama shot at top (which I’ve showed before), and the actual exposure from the Vermeer below. The Vermeer has a different aspect ratio ( 6×18 ) and as a result, the vertical field of view is compressed over that of the iPhone. The Vermeer is also using an effective f/300 aperture, so the exposure time for this shot was 25 MINUTES, whereas the iPhone shot was at most three to four seconds.

The iPhone, due to its swinging-lens equivalency, has obvious curvilinear distortion, whereas the Vermeer does not. I was actually honestly surprised at how little distortion it has. I was expecting verticals to remain true, but not the horizontals, because of the curved film plane.

My plan is to re-shoot the night shot with a different tripod. I had a lightweight tripod with me this outing, and it not only did not go high enough to include the entire dome of the Farmer’s Bank building, but it jiggled during the 25 minute exposure such that the non-moving subjects went soft.

As to the camera itself, I have a short list of criticism, both positive and negative.

Likes:

  • The camera is very nicely finished, with an obvious degree of high craftsmanship.
  • I very much like the shutter control on the camera, much better than the rubber lens cap-thing on my Travelwide that can easily get lost.
  • All the controls are easy to grip and operate, even if wearing gloves.
  • The film advance mechanism makes it easy to fully tension the film after advancing, especially if you over-advance a little and need to roll back.
  • It comes with a very nicely made cheat-sheet of instructions on how to load and advance the film, and how to calculate exposure. I used the chart exclusively and my exposures came out spot-on.
  • The camera comes with a 52mm filter adapter ring built in to the front, should you want or need to use contrast-boosting filters for black-and-white, Infrared filters, or neutral density if you enjoy sitting up all night making a single exposure.

Dislikes:

  • The closure mechanism (two thumb-screws to lock down the lid), while very secure when closed, is susceptible to loss- it would be very easy to drop one of the screws while changing film in the wild, and have it disappear in tall grass or down a storm drain. The camera would not be light-tight at that point.
  • There are no levels on the camera (a minor quibble, as they are inexpensive to obtain and install). When dealing with a panoramic camera, getting the horizon level is critical.
  • There are no markings on the camera to indicate the horizontal or vertical fields of view. I can understand how you might not have a horizontal field of view indicator, as the camera design is compact for the format due to the curved film plane, but a vertical field of view indicator would be extremely helpful when guessing compositions and deciding how high to set your tripod, or whether to tilt the camera up.

I’ve got some bubble levels on their way to me from Amazon, and I’ll be attaching them to the top deck when they arrive. That will solve one of my biggest immediate gripes about the camera. Now if I could only find a 6×17 viewfinder that has a similar equivalent focal length…

Meet And Shoot – Columbia Heights

Today was my session of the “Meet & Shoot” class I co-teach with several other instructors at Photoworks. The class is a five or six session workshop on street photography where each instructor takes a group of students out for a guided photography excursion to a location of their choosing. Students can sign up for all sessions, or pick and choose which ones they want as their schedule and/or instructor preference dictates.

This time, I had three new students and three repeat students from the last time I taught this class. Due to some last-minute scheduling snafus, three of the students were unable to make it, so it was a very intimate walkabout, and I was able to teach as much as I was playing shepherd.

We met at the Columbia Heights Metro station, and once the crew was collected, we took a walk up to the little plaza in front of the Tivoli Theater where a saturday farmers market was in full swing. My three students, seen below (L to R: Matthew, Suzan and Bobbi) wandered around and took full advantage of my guidance for the session to use color as a foundational theme. The farmers market was a perfect opportunity, with all the fruit and vegetables on display.

Columbia Heights is an ethnically diverse neighborhood, with a strong Latin-American presence. This is very obvious in the colors and styles of signage on shops and restaurants, and makes for a great subject for a color-based exercise.

Here Bobbi, Suzan and Matthew are examining some signage on a Dominican restaurant on Park Road.

We continued along Park Road over to Mount Pleasant, another neighborhood in Washington DC that also has a significant Latino presence. I took the opportunity to discuss including graffiti and public sculpture in your work as a “street” photographer. If you’re going to include other peoples’ art in your photography, make sure that you have a solid reason for doing so- it’s fair game as documentary, or if your capture and interpretation is transformative (abstract/close-up, for example), but if you’re planning to exhibit and market photos of other peoples’ art, even if it is displayed in public, you’re at best in an ethical gray area, and potentially in a copyright violation scenario.

Street photography is very much about found images – you’re not setting out to intentionally create compositions, but rather responding and reacting to things you encounter, like this poster that fell into the street and got run over until the rough pavement surface pierced through turning the whole thing into an abstract composition.

We had a great morning of shooting, and wrapped up for a chat at a cafe on Columbia Road in Adams Morgan (another neighborhood bordering on Mount Pleasant and Columbia Heights). I’m very pleased with my students, and I’m looking forward to seeing their images from today at our recap class in three weeks.

Mexico City – part 1 – People out and about

For the Memorial Day holiday weekend, I took a short vacation down to Mexico City. I wanted to do an art-themed vacation, taking in museums and popular art and crafts, to get some inspiration for my own work. And of course, to take images of my own. For this trip I decided to take my new Fuji X-T1 and a couple lenses because it was much more compact and less conspicuous than the Rolleiflex. It proved a baptism by fire for me with the camera, as I was shooting with it 10 hours a day every day for five days. This generally is a good thing, and I’ll write up my impressions in a separate post.

One of the first things I noticed about Mexico City is that it is a very young city – you can tell the population skews much more toward 20 than toward 60. There are young people everywhere, wandering the streets of the Centro Historico, visiting the museums, riding the subway. I spotted these two young lovers on the plaza in front of the Palacio de Bellas Artes. You saw many young couples like these two holding hands and being publicly expressive. This was a bit of a surprise to me as my last impression of Mexico City was 30+ years ago when it was a much more conservative, much more Catholic place, and this kind of public display between unmarried youth would have been frowned upon.

Young Love, Calle Madero

Further signs of change in Mexico City – young gay couples holding hands in public. These two were touring the Casa Studio Diego Rivera with me, and I caught them in an unguarded moment on the roof of the studio. I should have taken their portraits too, but I did photograph them together with their cellphone as they were trying to do selfies with not much success. They were very cute and sweet.

Gay Couple, Casa Diego Rivera

I also saw several other young gay couples out on the street holding hands in the Centro Historico, which surprised me a little as I was not expecting it there.

On another early Sunday morning, I took a walk through the Alameda park, which was just up the block from my hotel. This boy and his dad were out to go roller skating in the park. I loved his punked-out helmet with the spiky mohawk.

Rollerblade Chico
Rollerblade Chico

In a passageway between Calle Madero and Calle Tacuba, just behind the Banco de Mexico, there’s this big bronze bird bench (try saying that five times fast!). I spotted this lady taking a rest, smoking and playing on her phone. As is typical everywhere now, people of all ages are glued to their phones.

Lady, Bird Bench
Lady, Bird Bench

A handsome young man on his phone, outside Chapultepec Park. Hot travel tip for anyone planning to visit Mexico City – the entire city seems to roll up the sidewalks and shut down on Mondays, at least as far as attractions go – there’s maybe one museum open. They even lock up the gates to Chapultepec park and only allow bicyclists who are transiting through to enter!

Boy On Phone, Chapultepec

I went out for an early morning walk my first full day in Mexico City, to see what the rhythms of life are like. This man presented a dramatic composition in the morning sunlight as he leaned up against the wall.

Man On Phone
Man On Phone

Random Outtake – Georgetown Boathouse

This is a view I’ve seen a number of times but wasn’t ever sure how to capture it until yesterday. I’ve always had the wrong camera with me, either from the focal length, the aspect ratio, or both, perspective. This is an outtake in the sense that I was doing a model shoot with a friend of mine on the pier of the old C&O Canal bridge that used to cross the Potomac River in Georgetown, so taking this photo was not the purpose of the shoot. This is the view looking straight down at the dock for the boathouse.

Boathouse Dock, Georgetown

I was particularly drawn to the geometry and angles formed by the decking on the boat dock, with the red decking running perpendicular to the unpainted deck, and all the triangles formed by the perspective you have to take to see the scene in the first place. Even the boat, which has a totally different shape and texture to the decking, creates more triangles with its prow, and provides visual tension running the opposite direction so you move your eye around the image.

Model Shoot with the Fuji X-T1: Part 3

In this set I’m including some black-and-white shots along with the color ones to show what the Fuji can do. I used the b/w+R setting (the equivalent of using a red filter when shooting black and white film). I don’t know that this is as extreme as actually shooting black-and-white film with a red filter in terms of the contrast and look, but I like it.

Mustafa
Mustafa

Mustafa
Mustafa

Mustafa showed up to the shoot in a tux, which is hard to work around if that’s not what you’re aiming for. It’s a good look, and a very elegant one, but not necessarily fitting a pool hall. I tried to shake things up a bit with the kaleidoscope glasses, the steampunk welder’s goggles and my own vintage leather jacket. Tip to models – unless you are told wardrobe will be provided, always bring at least two different looks to a test shoot with you so you don’t get stuck looking out-of-place on the shoot.

Mustafa
Mustafa

Mustafa
Mustafa

Mustafa has a great face – he looks good from lots of angles. When posing a model or a portrait subject, you want to make sure that you’re not doing anything un-flattering. If you’re turning the head away from front-on, you want the nose to either obviously stand back from or break the contour of the cheek so you don’t inadvertently flatten it by having it by having the tip of the nose meet the outline of the cheek. At the same time, pay attention to the eyes – you want to see whites on both sides of the iris. If you turn someone’s head in part profile and then have them look back at the camera with their eyes, the irises in the corner of the eye make them look like a psycho-killer. In these shots it works because he’s looking the same direction with his eyes as his face is pointing.

Mustafa
Mustafa

Mustafa
Mustafa