
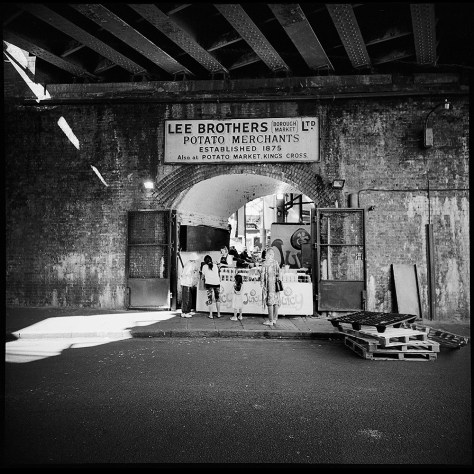
A street find while walking around with the LC-A 120. This is under the railroad tracks that cross the South Bank pier of London Bridge, just across the street from Southwark Cathedral.
A street find while walking around with the LC-A 120. This is under the railroad tracks that cross the South Bank pier of London Bridge, just across the street from Southwark Cathedral.
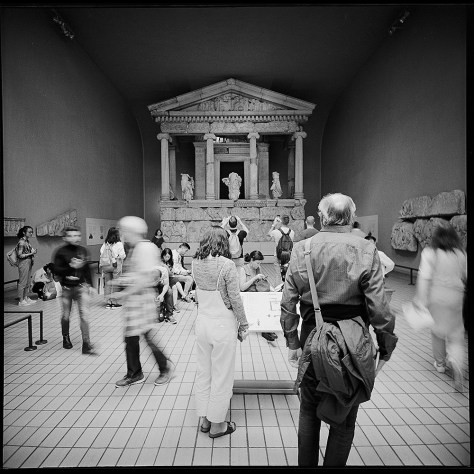
I’m entranced by the range of things happening in this photo. The geometry of the space (especially the grid on the floor) leading your eye back toward a vanishing point, the contrast between the stark modernity of the room structure and the gnarled, organic forms of the ancient Greek temple, the static, permanent nature of the architecture (all the moreso thanks to the twenty-five hundred year old temple in the room) providing backdrop for the hustle-bustle of people circulating the room, and the movement around the people stopped stock still to contemplate the temple. This was probably another 1/2 second exposure, maybe 1/4, hand-held with the Lomo LC-A.

I’ve walked past this mural for years, and they re-do it every so often. The primary change from visit to visit is the color palette, but over time, major compositional elements change as well. I’m showing the previous version (circa 2013) and now both in black and white just to keep the comparison visually fair.

The bird’s head on the right is a mosaic, originally including mirror fragments, now painted. I think the fisheye treatment in the first image works well because the mural already has a bit of a fisheye perspective to begin with.
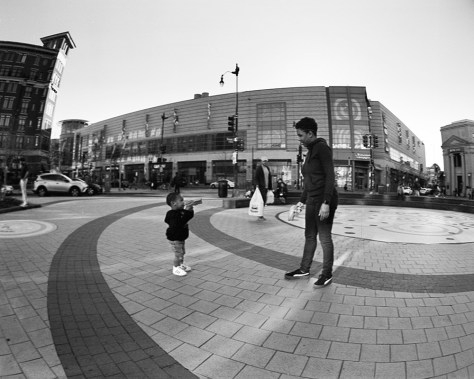
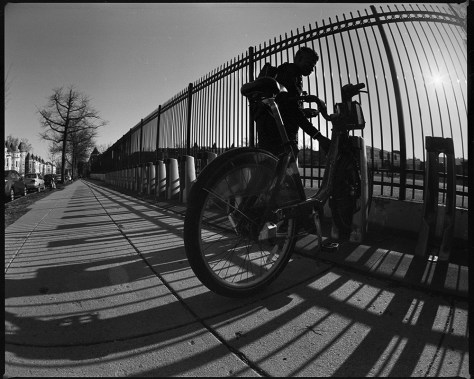
I decided to treat myself to a lens toy – I got a Mamiya RZ Fisheye lens for my RZ67. It arrived this weekend and I took it on a walkabout in my neighborhood to put it through its paces. I especially wanted to try and do some shots that did not scream “shot with a fisheye” to see if it could be versatile enough to keep in my camera kit, or was it really a one-trick pony.

In this shot, it shows that you CAN use it for street documentary if you want. It’s still a challenge, though, with the distortion it brings to background subjects. And it forces you to get right up on top of your subjects – They were maybe five feet away from me.
Applied sensibly to architecture, it works. You do have to be extra careful that your horizons are level and square, or you will get wild distortion.
This is perhaps my favorite image of the shoot. Leading lines abound and the backlit subject with the sun in the frame create drama.
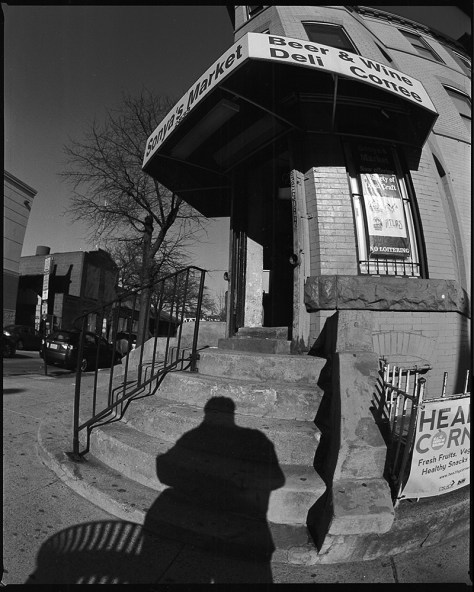
Selfie with the fisheye – with the sun behind me, it’s impossible to keep yourself out of the photo (or at least your shadow).
Last weekend I took an excursion down to the National Gallery of Art to do some book shopping in their bookstore. I brought the Lomo Belair with me to play around a bit.
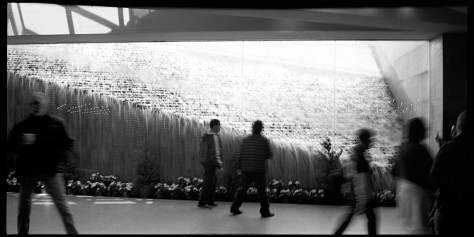
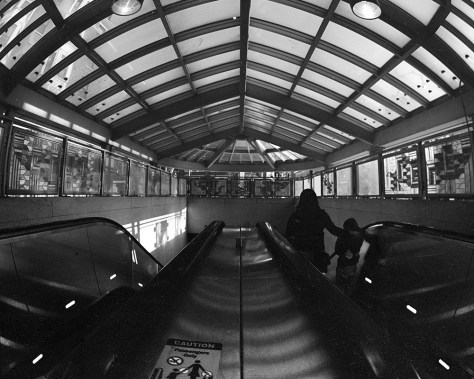
The cafeteria and bookstore for the NGA is below ground. There’s a great big window that looks out at a fountain that cascades from the plaza at street level above, and transforms what could otherwise be a dark and oppressively cavern-like space into something almost airy.
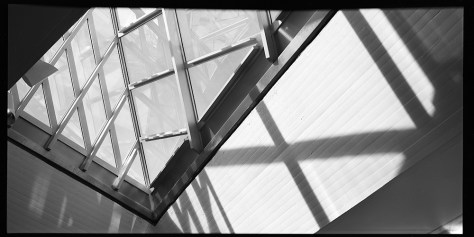
Also directly above the cafeteria and facing the waterfall are the glass pyramidal skylights. They’re not true pyramids, as they’re actually irregular tetrahedrons (four-faced geometric structures with each face being a triangle).
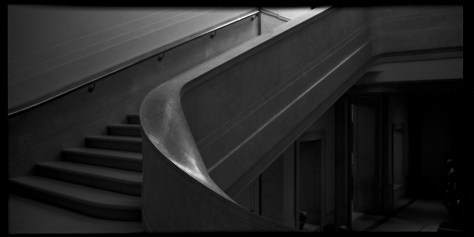
Contrasting to the brutal modern geometric structures of the cafeteria and the East Wing (itself a wedge-shaped structure designed by I.M. Pei and completed in the 1970s), the original gallery building is supremely neoclassical, designed by one of the late-19th/early 20th century’s greatest American architects, John Russell Pope. The marble staircase shown here has the sweeping grandeur and majesty of a European royal palace.
The images as you see them here are an interim step- my plan is to make platinum prints from all of them. The originals are shot on 2 1/4 inch roll film, so prints directly from the in-camera original film would be quite small – 2 1/4 x 4 1/4 inches. I want to make slightly bigger prints, and I want to try out making digitally enlarged negatives with another technique I recently came across for the digital negative process. I’ve been around and around with making digital negatives for a while and never been especially happy with my results. All the techniques I’ve seen and tried so far are rather labor-intensive and involve making several rounds of test prints just to develop the adjustment curve needed to make the negative print well in pt/pd.
I came across a video from Bostick & Sullivan that explains the process quite simply and clearly, and the website provides you with a downloadable pre-made curve for adjusting your negatives to make them suitable for pt/pd printing. I’ve made the appropriate digital files from these images, and the next step will be to print them over the weekend and try making my prints from them. I’ll post the results of the printing session as soon as I have them.
Here is the video from YouTube:
And the page to download the curves for Pt/Pd, Cyanotype, Kallitype, and Van Dyke:
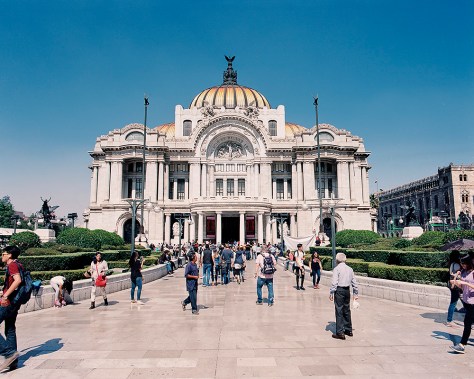
The last time I wanted to photograph the Palace of Fine Arts, the weather was not so accommodating and the skies were hazy and smoggy every day. This trip, the weather cooperated and you can see the glory that is the Palacio. The domes of the Palacio are so iconic a symbol of Mexico City, they’re even on the Starbucks mug! Next time I’m back, I’ll have to go in the Sears across the street and see if I can get a good shot out one of the third or fourth floor windows.
The interior is every bit as spectacular – The entrance lobby is a glory of Deco Mexicano – very much Art Deco, but with a distinct Mexican cultural twist – you can feel the stirrings of pride in indigenous Mexican heritage that were finding expression in stylized Aztec and Mayan motifs and the murals of Diego Rivera, David Alfaro Siquieros and Jose Orozco that adorn the walls of the lobby.
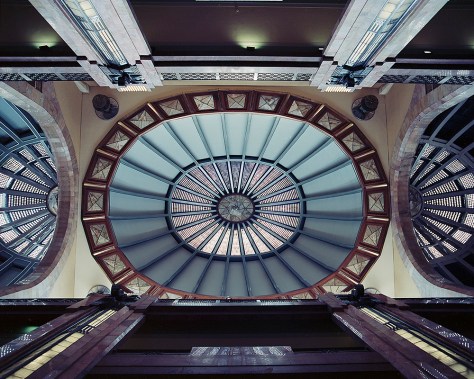
I feel lucky to have pulled off this shot, as I had to point the camera straight up, and hold it still for 1/15th of a second (I think it was a 1/15h, might have been 1/8th). No small feat when your camera is as big and heavy a brick as my Mamiya RZ67. I must say it has an extremely well-damped mirror that doesn’t cause camera shake – while it isn’t quite as smooth as my Rolleiflex, which has no mirror movement at all, I can hand-hold it down to 1/15th or 1/8th regularly (the Rollei I feel pretty confident to 1/4 second, and have been known to pull off 1 second exposures hand held).
More specifically, the Georgetown neighborhood. Georgetown may be many things (incredibly overpriced, a tourist trap, insanely busy and difficult to navigate because they refused the Metro when the system was being built) but it is very vibrant and there’s always something going on. It still retains much of the late 18th/early 19th century architecture from when Georgetown was actually a separate city from Washington DC, and has a very distinct feel. I like getting out and photographing there, especially at twilight into the sunset hour, because Georgetown’s position on the crest of a hill overlooking the Potomac really captures the light of that hour like no other part of the city.
This is looking east along M Street, one of the main commercial corridors in Georgetown, from the corner of Wisconsin Avenue and M Street. The sun is setting, the light is fading, and the traffic and street lamps are glowing with the first hints of night lights.
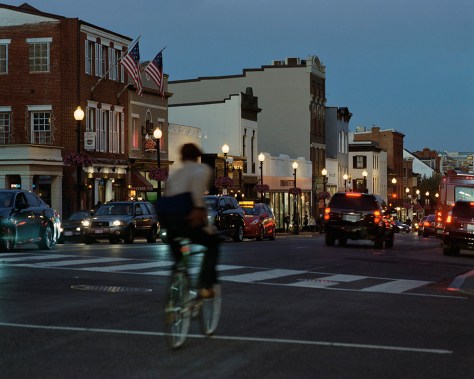
The cyclist is moving just fast enough to be blurred as he passes through the scene.
Here is the famous Farmers and Merchants Bank at the corner of Wisconsin and M Streets. This is an absolutely iconic structure in Georgetown, and is instantly recognizable around the world to people who have visited Washington DC.
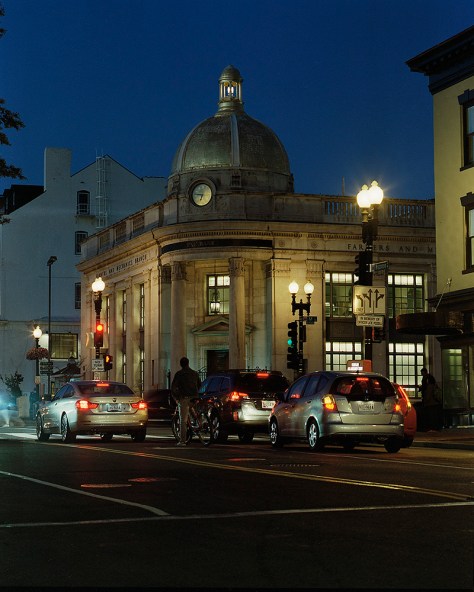
I love the dull gleam of the gilded dome of the bank catching the last rays of the sun.
And here is a glimpse of Georgetown’s industrial waterfront past, where the C&O Canal carves its last yards of waterway through the city before meeting the Potomac River, and where the warehouses for tobacco, wheat, corn, cotton and local products were stored, bought, and sold at the last navigable port on the Potomac.
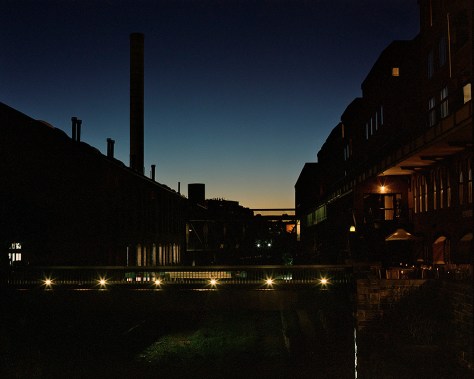
Today, fancy boutiques and high-end condos line the canal, the smokestacks of power plants remaining as decorative follies to remind us of the town’s industrial past.
I keep shooting this building and the surrounding intersection because the architecture provides all kinds of graphical possibilities. Here, today, the drum in front of the tower looks almost like polished metal, whereas in reality, it’s coarse concrete. And a 25-second daylight exposure eliminates all but traces of traffic and the most immobile of pedestrians.
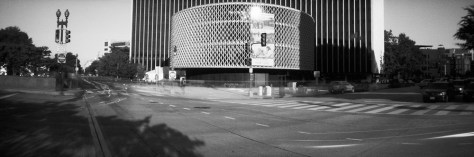
The 6×18 pinhole, when kept plumb, level and square, is virtually distortionless. I’m going to try shooting this scene again but from a low angle, pointing up, to see how curved it gets.
Now, with working with the pinhole, Kodak Tri-X has really turned into my go-to film because I really need the extra speed even in daylight. And the grain of Tri-X, in 120, and in contact prints/scans, really is a non-issue.
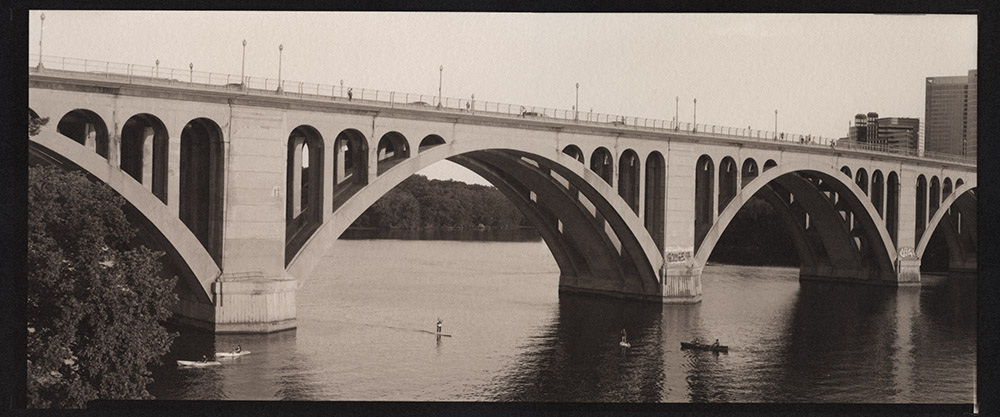
Another print I made this weekend – Key Bridge, in palladium. This is a 5×12 negative from my Canham. For the technically minded, I used a circa 1949 Kodak Commercial Ektar 12″ lens for the shot. It’s a very sharp lens with pleasant rendering, and a good match for the subject matter. I also want to talk for a second about the printing – this is a pure palladium print, with a touch of NA2 added for contrast. Sodium Platinum (NA2 for short) is a contrast agent you can add to a palladium print to boost the contrast if required. NA2 is very powerful stuff – a tiny bit goes a long way. In this case, I needed just one drop of 2.5% NA2 added to the 12 drops of Palladium and 12 drops of Ferric Oxalate sensitizer. NA2 comes from the manufacturer in a 5% strength solution, so you can see how little was needed to give the print some snap.
If you are using blended platinum and palladium, or trying to do a pure platinum print, and are in need of a contrast boost, you cannot use NA2 as a contrast agent – the platinum in it binds with platinum in your paper and what ends up happening is you reduce your highlights, blowing out detail, without actually increasing contrast. If you are using a blend, or pure platinum, you have several options – you can boost the contrast with a different additive, such as gold chloride, you can pre-coat your paper with fumed silica, or you can use a dichromate infused developer. I prefer adding a contrast agent into the emulsion rather than in the developer, because to do the infused developer route, you’ll need to have six or eight bottles of developers with different concentrations of contrast agent, and then you’ll have to play with chemistry to mix up replenisher for each developer concentration as it gets used. That realistically means keeping twelve to sixteen bottles of developer around. The downside to additives to the emulsion is that most of them will alter the color of the print. Gold Chloride will do anything from slightly cooler gray tones to eggplant/aubergine tones, depending on how much of it you use. Sodium Tungstate will actually reduce contrast in the print, and give you reddish brown tones. You can use dichromate in the emulsion as an alternative to the developer, but you must be careful in handling the undeveloped print as dichromate is toxic.
You may recall I recently posted some triptychs I did with my Lomo Belair X/6-12. I had been postponing printing them because I was A: being lazy, and B: I knew that they would be challenging to print because 1: lining up two negatives is hard enough, but getting three is even harder, and these are three pieces of roll film which doesn’t want to lay flat, and 2: I was concerned that there would be too much space between the frames because of the size of the image area vis-a-vis the negative size.
Inertia being the greatest of obstacles, it took me until now to get around to printing them. The challenges of registering the negatives to map my coating area, then re-registering them so they would align properly when exposing were substantial, but not as bad as I thought they would be. I guess there was enough humidity in the room that they cooperated for the most part and didn’t act as dust magnets or tensioned leaf springs while trying to place the cover glass in the contact frame.
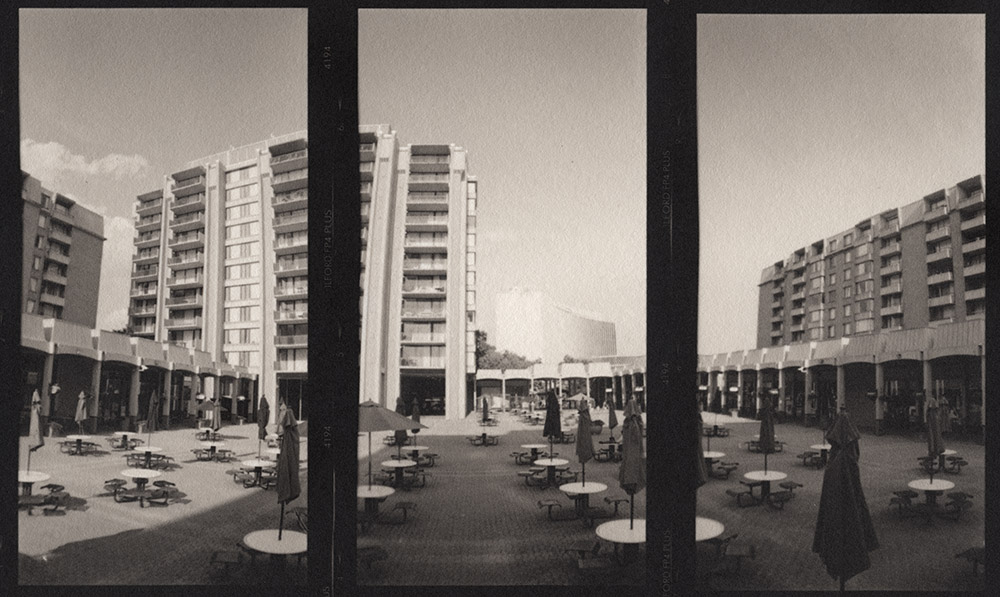
I think of this first one as a panorama of panoramas – it’s a horizontal panorama in the end, made of three vertical panorama shots. It’s the more conventional of the two in that it shows a fairly straightforward interpretation of the scene.
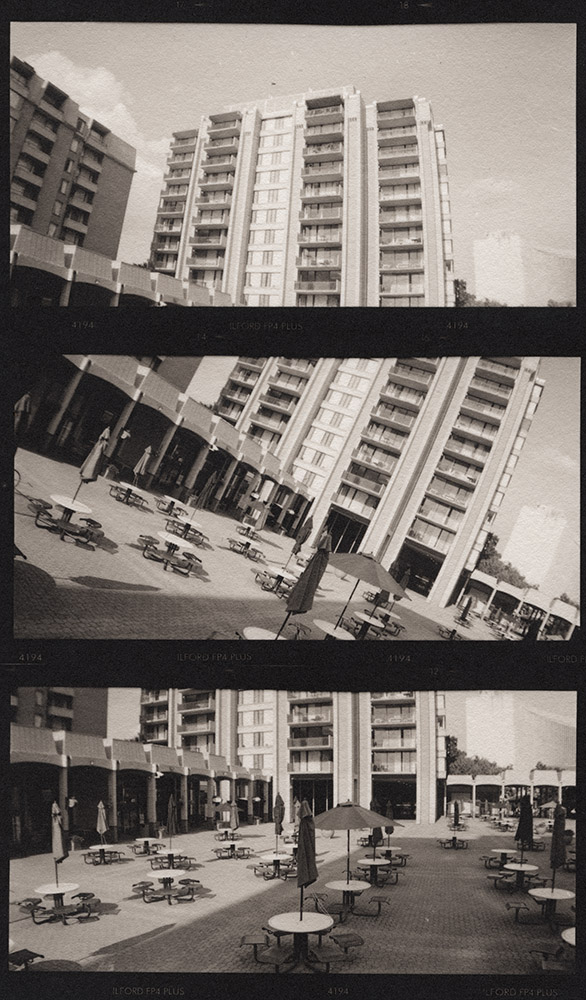
The vertical triptych I got a bit more creative in my interpretation, showing the middle frame askew, and each frame is not discreet in what it depicts – if you look carefully, they overlap in their subject matter, and you could almost do the top and bottom frames as a square-isn diptych.
Both images were printed on #Hahnemuhle #PlatinumRag in pure #palladium. No contrast agent was used, and they were developed in #PotassiumOxalate.


