This was, to me, a bit of a risk-taking. I’ve done each of the components of these images before, in some way shape or form, but never the combination of all at once. I’ve done pinhole. I’ve done panoramic. I’ve done long exposures. I’ve done color. I’ve done multiple exposures. But never color long exposure panoramic pinholes, and even a color panoramic long exposure multiple exposure pinhole. So these are the results of my experiments.
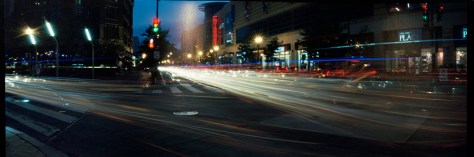
The first frame is taken from the intersection of Park Road and 14th Street, looking down 14th Street toward the DC USA shopping complex. This was a 12-minute exposure, using the exposure calculator from my pinhole camera. This was at twilight, thus the (relatively) shorter exposure.
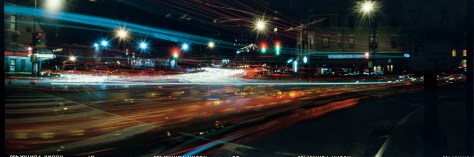
This next scene is at the corner of 18th Street and Columbia Road in Adams Morgan. I love the unpredictability of this kind of photography – you know you’ll get patterns of light, and can kind of figure out where they’ll be, but knowing for example that in the span of the 25 minutes of this exposure a city bus would pull through and stop at the light long enough for Woodley Park to dangle mid-scene like a disembodied phantom, well, I couldn’t have predicted or planned that, especially WHERE in the scene it was going to show up.
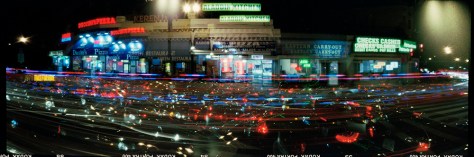
This last scene was a real experiment – Not only did I make a total of a 25 minute exposure, but halfway through I moved the camera about 15 feet closer to the primary subject and re-started the exposure.
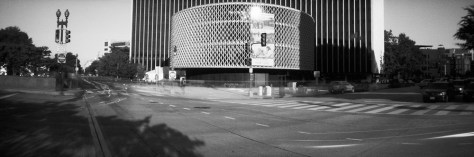
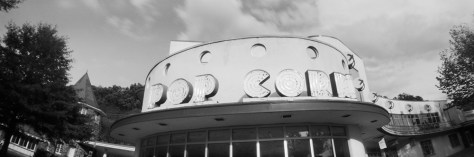
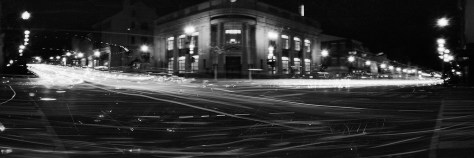
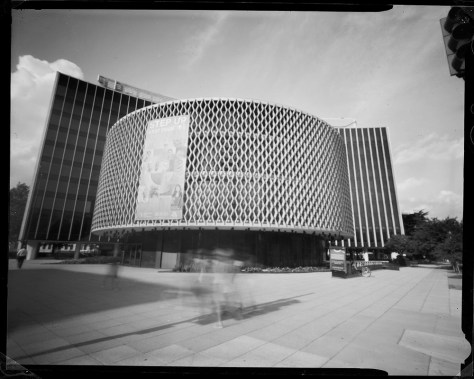
I keep shooting this building and the surrounding intersection because the architecture provides all kinds of graphical possibilities. Here, today, the drum in front of the tower looks almost like polished metal, whereas in reality, it’s coarse concrete. And a 25-second daylight exposure eliminates all but traces of traffic and the most immobile of pedestrians.
The 6×18 pinhole, when kept plumb, level and square, is virtually distortionless. I’m going to try shooting this scene again but from a low angle, pointing up, to see how curved it gets.
Now, with working with the pinhole, Kodak Tri-X has really turned into my go-to film because I really need the extra speed even in daylight. And the grain of Tri-X, in 120, and in contact prints/scans, really is a non-issue.
I’ve been out getting my exercise walking around Washington DC shooting 6×18 panoramic pinhole images. 6×18 is quite a large negative, and it’s not something easy to shoot because the composition is so wide.
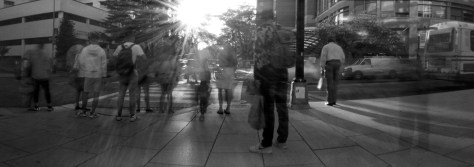
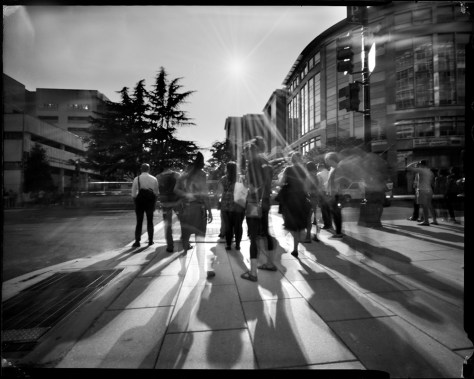
I think of this image as being sort-of an “un-pinhole” because it captures a scene briefly enough that at first glance, it appears the action is frozen.
Look more carefully at the people in the scene, though, and you’ll see them blurred during the 25 second exposure. I also caught the sunset reflecting off the office building in the distant background. In a strange kind of way, it feels a little Crewdson-esque, like a not-quite-still from a motion picture.
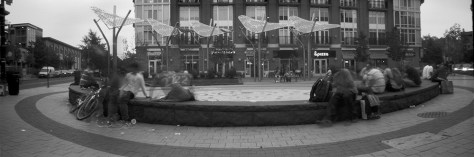
A different take on the “action pinhole” shot. This is the plaza at Park Road and 14th Street, NW in Washington DC. It’s a very popular place for people of all ages to hang out, day or night.
The sculptures at the back of the plaza are “light trees” that use solar panels to charge the lights built into the “branches”. Like the first image, there’s “action” happening here that’s been described in the span of 25 seconds or so, where some people are more static and perceptible than others.
The pinhole distorts perspective here. The plaza is round, but like in the next image, the curvature of the pinhole’s focal plane exaggerates the circular aspect. Here I’m playing with intentional distortion through tilting the curved film plane of the pinhole camera.
This is what you get when you point a curved film plane up, at something that is already curved to begin with.
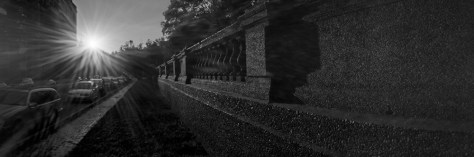
I’m really getting into these sunburst effect shots from having the sun in the frame with a small aperture pinhole. It gives a whole different take on the notion of “flare”.
For comparison, I’ll include an earlier shot I did with the same effect.
Ok- now I’ve had a chance to put some film through the camera and give it a solid go. Here are some preliminary images from the camera.
This first one worked out amazingly well. I did something like this before with my 4×5 Travelwide pinhole.
Foggy Bottom Metro, Waiting
Different days, different cameras, different feels. I haven’t decided yet which I like better. The 4×5 is a sharper image, but the panoramic has a definite late-afternoon fall rush hour feel to it the other one doesn’t.
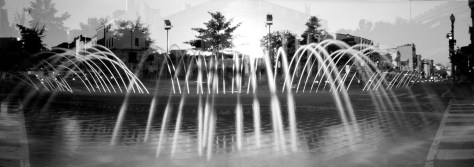
This was a happy accident – a double-exposure of two scenes in Georgetown, the historic and very scenic neighborhood in Washington DC home to the eponymous university and the Potomac River waterfront. The fountain that dominates the above exposure is a new water feature in the riverfront park built in the last few years to reclaim that space and make it appealing to people. The skyline you can see is the iconic intersection of Wisconsin and M Streets, with the famous bank building in the center.
I took this shot to test out how much linear distortion I would get from the pinhole’s curved film plane. As you can see, very little. The nearest pumpkins in the foreground were maybe a foot from the camera, and the ones in the background over a dozen feet away. Yet the shelf they’re sitting on which goes into the background remains sharp and rectilinear.
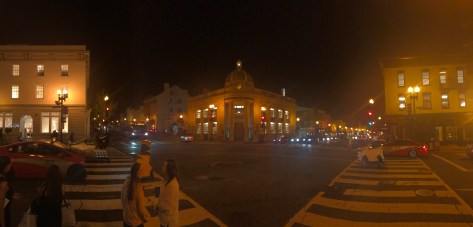
Here’s the comparison I suspect you’ve all been waiting for. The trial run iPhone panorama shot at top (which I’ve showed before), and the actual exposure from the Vermeer below. The Vermeer has a different aspect ratio ( 6×18 ) and as a result, the vertical field of view is compressed over that of the iPhone. The Vermeer is also using an effective f/300 aperture, so the exposure time for this shot was 25 MINUTES, whereas the iPhone shot was at most three to four seconds.
The iPhone, due to its swinging-lens equivalency, has obvious curvilinear distortion, whereas the Vermeer does not. I was actually honestly surprised at how little distortion it has. I was expecting verticals to remain true, but not the horizontals, because of the curved film plane.
My plan is to re-shoot the night shot with a different tripod. I had a lightweight tripod with me this outing, and it not only did not go high enough to include the entire dome of the Farmer’s Bank building, but it jiggled during the 25 minute exposure such that the non-moving subjects went soft.
As to the camera itself, I have a short list of criticism, both positive and negative.
Likes:
The camera is very nicely finished, with an obvious degree of high craftsmanship.
I very much like the shutter control on the camera, much better than the rubber lens cap-thing on my Travelwide that can easily get lost.
All the controls are easy to grip and operate, even if wearing gloves.
The film advance mechanism makes it easy to fully tension the film after advancing, especially if you over-advance a little and need to roll back.
It comes with a very nicely made cheat-sheet of instructions on how to load and advance the film, and how to calculate exposure. I used the chart exclusively and my exposures came out spot-on.
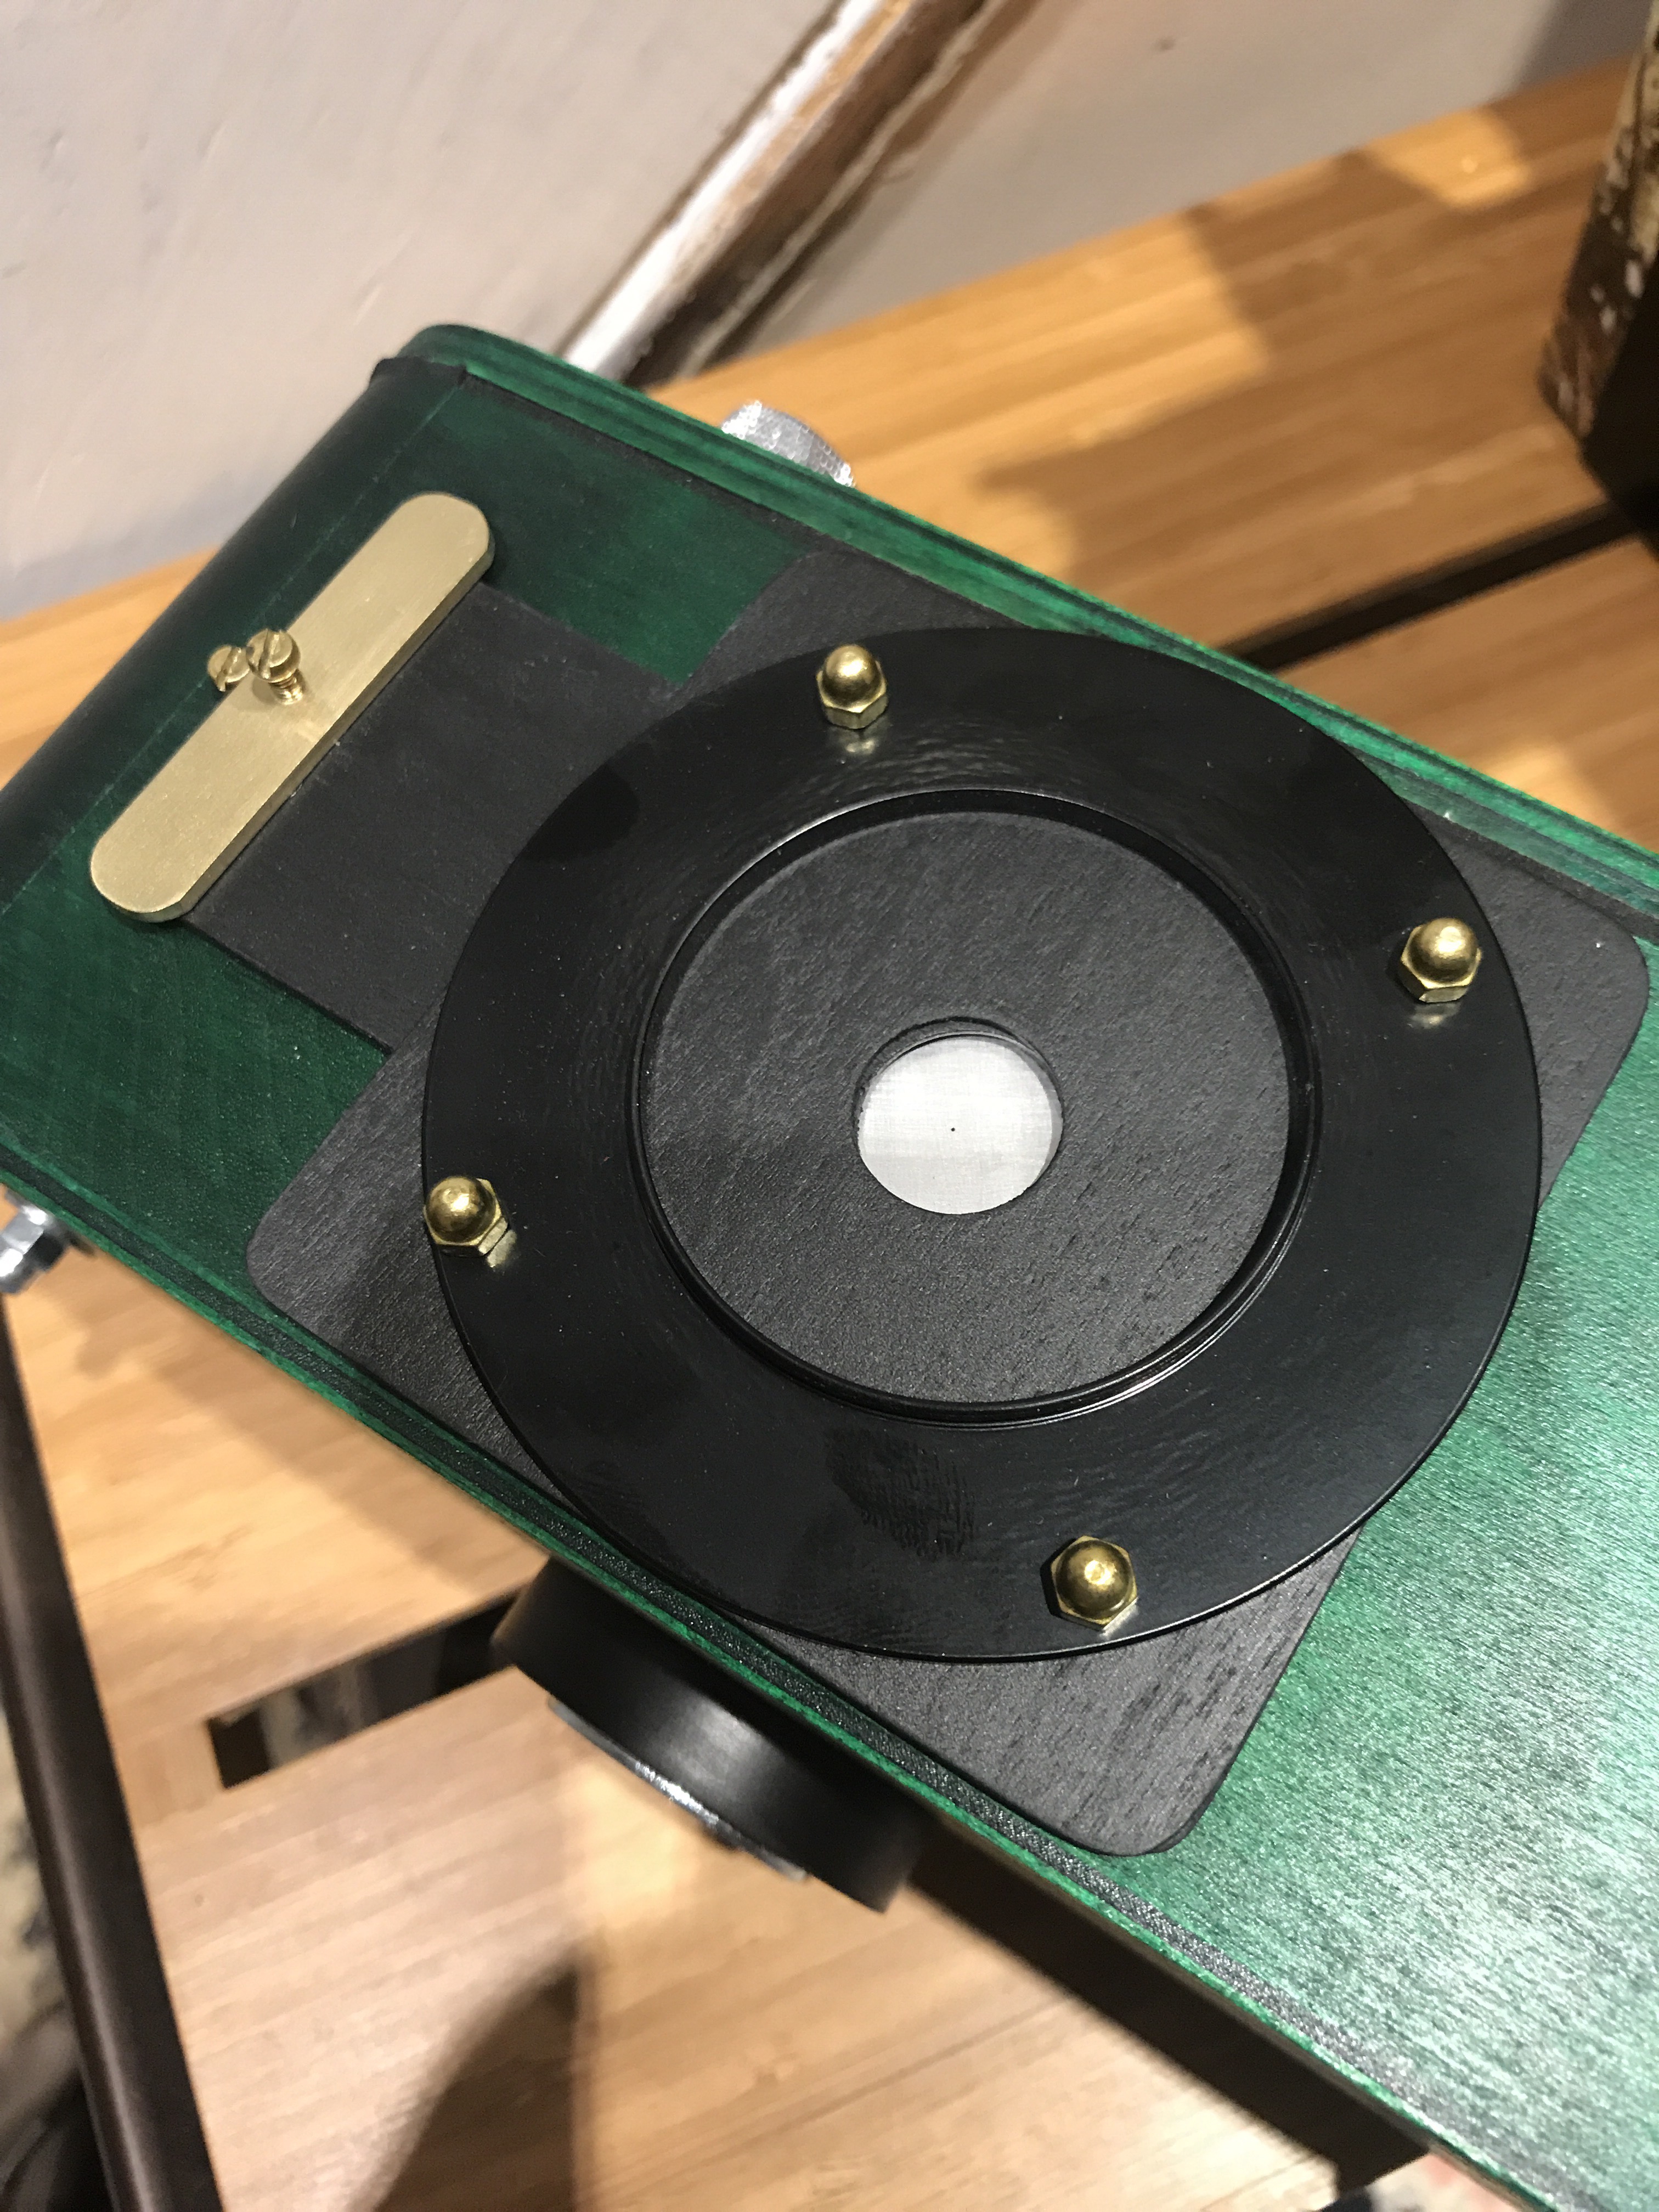
The camera comes with a 52mm filter adapter ring built in to the front, should you want or need to use contrast-boosting filters for black-and-white, Infrared filters, or neutral density if you enjoy sitting up all night making a single exposure.
Dislikes:
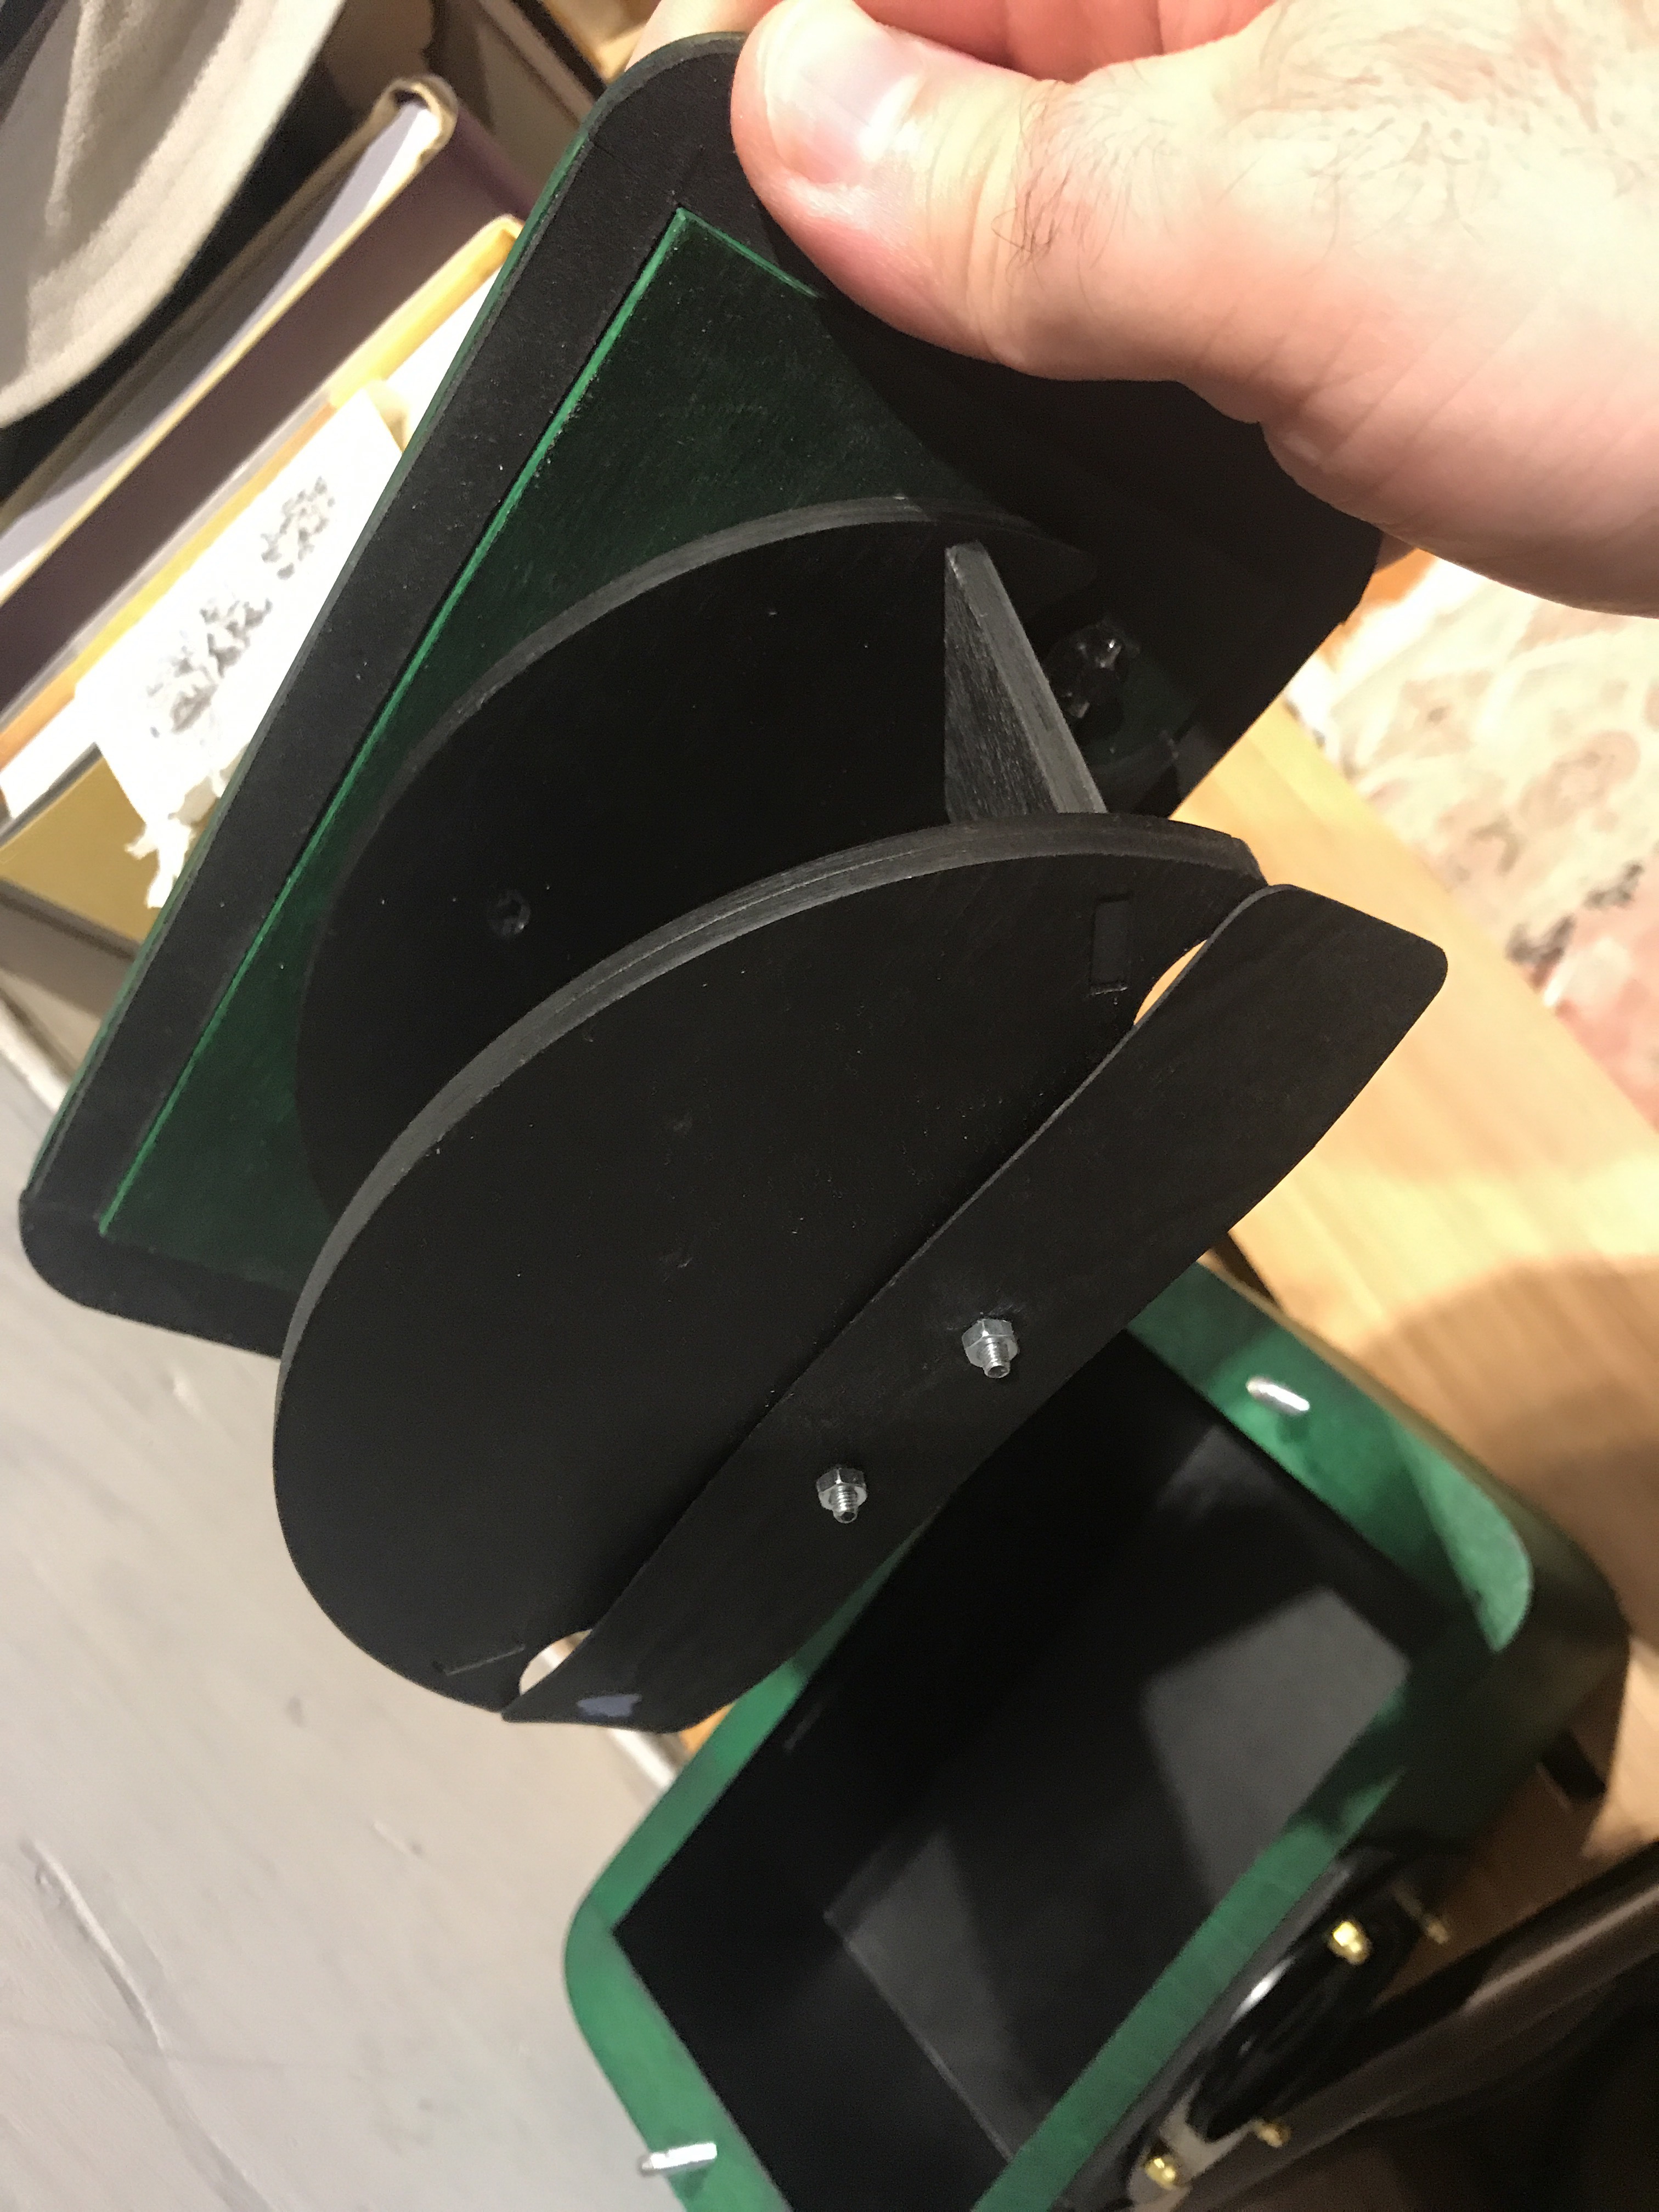
The closure mechanism (two thumb-screws to lock down the lid), while very secure when closed, is susceptible to loss- it would be very easy to drop one of the screws while changing film in the wild, and have it disappear in tall grass or down a storm drain. The camera would not be light-tight at that point.
There are no levels on the camera (a minor quibble, as they are inexpensive to obtain and install). When dealing with a panoramic camera, getting the horizon level is critical.
There are no markings on the camera to indicate the horizontal or vertical fields of view. I can understand how you might not have a horizontal field of view indicator, as the camera design is compact for the format due to the curved film plane, but a vertical field of view indicator would be extremely helpful when guessing compositions and deciding how high to set your tripod, or whether to tilt the camera up.
I’ve got some bubble levels on their way to me from Amazon, and I’ll be attaching them to the top deck when they arrive. That will solve one of my biggest immediate gripes about the camera. Now if I could only find a 6×17 viewfinder that has a similar equivalent focal length…
I took the Vermeer 6×17 pinhole out for a spin today after work. I tried to do some pre-visualization of what I'm going to get by swinging my iPhone in panorama mode. I'm posting examples of what I anticipate, plus views of the scene with the camera in action. I think I've mentioned this before, but in any case, the Vermeer 6×17 pinhole has a hemispheric film plane, which means no vignetting (light falloff toward the corners), and you can have a physically smaller camera given your frame size. But it does introduce curvilinear distortion- thus swinging the iPhone to mimic the effect.
I was a bit nervous taking the steps shot, as I was standing on private property for TWELVE MINUTES. It really felt like trespassing. Fortunately no residents of either house came in or out during that twelve minutes.
I don't have an "action" shot for this one, as I was in a hurry to wrap up this exposure to try and get over to P Street while the setting sun was still above the tree and roof line. It was casting some beautiful warm sunset light that I just HAD to photograph (I posted a shot to my Instagram feed (@DCPhotoArtist if you're interested in my instagramming. It's very much one end of the spectrum of the work I do- 99% iPhone photography, spur of the moment kind of stuff).
I’ll have results to show from this later this week. This camera has a hemispherical film plane, which does two things: it makes the entire negative area equidistant from the pinhole, so it doesn’t have vignetting or fall-off toward the edges, and it produces a particular form of curvilinear distortion.
The camera has an f/300 pinhole, which is quite a small aperture, requiring 186 times more light than f/22. So even full daylight exposures are quite long- 1/2 second. To control exposure, there is a built-in shutter that slides to the left. It also comes with a 52mm filter adapter, useful for things like shooting infrared or special effects filters.
The brand name on it is Vermeer, and the maker is in Poland. He has a shop on EBay for these, and makes them in a variety of sizes and configurations, including anamorphic cameras. My one item on the wish list for it would be either a cold shoe for mounting a bubble level, or just built-in levels on two axes.
Do you want to improve your photographic vision, but find yourself frustrated with your images? The Primitive Eye is a six-week guided exercise in seeing. The course meets on Tuesdays from 7-9pm, September 12 to October 24th. The only requirements are that you are ready and willing to tackle some challenging assignments, and that you obtain a pinhole objective for your camera. This could be a pinhole in a body cap, it could be a custom pinhole objective, or it could be a dedicated pinhole camera that shoots film or photographic paper. It could be a digital camera or it could be a Quaker Oats tube.
By stripping down your gear to the most basic of photographic tools, the pinhole lens, you will be forced to contend with the three fundamental components of a photograph – light, composition, and time.
Foggy Bottom Metro, Waiting
Light: light itself, with directionality, quality, and quantity, must be critically accounted for in pinhole photography. There’s no gaming the system with a fast lens.
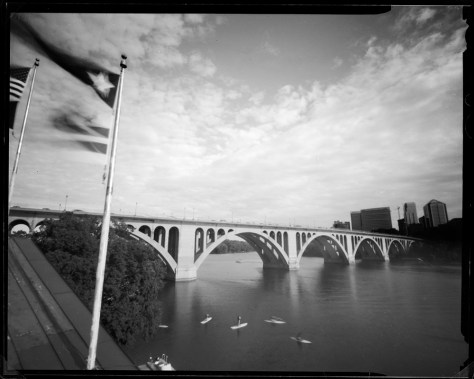
Key Bridge, Georgetown
Composition:
Typically, pinhole objectives are wide-angle. Because they are so small, composing through the objective is difficult at best. You have to carefully plan your composition, or you have to open yourself up to serendipity. Either way, you have to know how your camera sees before you set it up, or you’ll have no control over what you get.
Pan-American Health Organization HQ
Time:
Pinhole objectives force a recognition of the importance of time in a photo. With modern, automated cameras that have mechanical shutters that freeze slices of time as small as 1/8000th of a second, and electronic ones much faster, we are used to thinking of photographs as truly static objects, and movement and blur are objectionable. With pinhole photography where a 1 second exposure is quite fast, you must carefully plan for how movement will be captured by your camera, because it will. It will also force you to re-think the notion of a photograph as being time-less and two-dimensional, and being time-ful and four-dimensional.
The Primitive Eye: Learning to See Through a Pinhole is a six-week class on how to develop your vision through simplification. Strip away all the bells and whistles of technology, and you have to concentrate on the fundamentals of photography: light, composition, and time. To register, go to the Photoworks website or click here:
For those unaware of it, fslashd (f/D) is a website devoted to pinhole photography. I’ve had one of my images published on their site as part of their Inspiration of the Week page –
Kier, the editor of the site, also included a few remarks by me about my photography and why I appreciate and enjoy alternative/lensless image-making tools.
Scott Davis is an experienced photographer in historic printing processes, and has recently started to work in pinhole for additional inspiration. He’s developed an appreciation for the simplicity of pinhole and how it lets him focus on the image, not the equipment. As he states: “Working with cameras that don’t have lenses or shutters per se, or at least that have primitive ones, means that serendipity becomes important in my work…What interests me is the capture of whole seconds, minutes and even hours of time in a frame, contrasting the things that move in the scene with things that remain static.”
For anyone interested, he’s also running a call for entries for pinhole work – http://fslashd.com/call-for-entry/. This is your chance to get published not just on a webpage but in an actual physical book.
Don’t worry- I’m not abandoning lensed photography with high-acutance, high-precision cameras. I love my Rolleiflex! What I am doing, though, is exploring pinhole photography and other forms of lo-fi photography (my previous post with the Lomo Belair triptychs for example). I find it quite liberating in many ways – you have to quit worrying about precision, and just make images. Live with the serendipitous. Like this first image. I’m absolutely blown away by what I pulled off with it – it’s actually a double-exposure. I’m going to play around more with the idea of multiple exposures on pinhole.
Foggy Bottom Metro, Waiting
Pinholes, although they are very slow in many ways, have some major advantages – because there is no glass to distort the image, they are absolutely rectilinear. Straight lines will always be straight lines. There’s no shutter or aperture to set with one – the pinhole is the aperture, and in the case of my pinhole camera, it’s f/208, which means that even in full sunlight I’m getting roughly 1 second – 2 seconds for exposure times. The shutter in this case is just the body cap – take it off, count one one thousand, put it back on. It doesn’t get simpler than that. Of course, this has a different downside – hand-holding exposures is not realistic, ever, unless you really really really love motion blur.
Pan-American Health Organization HQ
I like motion blur well enough, but I like it applied selectively – I like the contrast between sharp, static and moving, blurred. I like how using long time exposures captures a third dimension to a photograph, time, that we perceive as non-existent in “typical” photography where time is condensed/extracted to 1/500th of a second. Playing with time in a camera really does in a way turn the camera into a time machine. It also shows us that our concept of time is artificial. Things exist not IN time but rather THROUGH time.