When I was in Rome last year… (no jokes please!) I shot a bunch of panoramic images with my new-to-me Lomo Belair X6-12. My just completed session of the Intro to Platinum/Palladium Printing class I teach inspired me to dig them out and see how they would fare in the medium. I’m really loving these tiny prints – 2 1/4 by 4 1/4 inches! They make you get up close and intimate with the print. I’m matting them in 11×14 inch 8-ply mats for extra measure.
Sometimes you have to walk away from a process or a practice for a while, which happened to me with platinum/palladium. I was on a kick of doing other stuff, shooting my travels with the Rolleiflex. Then it was the Fuji rabbit hole with digital and the X-T1. Then this class came along and I needed something to jumpstart my printing. These images were just the ticket. Photographers in general have an obsession with how big they can make their prints, and even the general public too. But there’s something to be said for tiny prints. I still remember the Andre Kertesz show at the National Gallery where they had a lot of his early work on display – in his youth, he could only make contact prints off of small negatives from roll film cameras because he was poor and didn’t have space for a dedicated darkroom. Getting up close and personal with his images, like “Underwater Swimmer”, which is all of 1 1/2 by 2 1/4 inches, really makes you think about the image itself instead of being awed by its size. Not that I have several million dollars to spare, but I’d much rather spend that kind of money on a print of “Underwater Swimmer” than on Andreas Gursky’s “Rhein II”. Fortunately, the Kertesz would be a lot cheaper to buy than the Gursky anyway.
On a separate note, I’d like to give a shout-out to Carol Boss at Hahnemuhle papers. All three images above were printed on the new Hahnemuhle Platinum Rag paper. She has very generously become a sponsoring partner of my Intro to Platinum/Palladium class at Glen Echo Photoworks, and is supplying us with our paper. It is a wonderful new paper- very easy to coat and print on. It may well displace my old standard Bergger COT 320.
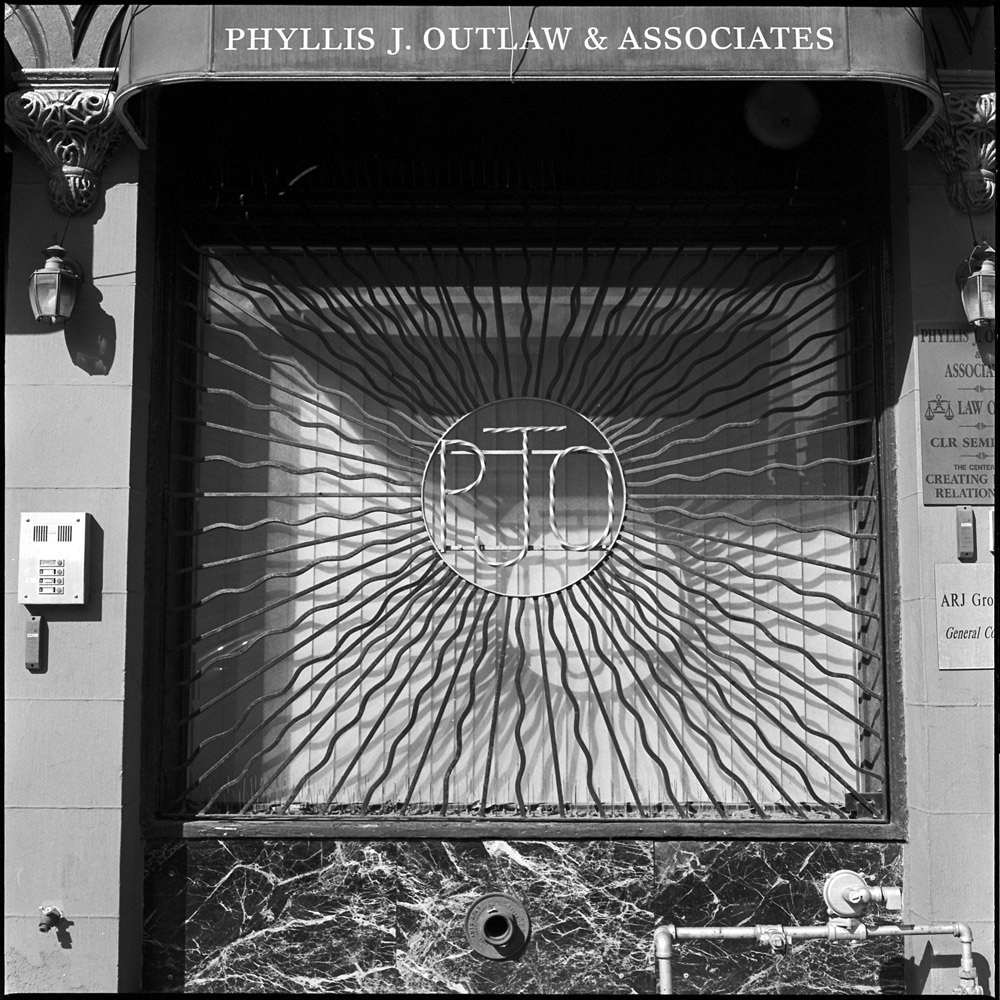
H Street Northeast is a neighborhood in major transition. It was in the 1950s and 60s an important retail and entertainment corridor for the African-American community in DC, along with the U Street corridor in Northwest. Along came the 1968 Martin Luther King riots, and then in the 1970s and 80s the rise of the drug epidemics, and H Street turned into pawn shops, liquor stores, and abandoned buildings. In the early 2000s, property developers turned their eyes toward the area for the relative abundance of cheap real estate as the next new place they could revitalize and get rich in the process.
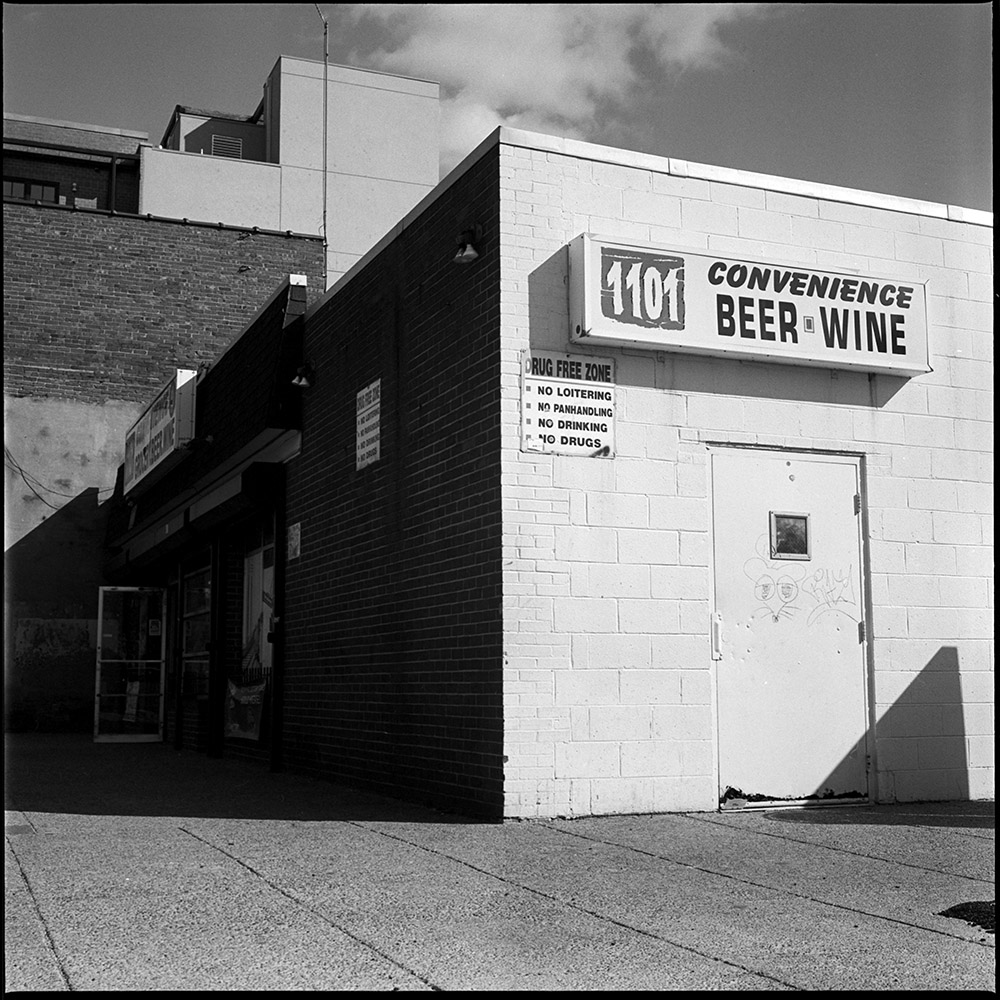
These first four shots here represent the old side of the neighborhood – liquor stores, barred windows and businesses that clung to life through the lean years.
Cold Beer & Wine1101 ConveniencePhyllis J OutlawS and S Shoe Repair
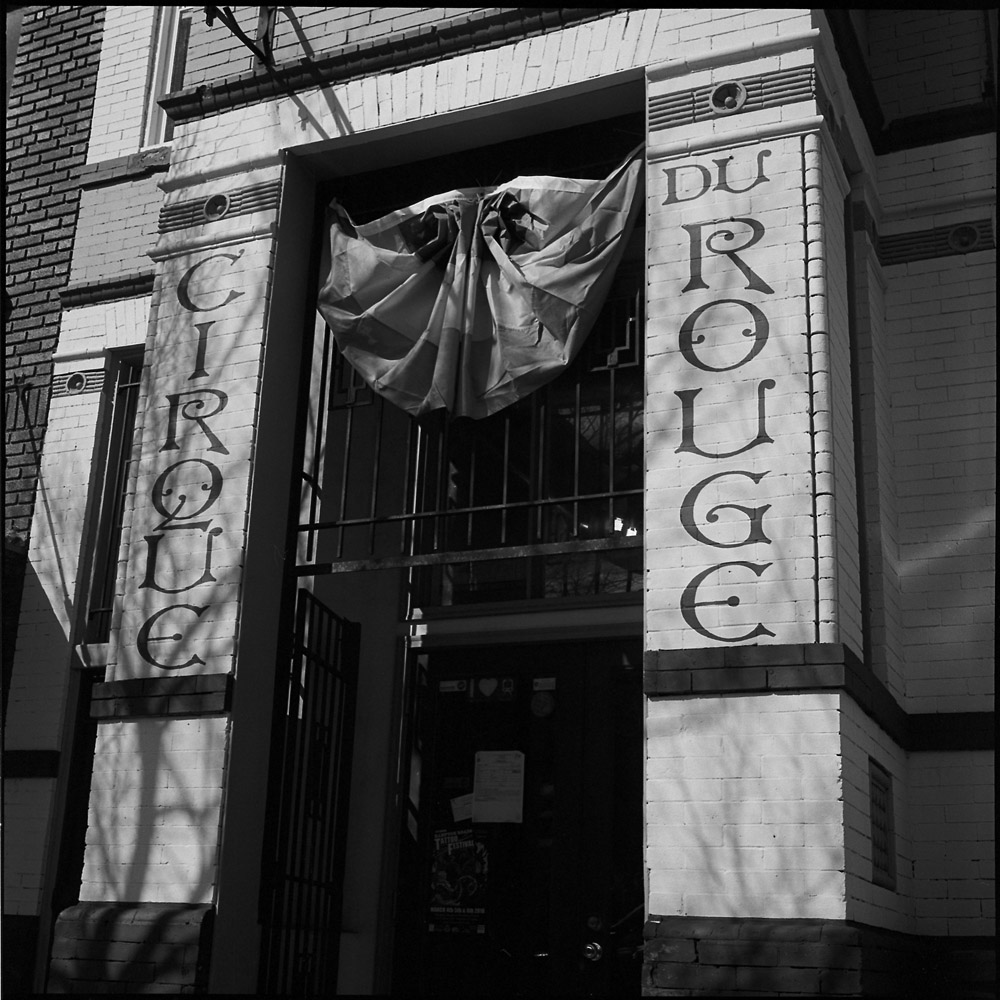
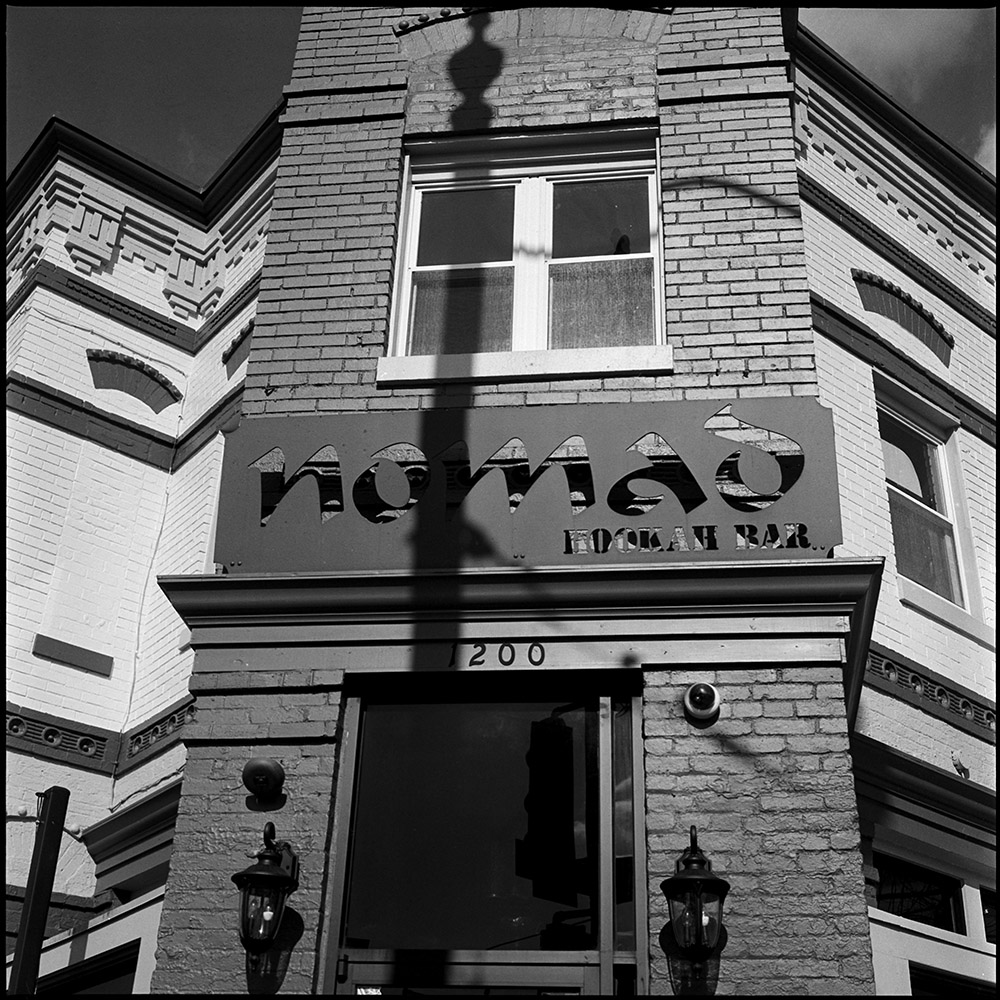
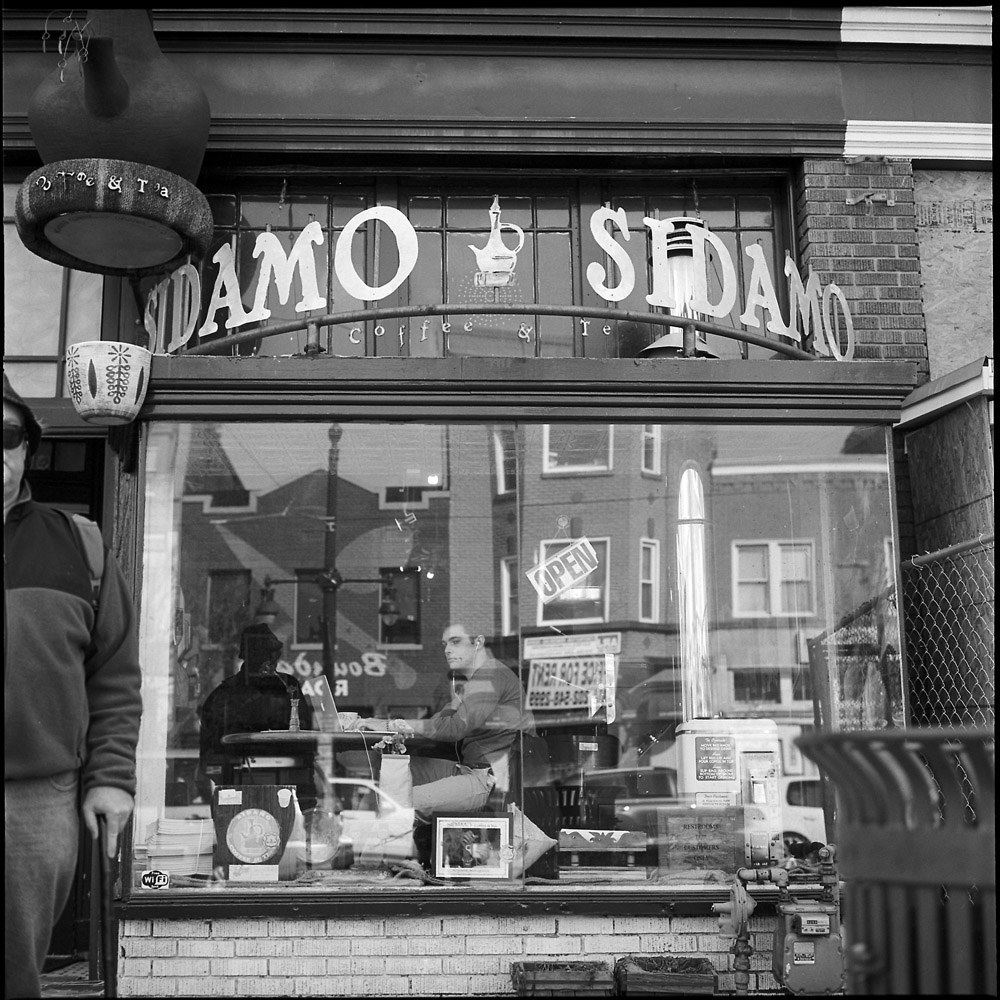
This set are the changing face of H Street – fresh paint, new entertainment venues, coffee shops and chic pubs.
Cirque Du RougeNomad Hookah BarSidamo Coffee & TeaThe New Drink
The not-so-visible dark underside to this is that the past residents (lower and middle income African-Americans) and the businesses they used to operate are being pushed out not only by the housing redevelopment that is driving real estate prices up by several hundred percent over the span of a decade or less, but by the changing retail landscape – when enough businesses on your street have gone from selling fifty-cent cups of coffee and five dollar lunch deals to six dollar cappuccinos and thirty dollar tasting menus, your old clientele aren’t coming around anymore. If you were already operating on a shoestring, it can be cost-prohibitive to reinvent yourself.
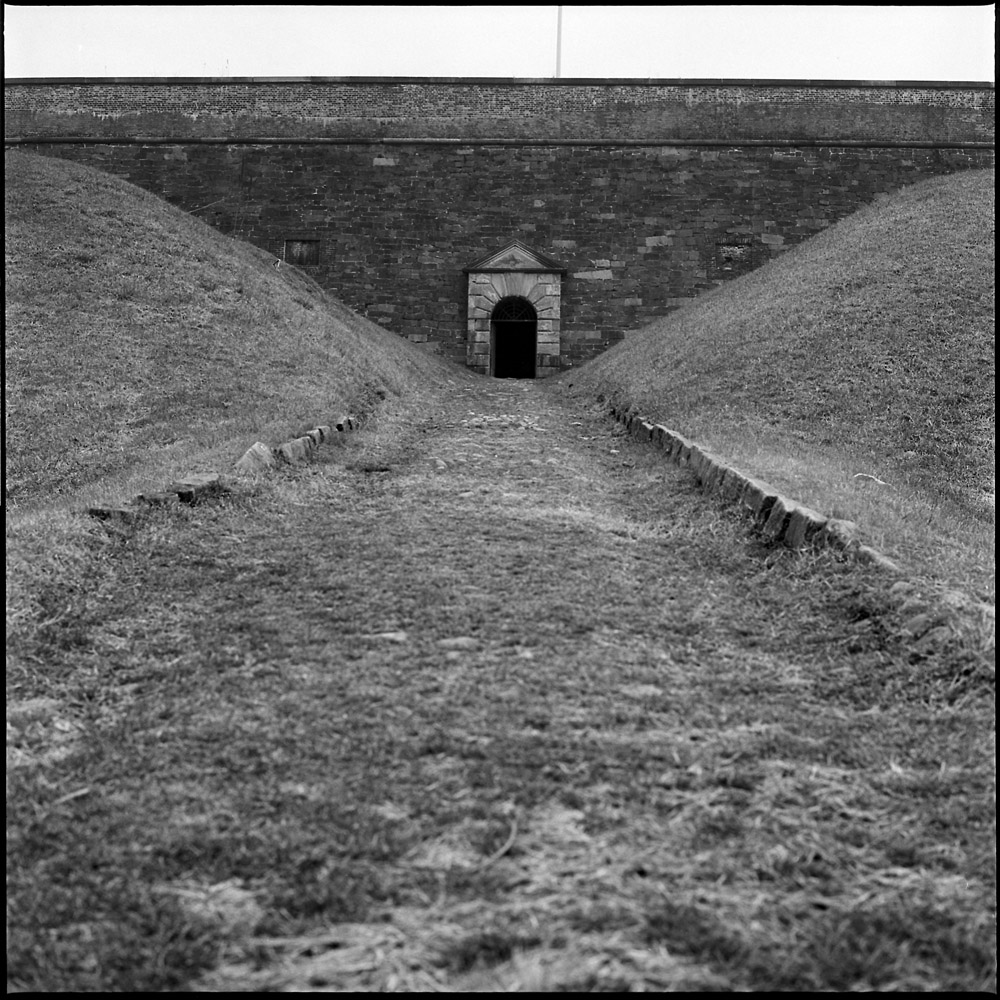
On the same day I went to Fort Foote, I kept on driving south into Maryland until I got to Fort Washington, proper. Fort Washington the fort is located in Fort Washington, the town, and to arrive there you drive through some rambling suburban tracts. Like Fort Foote, Fort Washington sits on the banks of the Potomac River atop a peninsula formed by Piscataway Creek’s entrance into the Potomac River. It, however, was not intended to be a temporary site but rather has been occupied and fortified since before the War of 1812. Its use as an active military base ended after World War II, but most of the structures you see were built between 1800 and 1918.
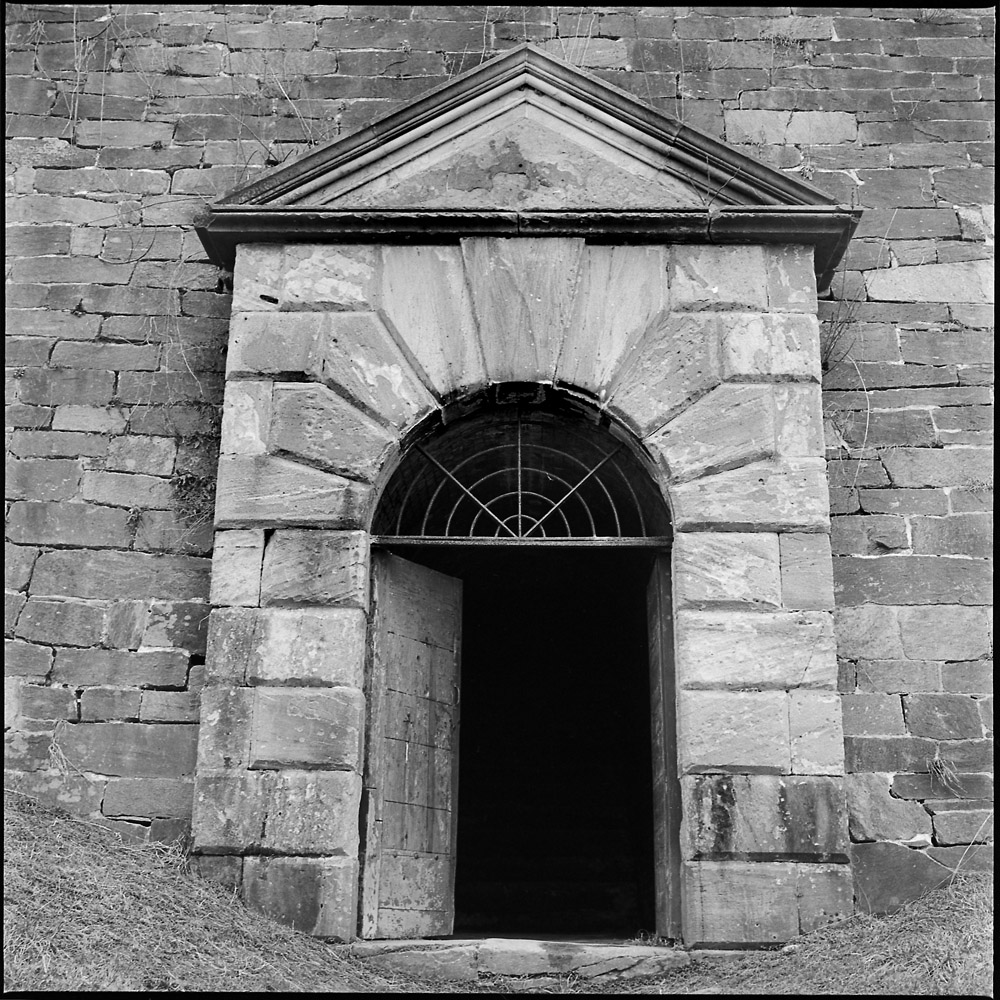
These first two images are of the gate in the early 19th century fortifications. This was the entrance that connects the hilltop fortifications to the water battery at river level.
EarthworksWater Gate
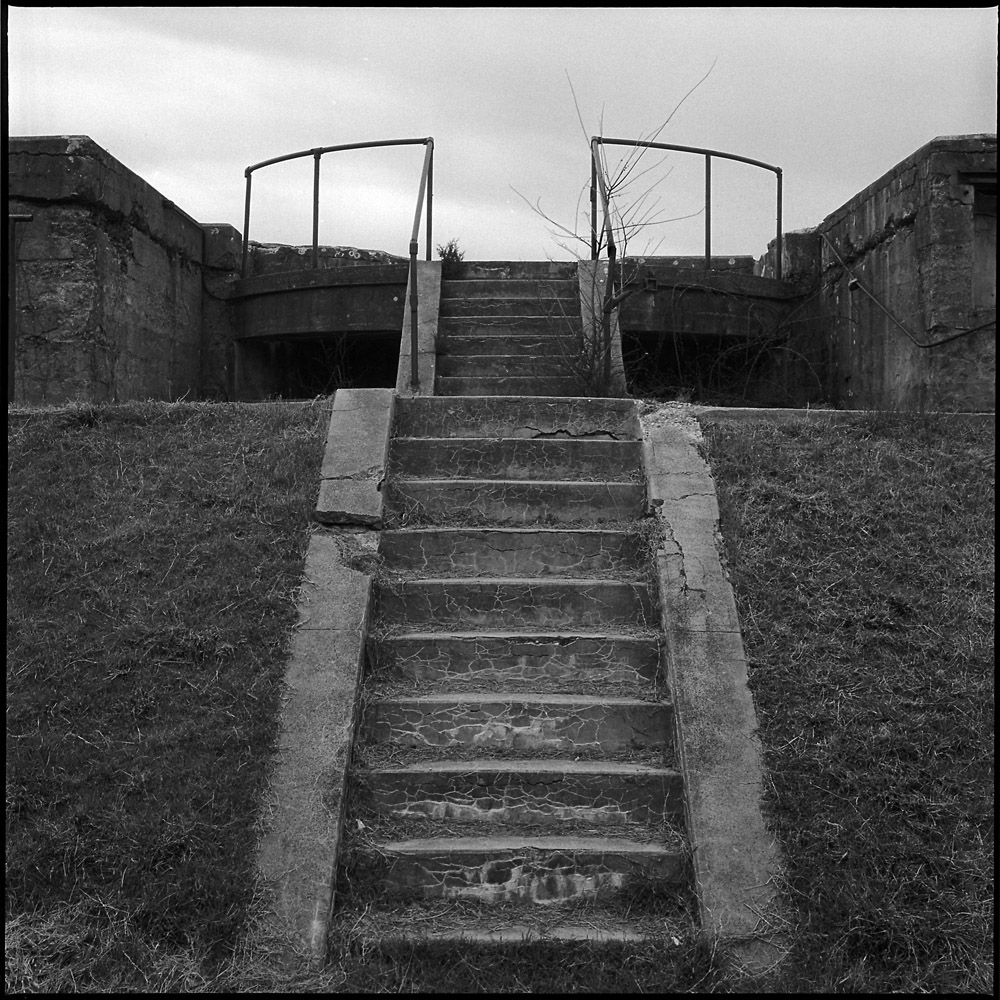
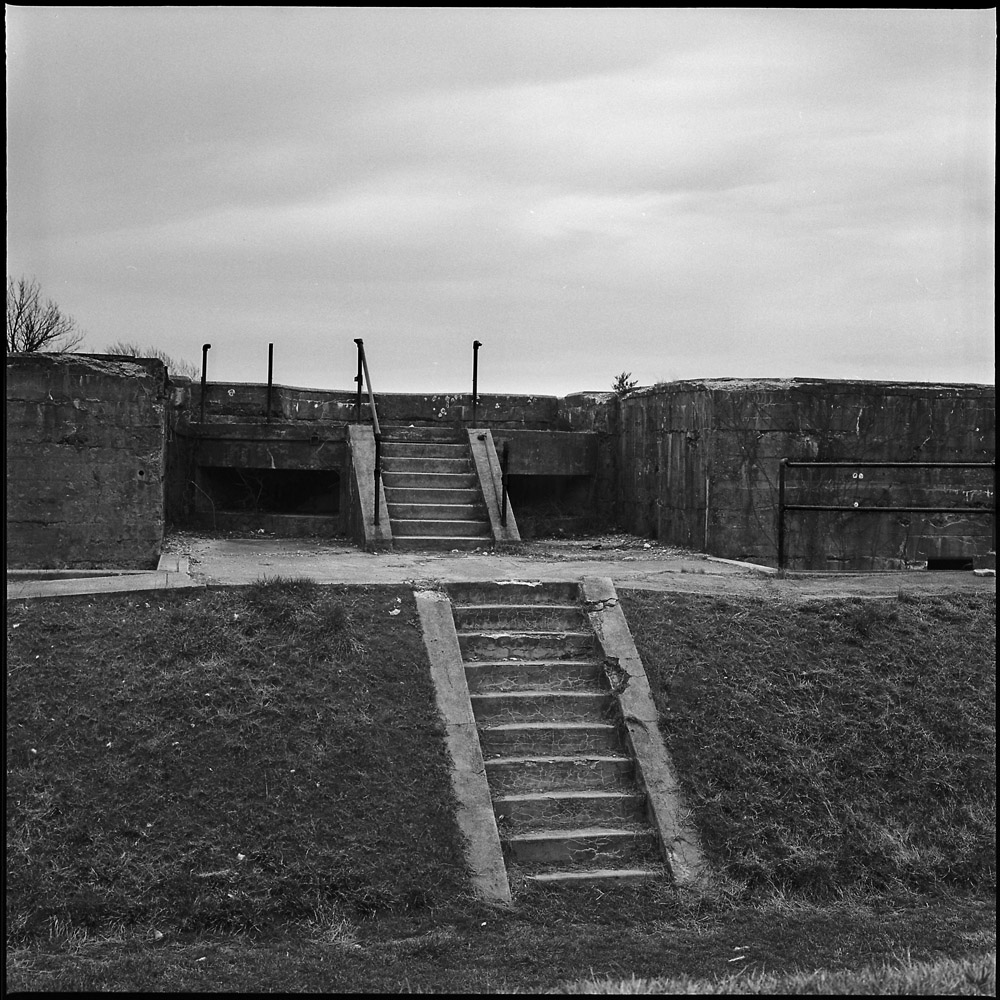
The water battery structures date to the first decades of the 20th century. You can see they are much lower, made of steel and concrete. The front side is protected by an earthen berm. The bunkers would have held the troops manning the now-dismounted cannon and communications equipment to control the batteries from within the fort.
There is something both ominous and at the same time hopeful about these structures, viewed from the land side. The bunker doorway looks like an entrance to the underworld.
Water Battery Entrance
The stairs, however, now stripped of their weaponry, point to an upward journey, facing the unknown. They’re the prow of a ship, a pathway to adventure, or perhaps a Mayan temple at whose top great mysteries will be revealed.
Water Battery Stairs
The clouds above tease the possibility of rain, but it will be a gentle rain, not a thundering downpour. They’re the gateway to the horizon.
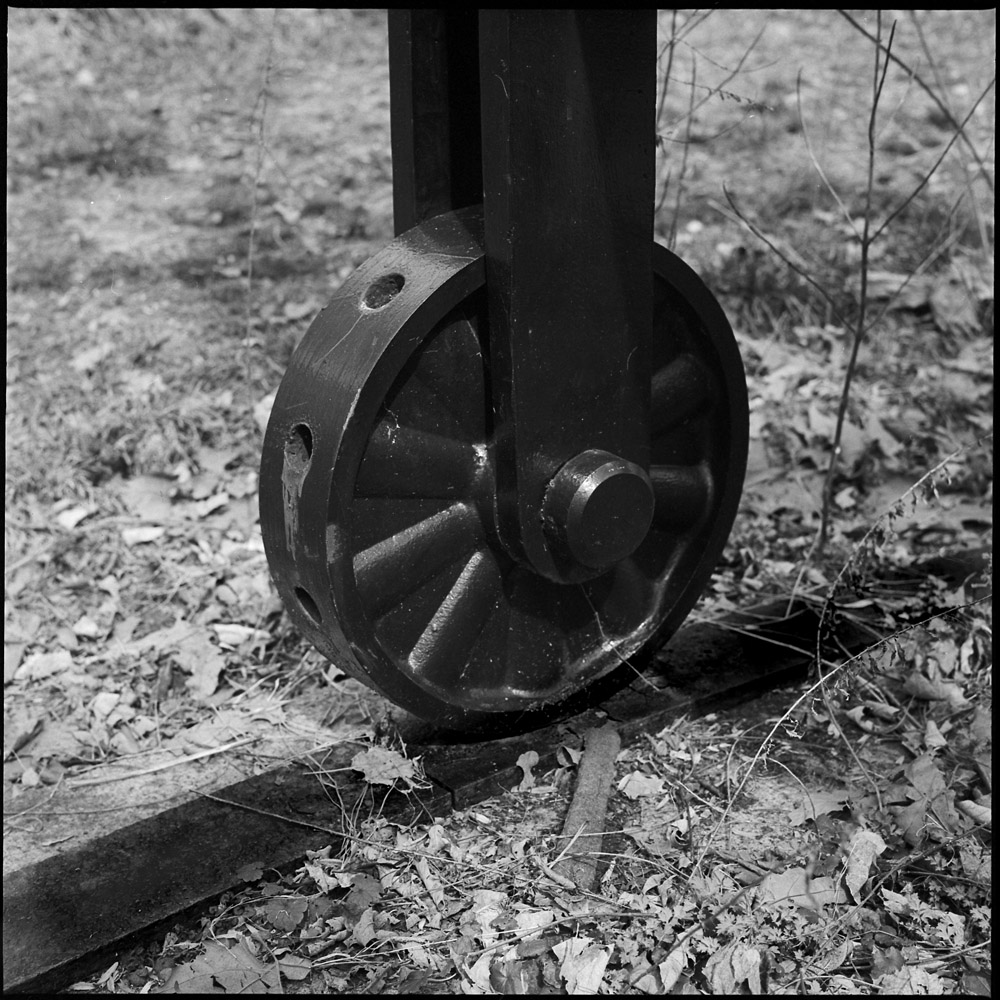
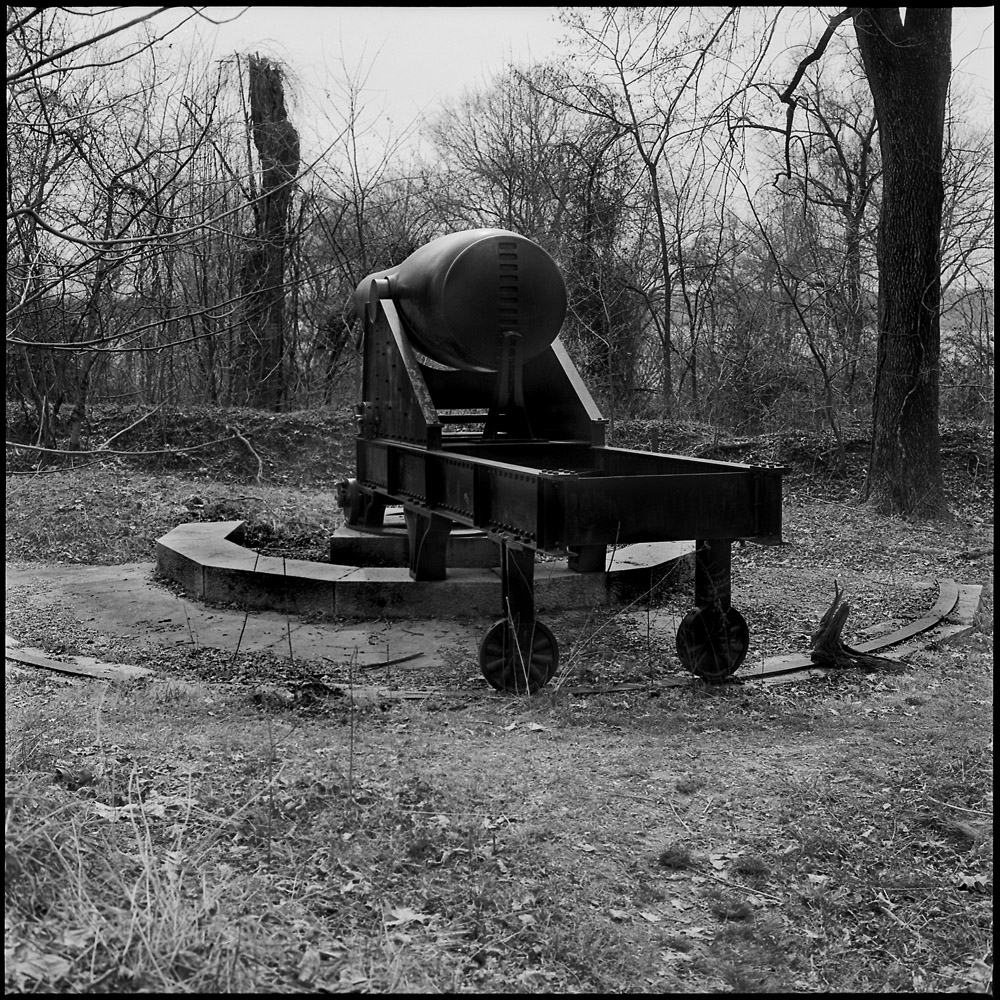
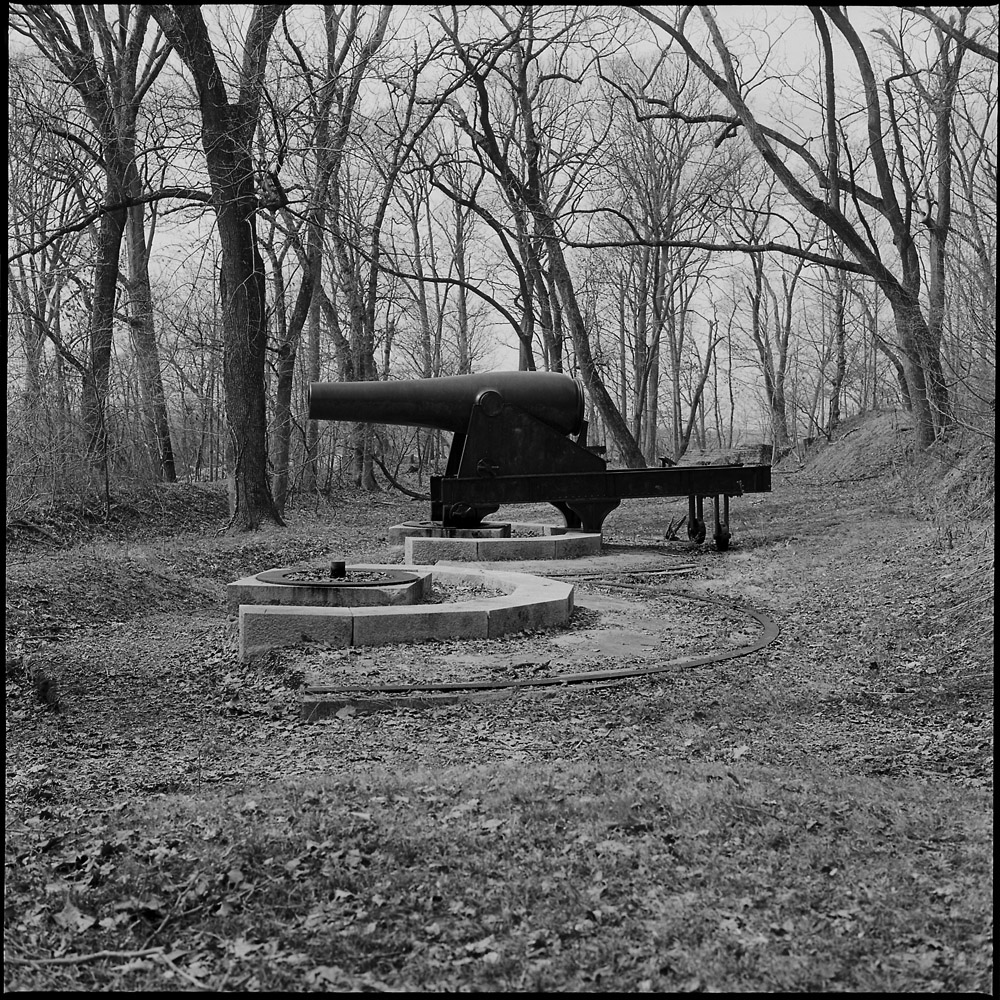
These are details of the fifteen inch Rodman guns and their emplacements at Fort Foote. I apologize for the delay in posting this second round. In this set of images I was focusing on the textures of the ironwork and the geometric patterns and repetition in the gun emplacements. There are endless circles and semi-circles repeating throughout, from the barrel of the gun itself to the wheels to the tracks to guide the traverse. They take on a bit of a crop-circle kind of feel: looking at the remnants makes you wonder if they’re the leftovers of an alien civilization.
Gun Carriage WheelRodman Gun, Fort FooteStanding SentryLone Rodman, Fort FooteGun Placements, Fort Foote
Because these are in the (encroaching) natural environment, I’ll grudgingly classify them as landscapes, but I think of them more as documentary work given the subject matter.
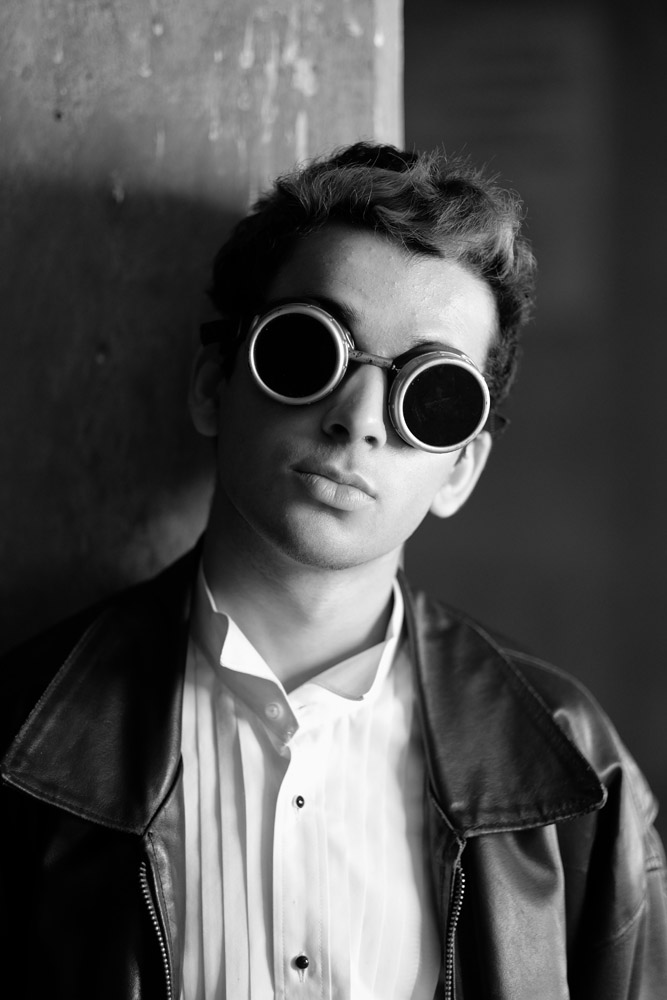
In this set I’m including some black-and-white shots along with the color ones to show what the Fuji can do. I used the b/w+R setting (the equivalent of using a red filter when shooting black and white film). I don’t know that this is as extreme as actually shooting black-and-white film with a red filter in terms of the contrast and look, but I like it.
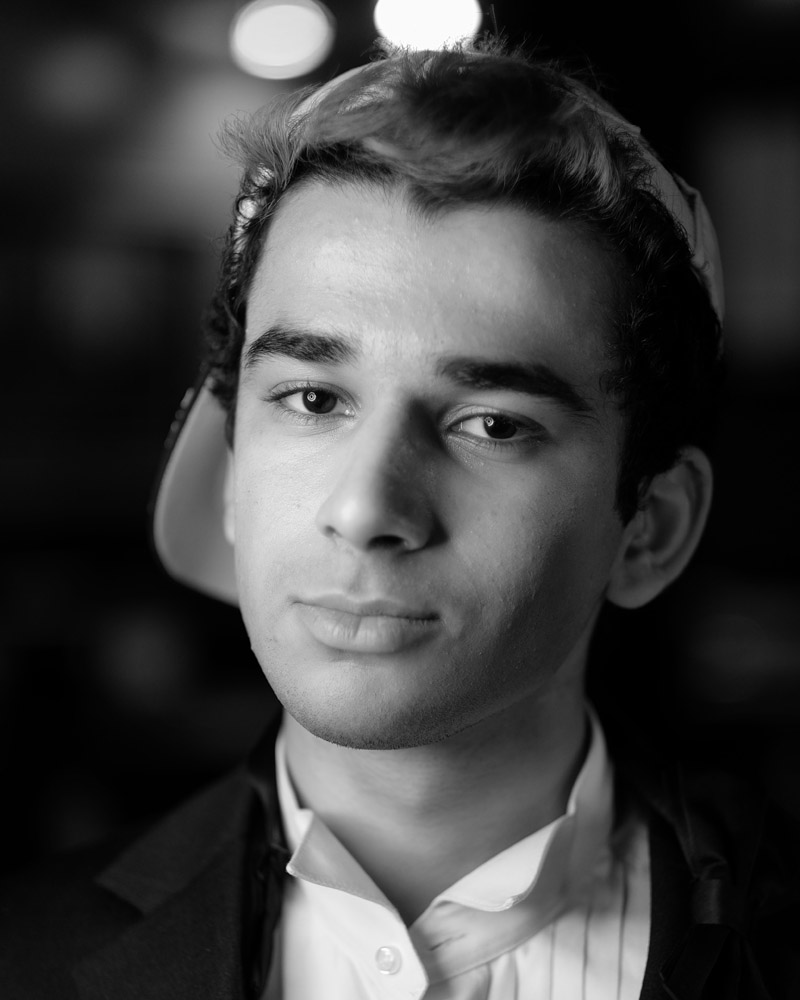
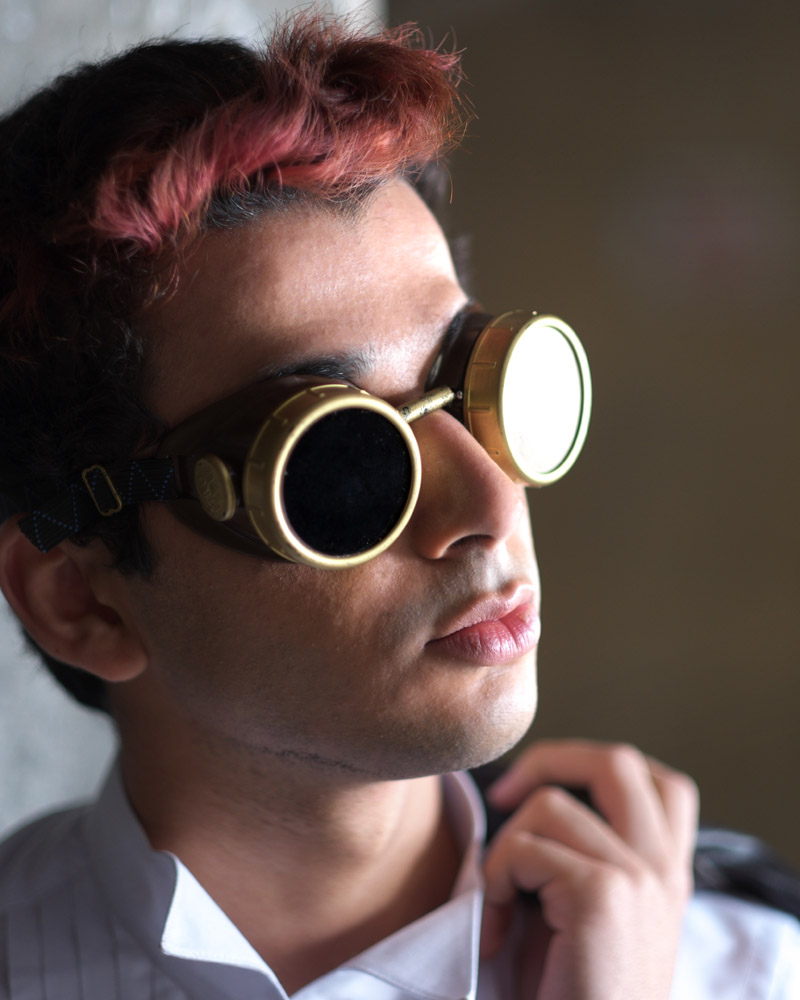
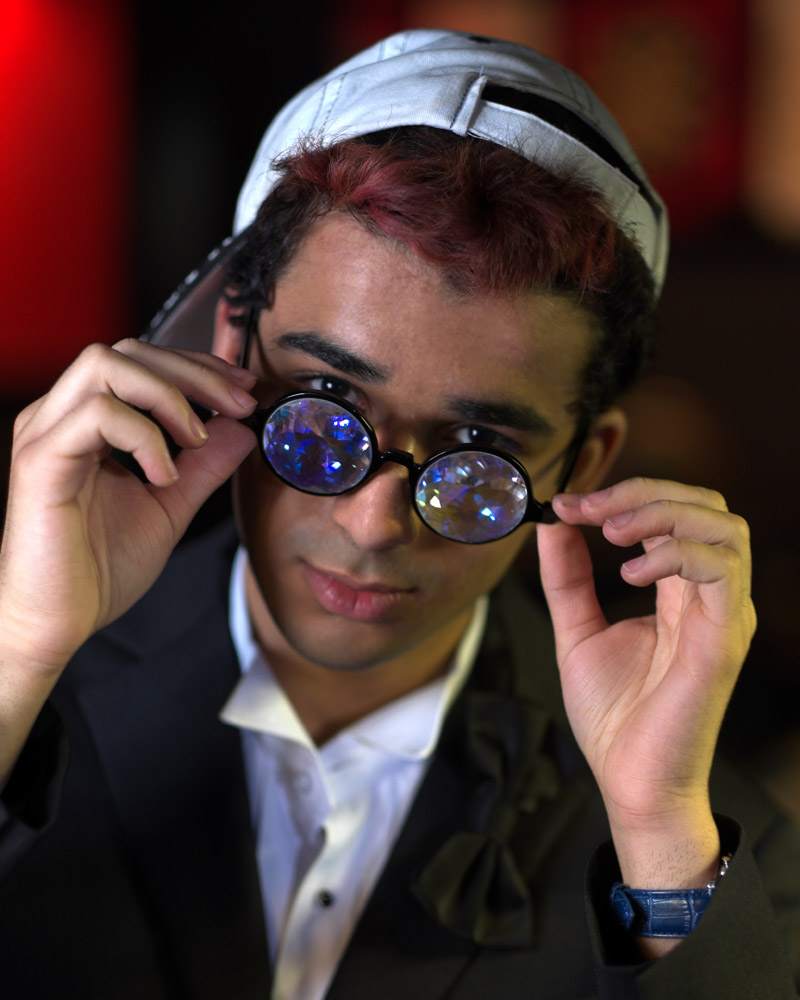
MustafaMustafa
Mustafa showed up to the shoot in a tux, which is hard to work around if that’s not what you’re aiming for. It’s a good look, and a very elegant one, but not necessarily fitting a pool hall. I tried to shake things up a bit with the kaleidoscope glasses, the steampunk welder’s goggles and my own vintage leather jacket. Tip to models – unless you are told wardrobe will be provided, always bring at least two different looks to a test shoot with you so you don’t get stuck looking out-of-place on the shoot.
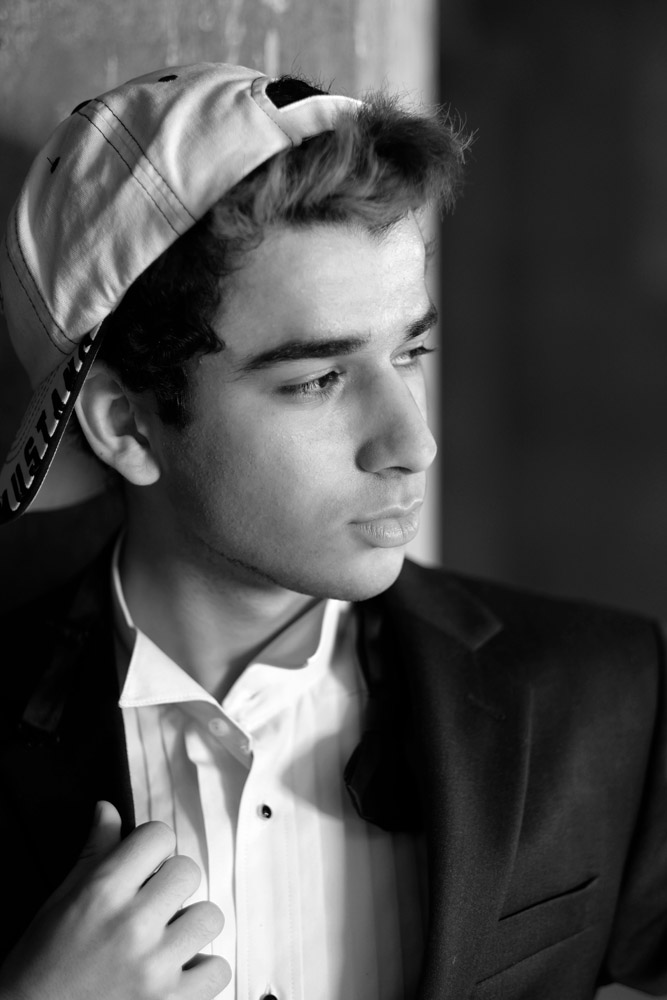
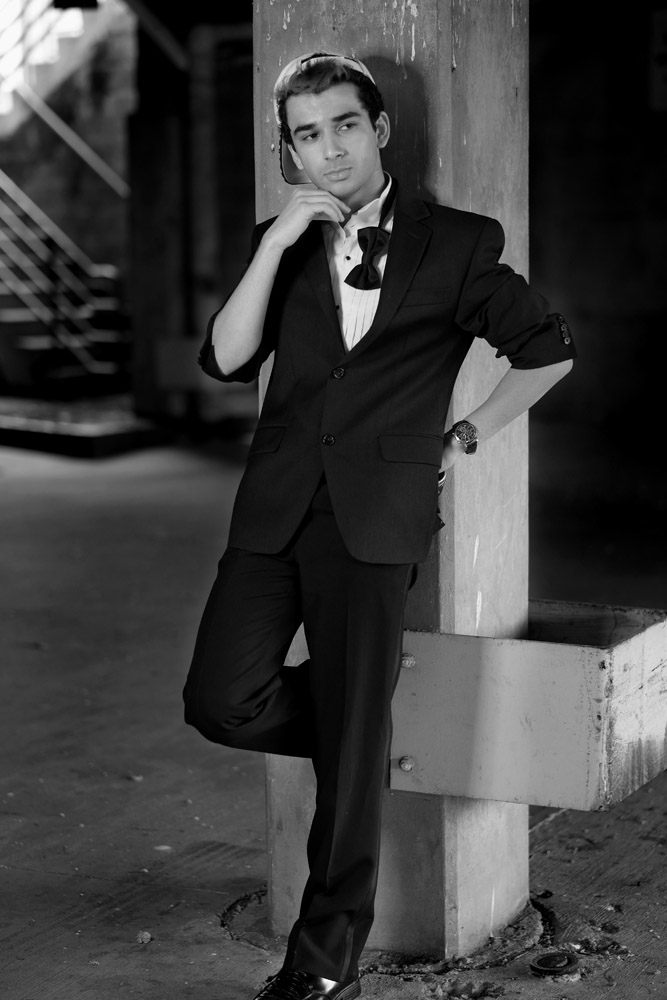
MustafaMustafa
Mustafa has a great face – he looks good from lots of angles. When posing a model or a portrait subject, you want to make sure that you’re not doing anything un-flattering. If you’re turning the head away from front-on, you want the nose to either obviously stand back from or break the contour of the cheek so you don’t inadvertently flatten it by having it by having the tip of the nose meet the outline of the cheek. At the same time, pay attention to the eyes – you want to see whites on both sides of the iris. If you turn someone’s head in part profile and then have them look back at the camera with their eyes, the irises in the corner of the eye make them look like a psycho-killer. In these shots it works because he’s looking the same direction with his eyes as his face is pointing.
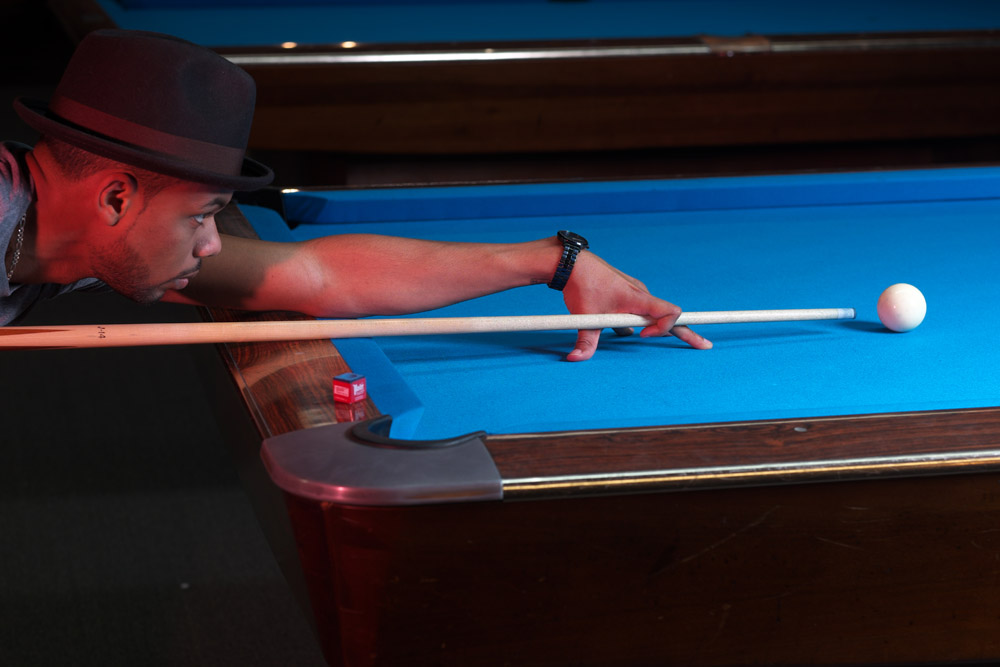
Yesterday I had a model shoot with three aspiring models who needed to build their portfolios. We went to a billiards parlor for the afternoon and I put them and the Fuji through its paces. It was also the first test in the field for my new 400 w/s bare-bulb strobes. The new strobes are battery-powered via external rechargeable batteries. They can be configured to sit on-camera and be triggered via hot shoe, take a wireless remote trigger like a PocketWizard, be triggered via sync cord, or be triggered by a proprietary wireless trigger system that also allows you to remotely adjust the power level from the camera position. The first one I bought was a Calumet-labeled version. When Calumet was still in business in the US, these were quite expensive – a single head unit plus the required but not included battery pack would have set you back a cool $1000. Nowadays, they’re on clearance on Amazon for $300 or so. They are also now being sold with the NEEWER, Flashpoint and Godox labels, at a much more reasonable price – I got a NEEWER version with the external rechargeable battery pack for $400 as a second unit for doing fill flash or background lighting.
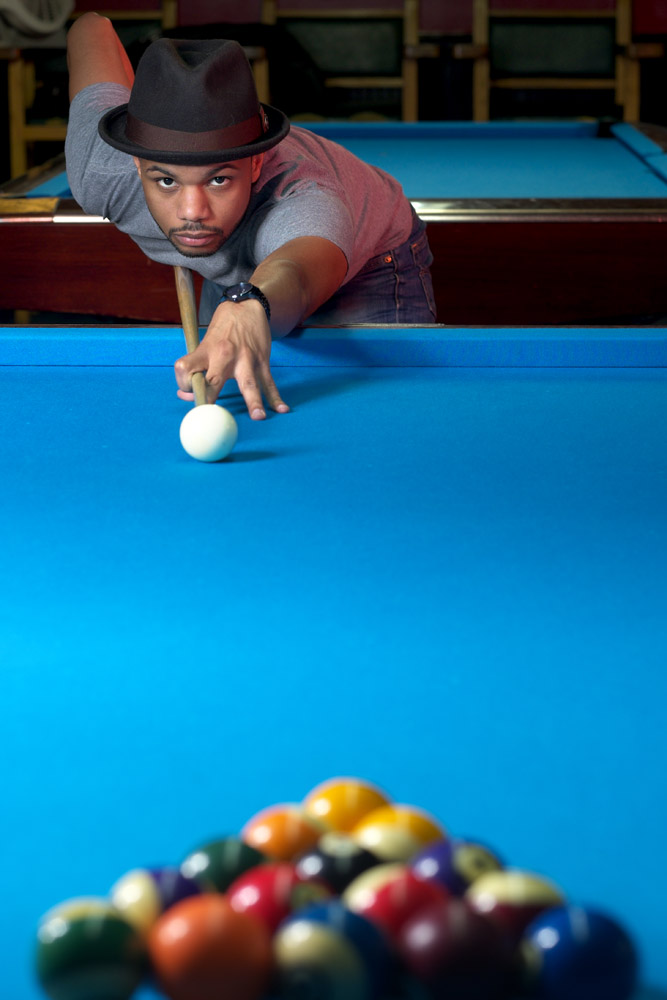
These first two shots were taken with Alex shooting pool. In the first shot, I set him up taking the break shot. Don’t let the fact that he’s a model fool you- he’s also a pool shark – right after this shot, his break dropped three balls. I wouldn’t bet against him. This was taken with the Fuji 56 f1.2. My main light was the Calumet Genesis in an umbrella softbox, and the fill was the NEEWER with a gridded reflector and a red gel in it. Having the ability to both color gel and grid the fill is really handy, as the color adds a touch of drama to the scene, and the grid keeps it from spraying all over the place and coloring things you don’t want it to, like the table felt.
Alex
For this shot, I kept the lights the same but switched to the 23mm f1.4 so I could get in close and still get the extension of his shoulder, arm, cue, and the ball on the table, as this table was in the middle of the room with other tables behind me, and I only had about four or five feet to work in. The red gel adds a touch of drama and energy to the shot without overwhelming, and is a good way to deal with the very mixed light in a pool hall where you can have fluorescent (the over-the-table lights), halogen/tungsten (lights in the bar area and on the walls) and LED (accent lights like rope lights around partition walls and the like, or under the bar) all in the same area.
Alex
I also did some head shots with Alex (who is an easy, professional model to work with). I backed this indie film called Hallucinaut on Kickstarter last year and as my reward, I got these kaleidoscope-lensed glasses that appear in the film as a prop. I chose them specifically as my reward as something that would make a really cool prop for photo shoots. This was their first appearance in one of my shoots. They really pick up and reflect colors well, and make for a dramatic statement.
Alex, with Hallucinaut glasses
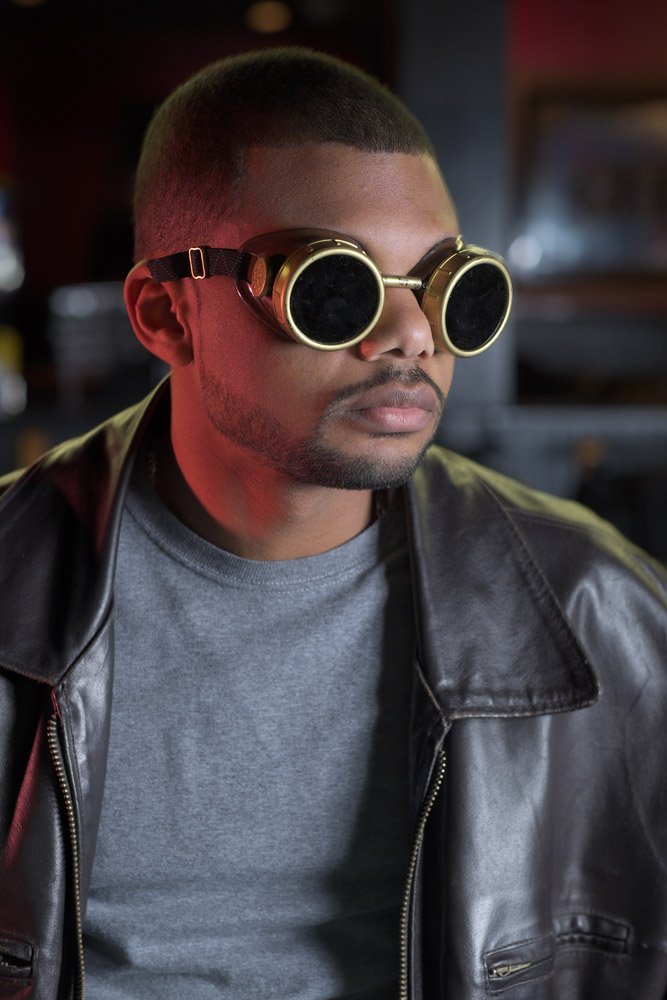
A variation on the theme, I broke out my welder’s goggles and matched them up with a vintage leather jacket for a steampunk look. Alex’s short-cropped hair adds to the look by letting the goggles really stand out against the shape of his head.
Alex, going Steampunk
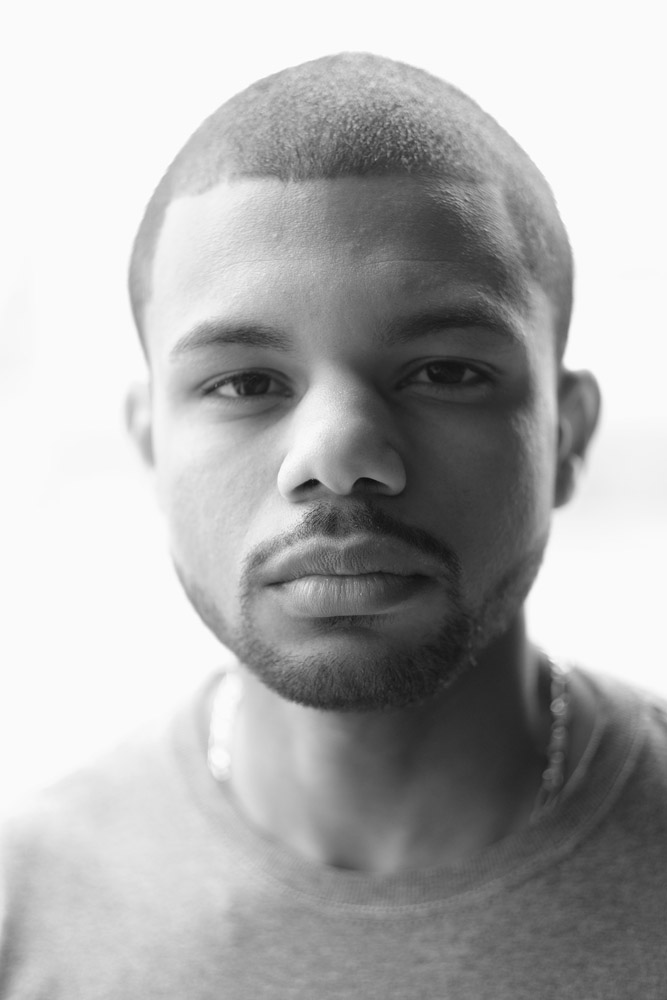
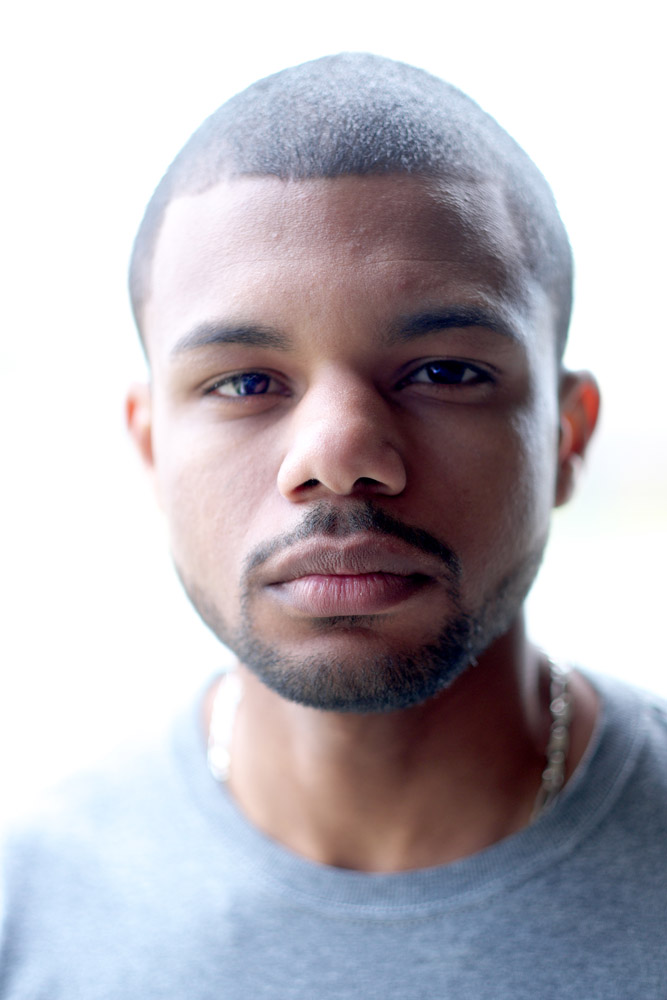
In the last look for Alex, I did two versions of this really clean, minimal portrait. When I showed it to him on screen he commented “I have a really long neck!” as if that was a bad thing. I reminded him of what you’ll hear on every season of the now-ended America’s Next Top Model – it’s a really good thing to have a long neck. Tyra Banks and her photographers were always reminding the contestants to elongate their bodies and gestures, to create drama and elegance. If you have a short neck, stretch it out, otherwise the camera can make it look like you’re neckless and just have a head glued directly to your torso.
Alex
These were both shot outdoors under the eave of a parking garage, and combining the flash in a beauty dish as a fill with the backlight of the street behind made it easy to completely blow out the background into a nice even white. Handy trick when you’re going studio-less and need an even background.
Alex
I shot all these images in RAW, then converted afterward to JPEG. I like working this way because it feels more like traditional darkroom photography, where I’m working from the in-camera negative. Working from in-camera JPEGs, while still very good, to me is not as good because it’s like making a copy of a print – changes have been made and nuances have been degraded.
Not that there should be any doubt, but the Fuji 56mm is a knockout lens (Fuji has always made some top-grade glass, especially for their medium-format cameras). The falloff in sharpness at wide-open or near wide-open is creamy-smooth, and the rendering of out-of-focus highlights is never harsh or jagged.
Takeaways from this shoot:
-Work with good models. Not everyone is a good model, and not all good models start out that way, but if you’re new to the process of working with models, hire folks (and I do mean hire, as in pay for with cash, not just trade-for-prints/CD) who have experience working with photographers.
-know your equipment. If I were not as experienced with studio lighting, figuring out what was going on with my Calumet/NEEWER flashes could have been a pain, as they don’t have modeling lights (to save on battery life) and are not TTL because they’re made to be universal and are not dedicated to any one system.
-have fun. Be loose, work with your environment, take advantage of the opportunities it presents, and challenge yourself to overcome its obstacles. You’ll make much better pictures that way.
Serendipity plays a major role in my life. A couple weeks ago I took a mental health day mid-week and decided to visit some of our local history. My original intent was to take a short road trip to see some historic houses in northern Virginia, but they (the Woodlawn Plantation and the Pope-Leighy House) were still closed for the season. Instead, I thought I’d take a quick drive down Indian Head Highway into southern Maryland and visit Fort Washington, created to defend the capital city from river attack in the early days of the Republic. The current structures date from the years after the War of 1812 to the first decade of the 20th century. The main fort was designed by Pierre L’Enfant, the man who laid out the design for the streets of Washington DC.
On the drive down Indian Head Highway, after only a mile or so I saw a sign saying “Fort Foote Park”. I decided I’d detour and check it out. I really didn’t know much of anything about Fort Foote other than I presumed it was part of the Civil War-era defenses of Washington DC. My presumption about it was correct, but there’s a lot more to it than you might expect given that description. Most of the 68 defensive forts that ringed DC are now little more than some mounded dirt with a plaque commemorating what they were. They’re overgrown with trees and grass and cross-cut with walking trails, city streets, and even housing developments. Fort Stevens, the location where the only sitting United States President ever came under enemy fire, today is barely a half a square block, hidden behind a post-war church, 20th century homes and shops, and hemmed in by city streets.
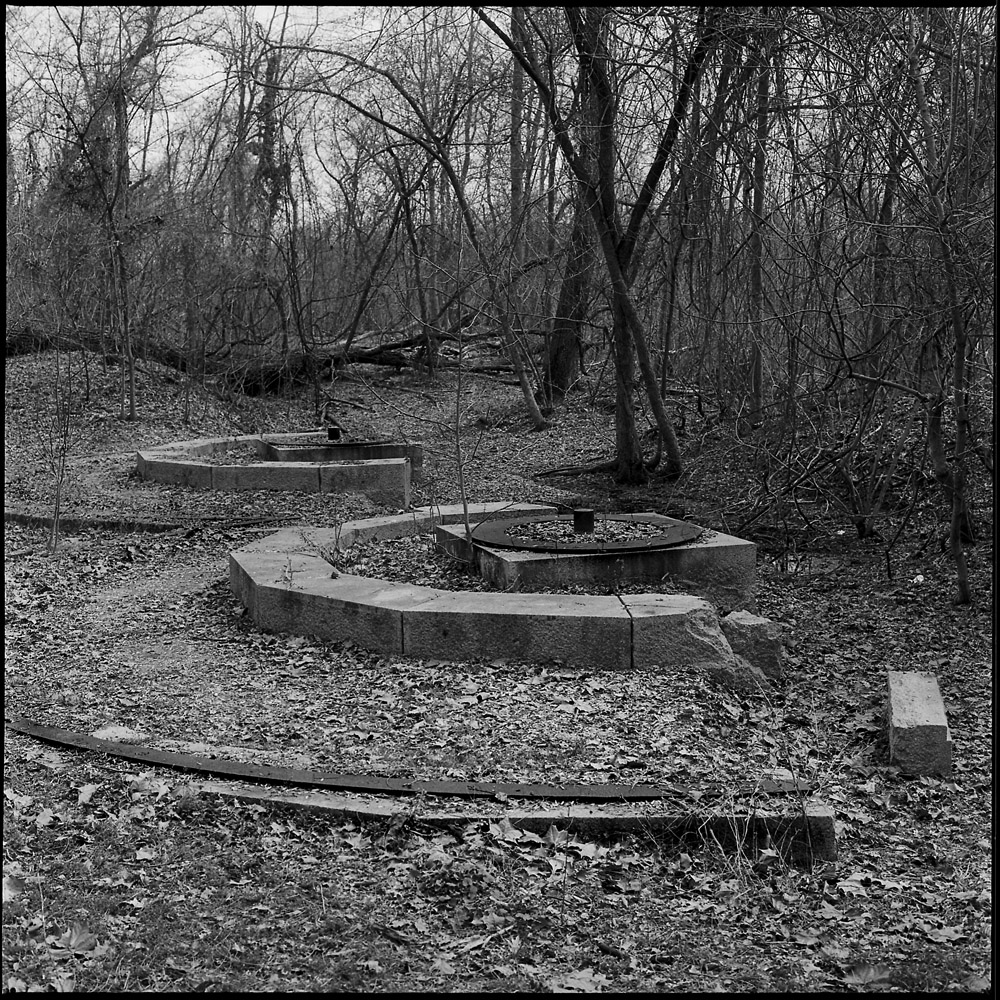
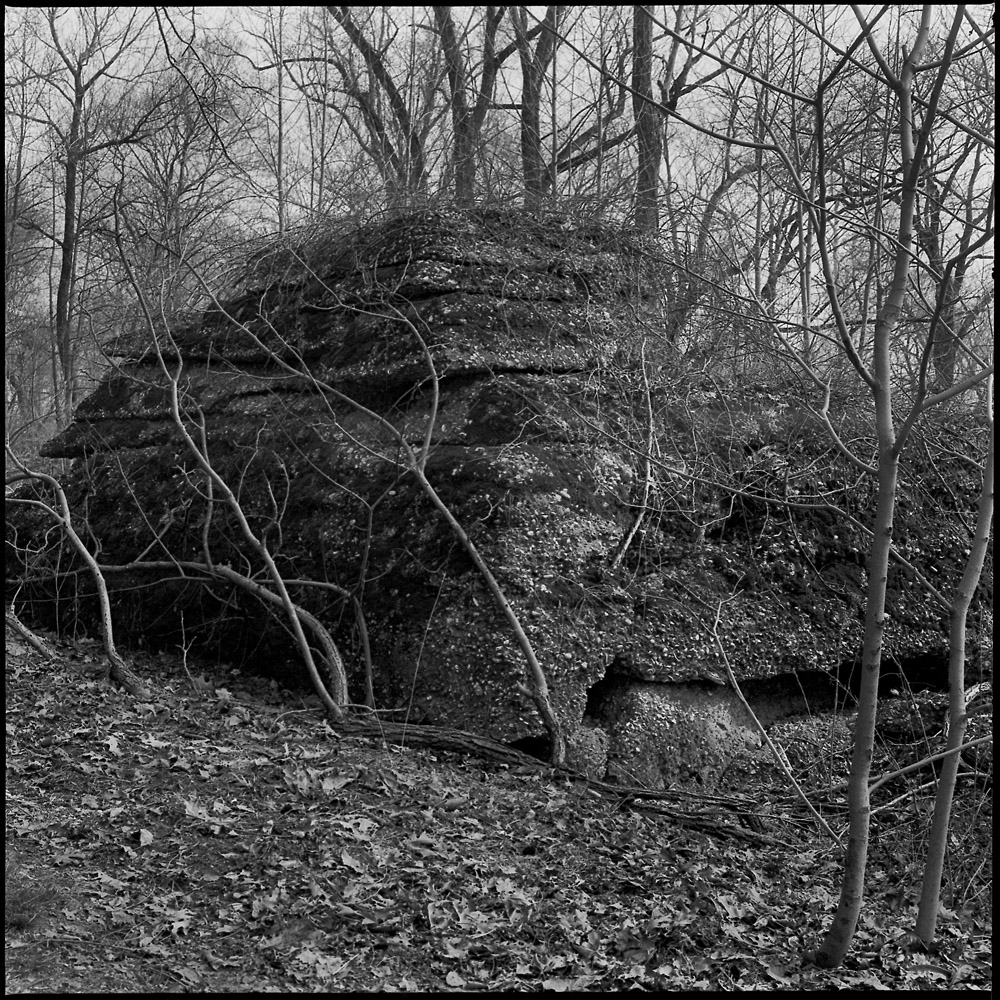
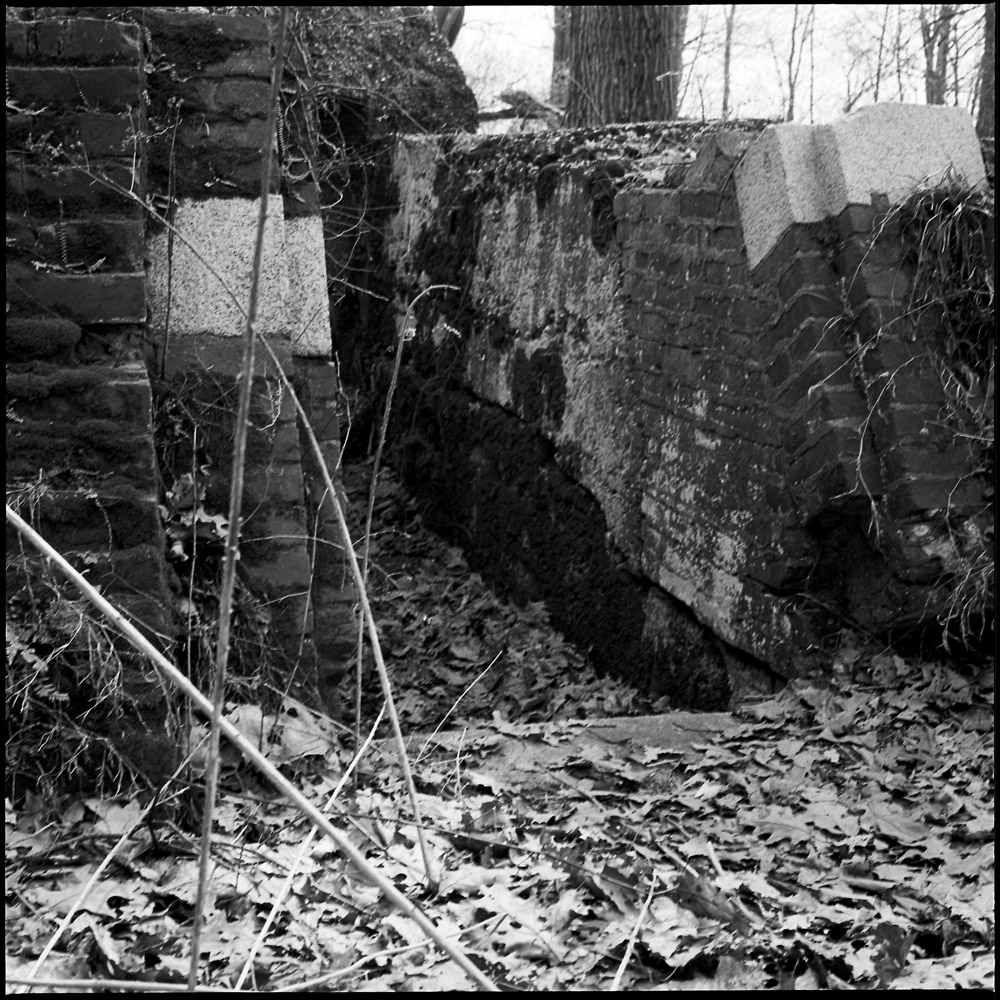
Fort Foote has been spared much of that indignity. Fort Foote (named after a Union admiral who was killed in action in 1863 assaulting Confederate strongholds on the Mississippi river) too is overgrown with forest, but the earthworks remain very much in their original configuration. It owes its survival in part due to the location on a 100 foot tall bluff facing the Potomac river, too awkward a site for proper development. Two of the mighty 15 inch Columbiads (also known as Rodman guns for the man who designed them) remain in situ, and the ammunition vault’s crumbling ruins (also known as a “bombproof”) can be seen and scampered over by enterprising and nimble youth.
Crumbling Bombproof, Fort FooteBombproof Entrance, Fort Foote
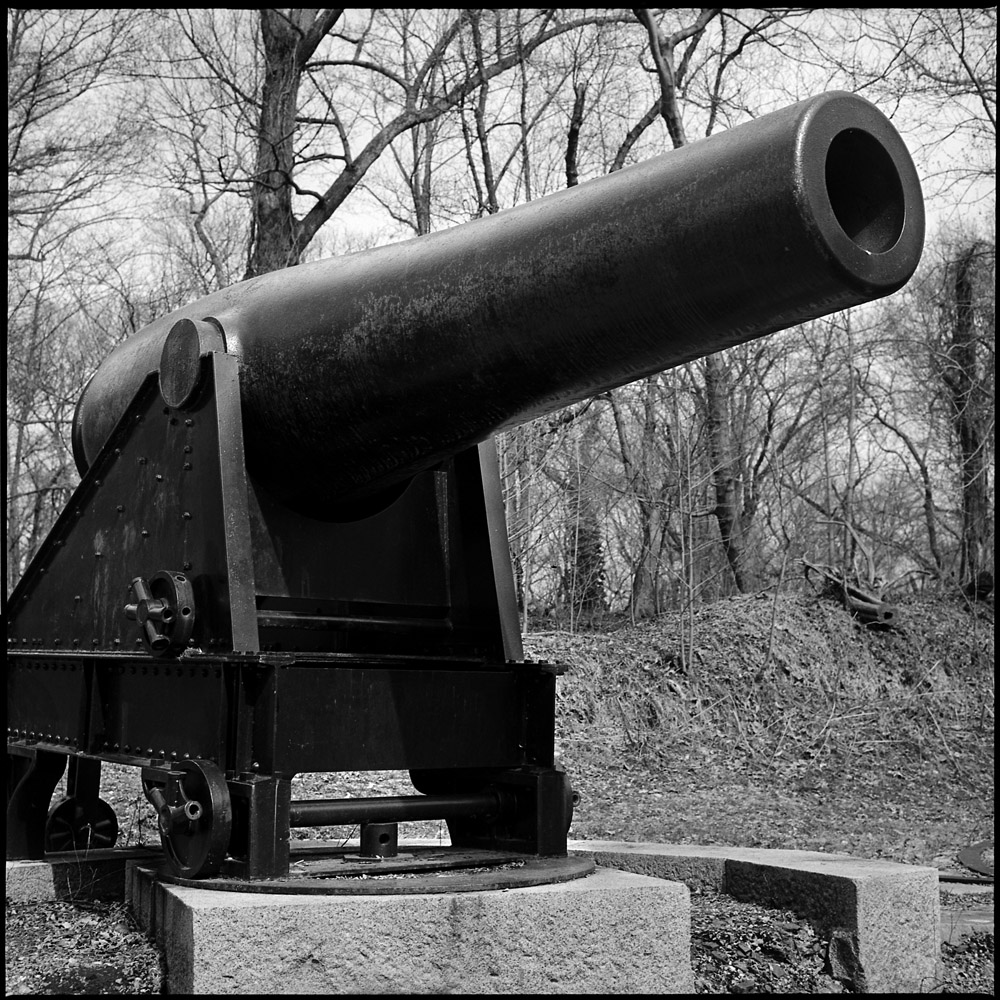
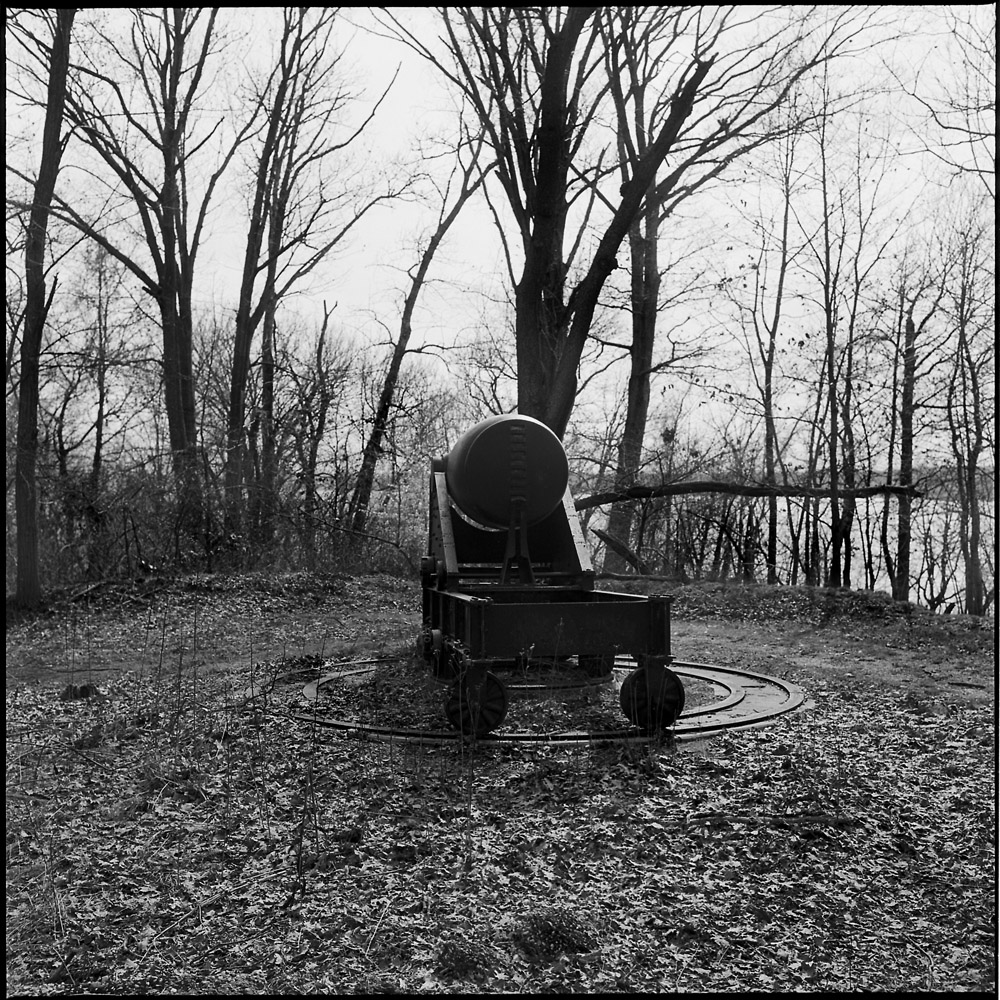
The Rodman gun was a major innovation in cannon technology. Due to a radical change in forging technique, they could be made much stronger and safer to be fired repeatedly without risk of the powder charge exploding the gun itself. The design was so successful that eventually the United States had nearly 450 of them providing coastal defense. The 15 inch Columbiad version could fire a 200 pound projectile some 5000 yards and penetrate ten-inch steel armor at that range. The guns at Fort Foote were never fired in anger. The smaller 12 inch and 8 inch cannons that topped the earthworks were removed by the end of the 19th century when the fort was decommissioned. Today, only a handful of the 15 inch Rodman guns remain in existence, the majority having been melted down or in some cases entombed in concrete to add support to the improved fortifications they once defended.
Rodman Gun, Front ViewRodman Gun
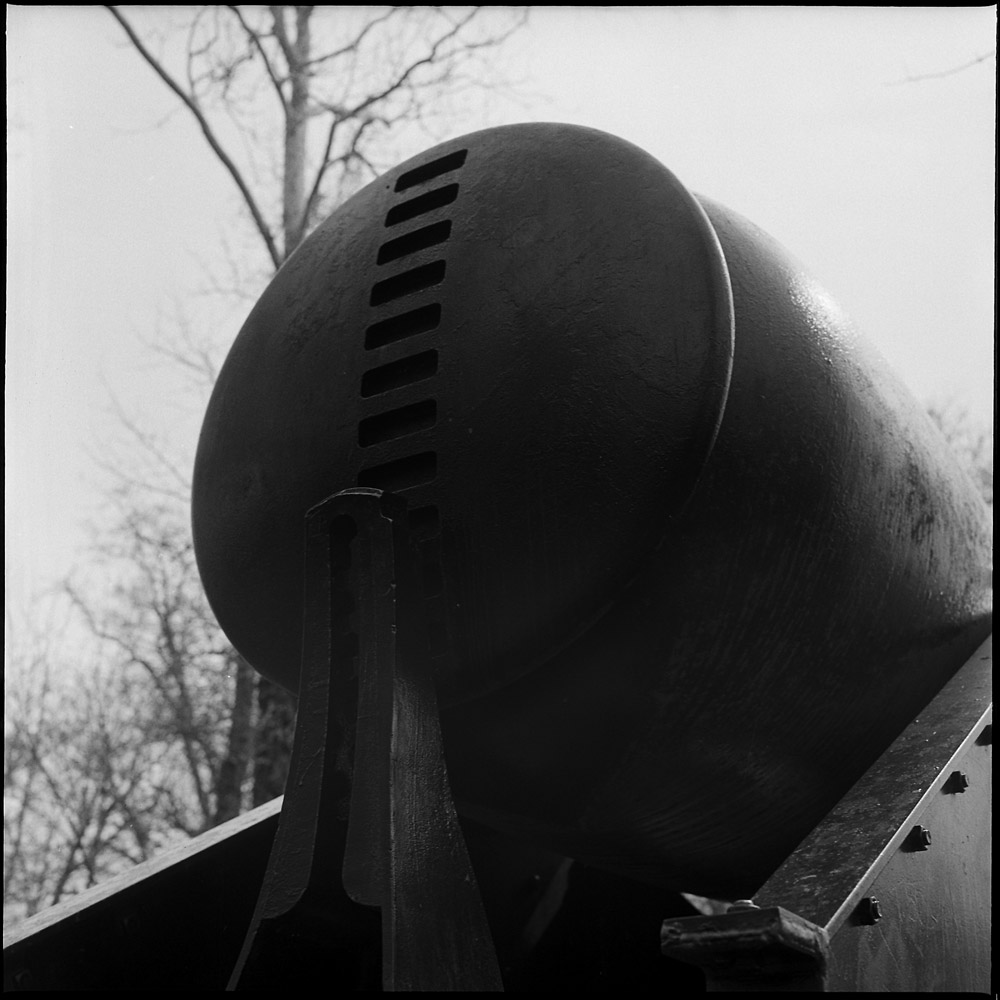
The notches on the back of the Rodman gun, along with the large, relatively flat “knob”, are signatures of the design, and indicative of some of the innovations. By making the “knob” large and flat, it made it much easier to hoist the cannon for moving it and loading and aiming – a common problem with smaller guns that had a much more traditional knob on the rear was that the weight of the gun, when hoisted in the air, would stress the join between the barrel and the knob and it would break, sending the extremely heavy barrel crashing to the ground, crushing anyone below, ruining the gun, and possibly discharging the shot if it were loaded.
Rear, Rodman Gun
The Rodman cannons were mounted on platforms that would enable them to be withdrawn below the earthworks to be loaded, and then raised when ready to aim and fire, reducing the exposure of the gunnery teams to enemy small arms fire. This wheel with its tubes to take wooden levers would have been used to raise and lower the gun on the pop-up mount.
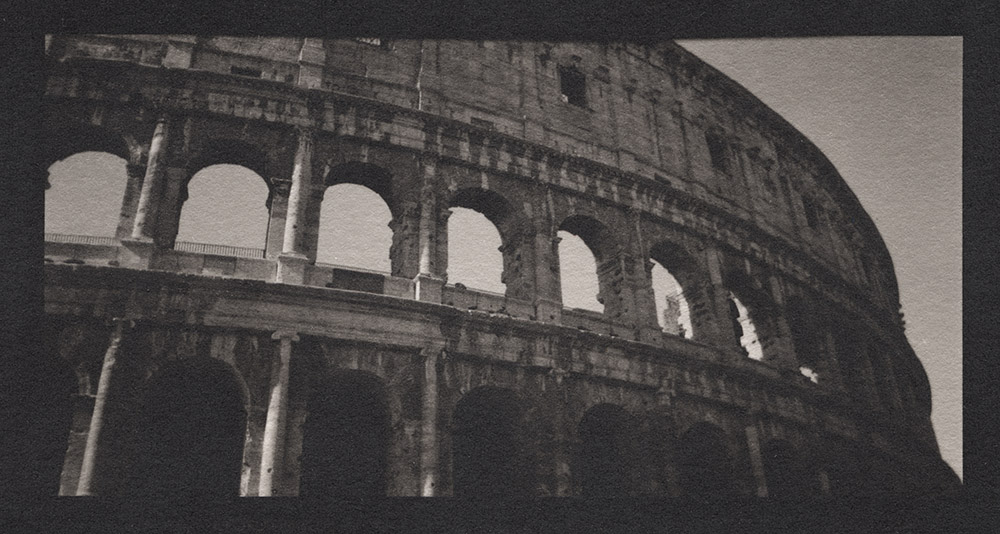
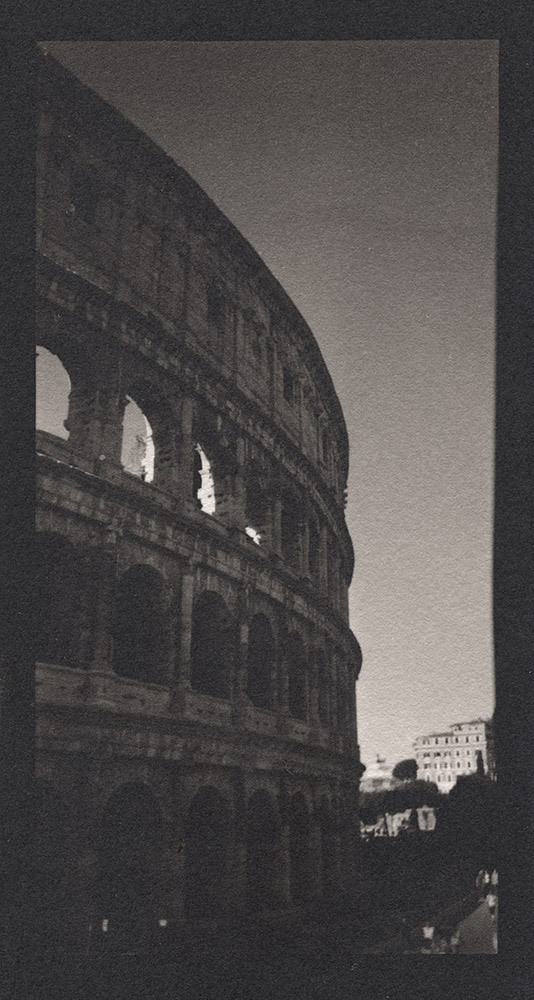
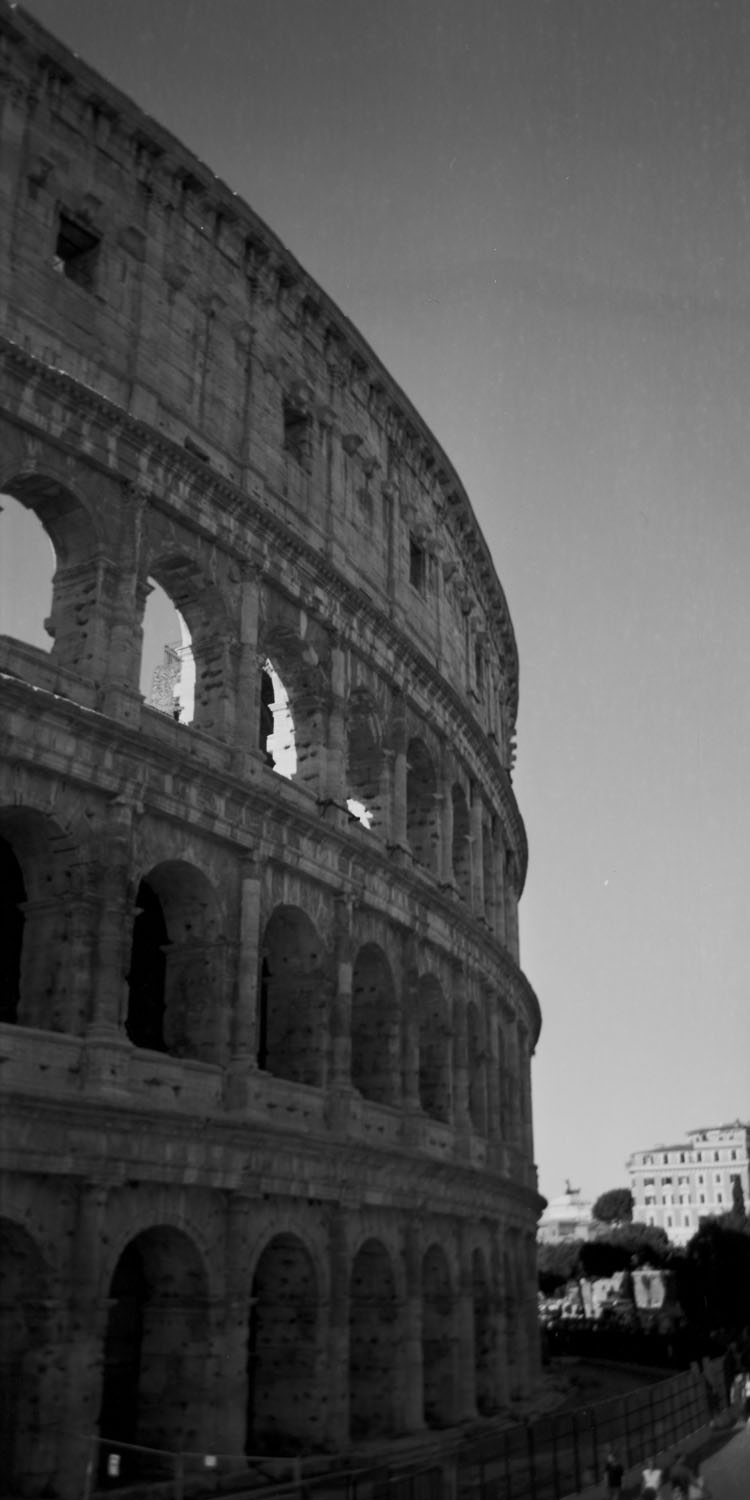
Photographing the Colosseum was one of the primary reasons I brought the Belair X/6-12. I knew already that I wanted to take panoramic shots of the building, as just about anything else aspect ratio-wise was not going to do the place justice. I think (I hope, anyway) that these give you somewhat of a sense of the scale of the building – it sits in a large open plaza and is every bit as large as a modern American Football stadium, seating somewhere in excess of 50,000 people. A testament to its architectural genius is that the entire stadium could be emptied in a matter of minutes.
Colosseum Panorama
These views depict the outer curtain wall, of which only a fraction remains. In fact, almost 2/3 of the original stadium and its decorations are gone – the columns, marble seats, wooden flooring and doors and bronze and gold decorations are all lost to the ravages of earthquakes, vandals, fires, and architectural re-purposing.
Colosseum Panorama
An astounding fact about the outer curtain wall – there is NO mortar used in its construction. The entire edifice was assembled and held together by iron bow-tie shaped clamps interconnecting each block.
So I was busy and didn’t get around to developing the last few rolls from my Italian adventure until a couple days ago. I’m working through them now – they’re all panoramic shots taken with my Lomo Belair X/6-12. I’m still on the fence about whether and how much I like it.
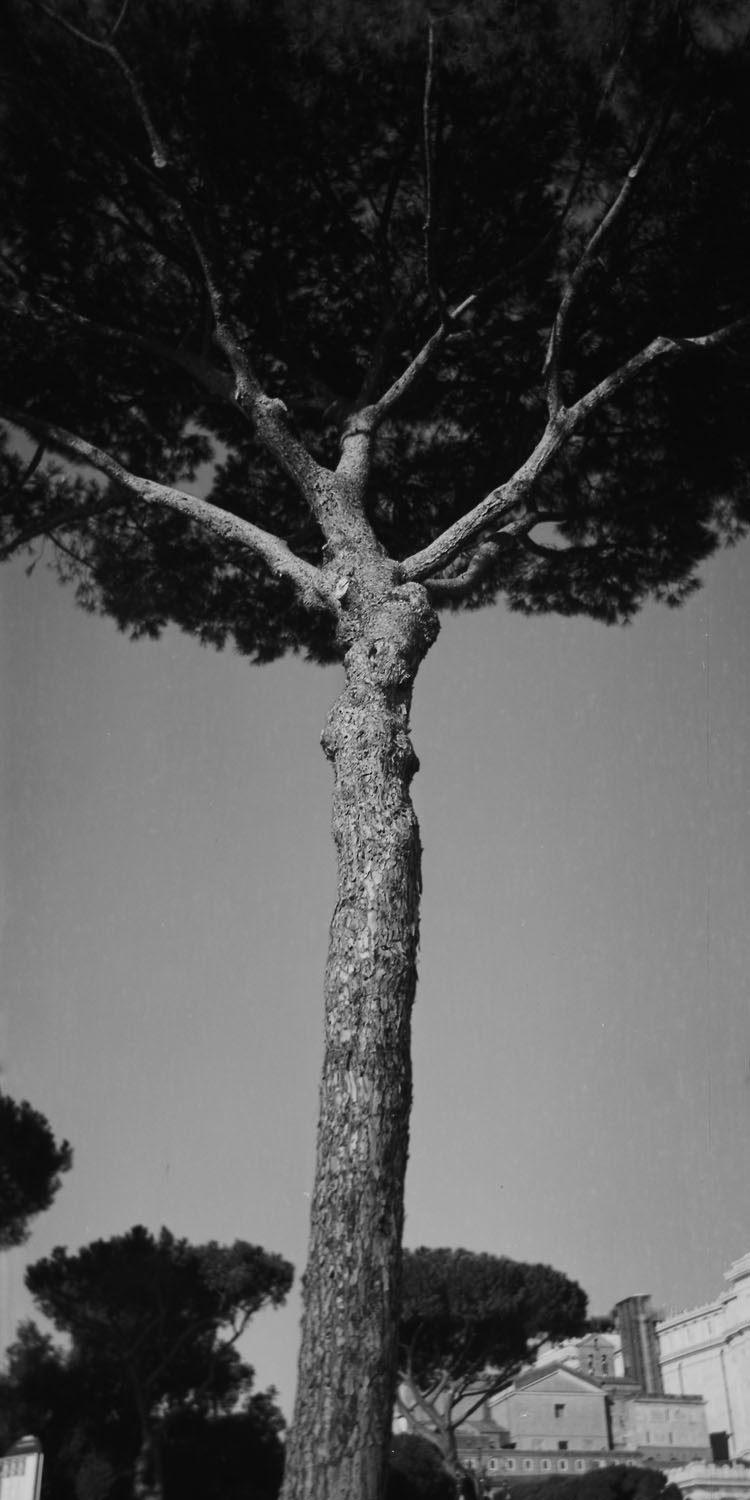
Umbrella Pine, Via Fori Imperiali
In this case, it worked. Quite well in fact. This is one of the famous “Pines of Rome” – the umbrella pine – that are ubiquitous throughout the city and the region. They’re the source of the pine nuts used in making pesto. The umbrella pine is such a signature emblem of Rome I needed to take a photo of it by itself because now having been there, I can’t think of the city without thinking of the pines.
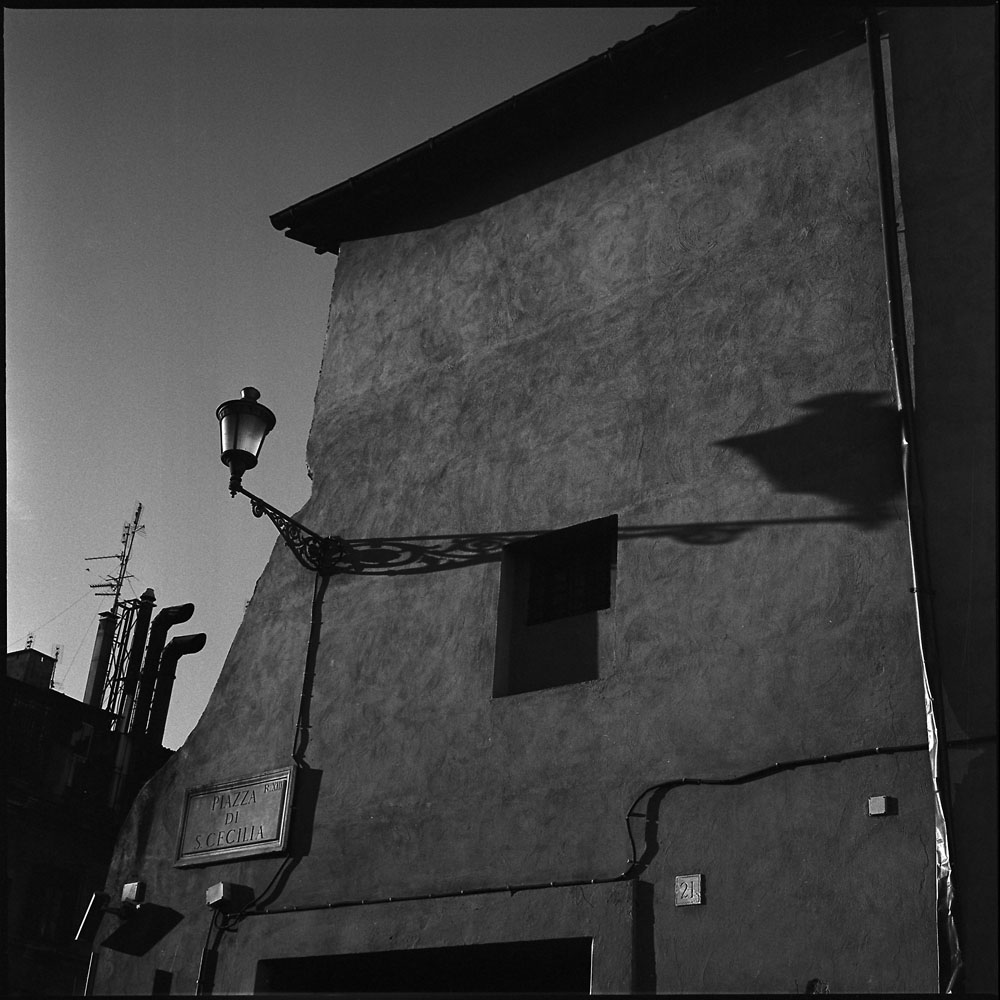
The Piazza Santa Cecilia is one of the focal points of my part of Trastevere. It is named after the eponymous church and convent that borders its west side. The lantern on #21 Piazza Santa Cecilia casts a long shadow in the light of dawn:
21 Piazza Santa Cecilia
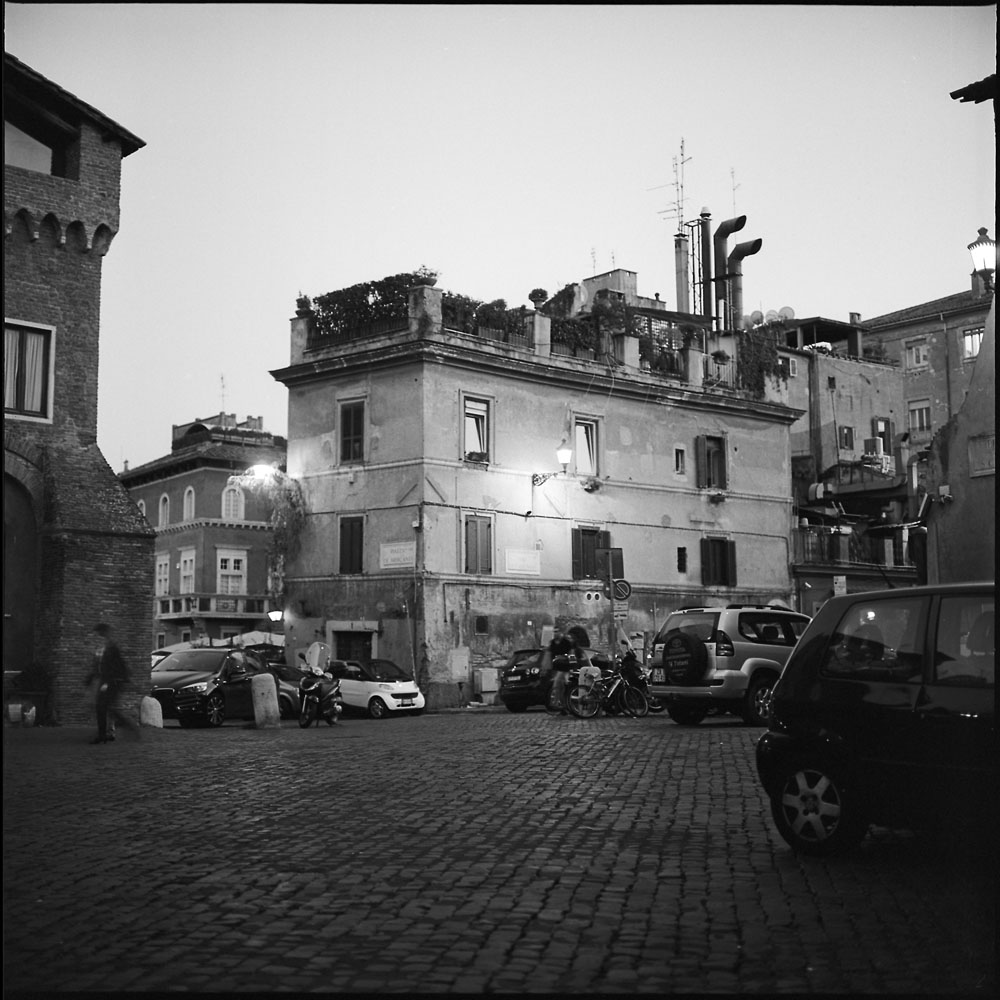
The Piazza dei Mercanti abuts the Piazza Santa Cecilia. In this view as the sun sets and the street lamps come on, there’s not much to see of the piazza itself from all the cars parked in it, but a very large restaurant faces it that does a bustling business on a warm fall evening. A neighborhood resident is out for a stroll, perhaps on their way to the coffee bar up the street.
Piazza dei Mercanti, Evening, from the Piazza Santa Cecilia
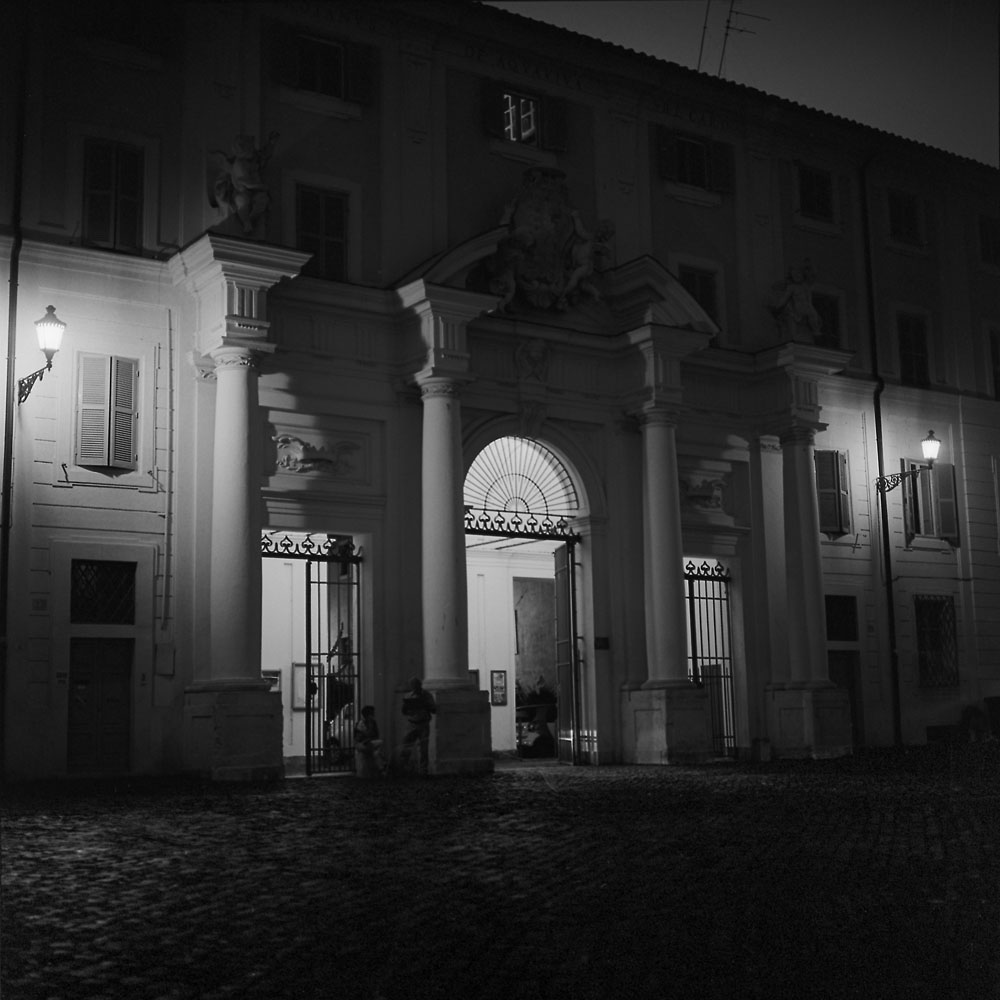
Santa Cecilia’s courtyard remains open quite late into the evening, and the public can come and go through the gates. There has been a church on the site since the 3rd Century AD, when it was built over the location of St. Cecilia’s house. The main body of the church dates to the 13th Century, and some 9th century mosaics are preserved within. The facade and the courtyard are 18th century renovations, however.
Exterior, Gates to Santa Cecilia, Night
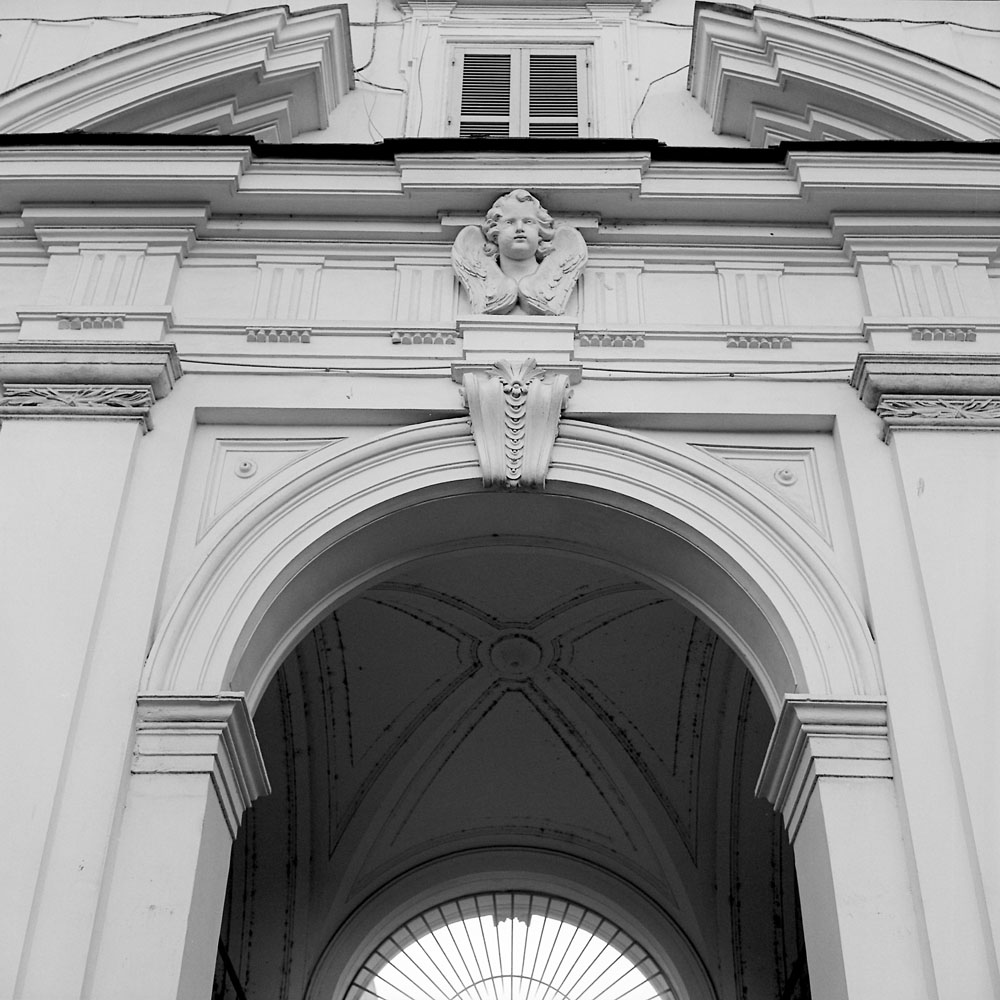
This cherub keystones the arch over the main gate to the courtyard.
Cherub, Santa Cecilia Courtyard
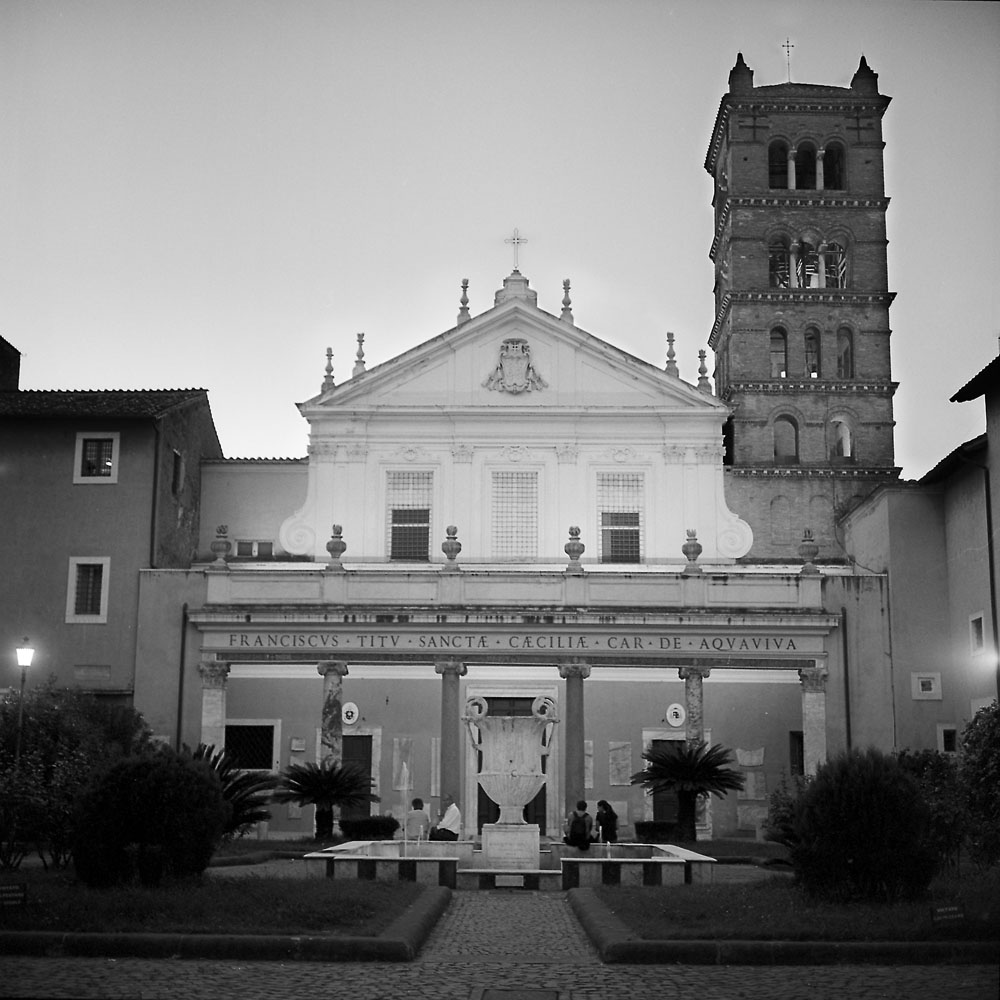
Inside the courtyard you can view the 18th century facade of the church, ancient mosaics and an ancient cantharus or water urn that now is the centerpiece to a fountain. The bell tower dates to the 12th Century, and looms over pretty much the entire neighborhood. Here young couples sit on the edge of the fountain to canoodle while admiring the church before wandering off to dinner or perhaps a more appropriate intimate location.