Category Archives: Cameras

Fort Foote Excursion

Serendipity plays a major role in my life. A couple weeks ago I took a mental health day mid-week and decided to visit some of our local history. My original intent was to take a short road trip to see some historic houses in northern Virginia, but they (the Woodlawn Plantation and the Pope-Leighy House) were still closed for the season. Instead, I thought I’d take a quick drive down Indian Head Highway into southern Maryland and visit Fort Washington, created to defend the capital city from river attack in the early days of the Republic. The current structures date from the years after the War of 1812 to the first decade of the 20th century. The main fort was designed by Pierre L’Enfant, the man who laid out the design for the streets of Washington DC.

On the drive down Indian Head Highway, after only a mile or so I saw a sign saying “Fort Foote Park”. I decided I’d detour and check it out. I really didn’t know much of anything about Fort Foote other than I presumed it was part of the Civil War-era defenses of Washington DC. My presumption about it was correct, but there’s a lot more to it than you might expect given that description. Most of the 68 defensive forts that ringed DC are now little more than some mounded dirt with a plaque commemorating what they were. They’re overgrown with trees and grass and cross-cut with walking trails, city streets, and even housing developments. Fort Stevens, the location where the only sitting United States President ever came under enemy fire, today is barely a half a square block, hidden behind a post-war church, 20th century homes and shops, and hemmed in by city streets.

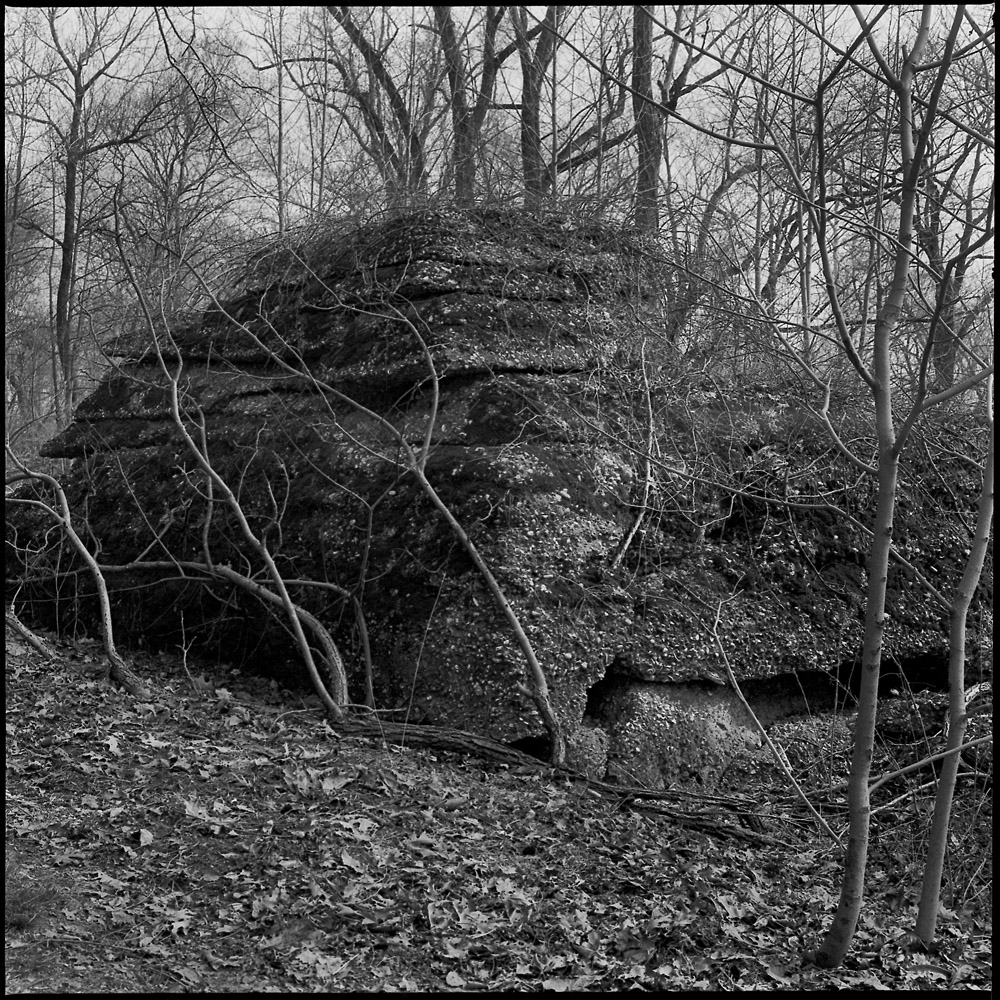
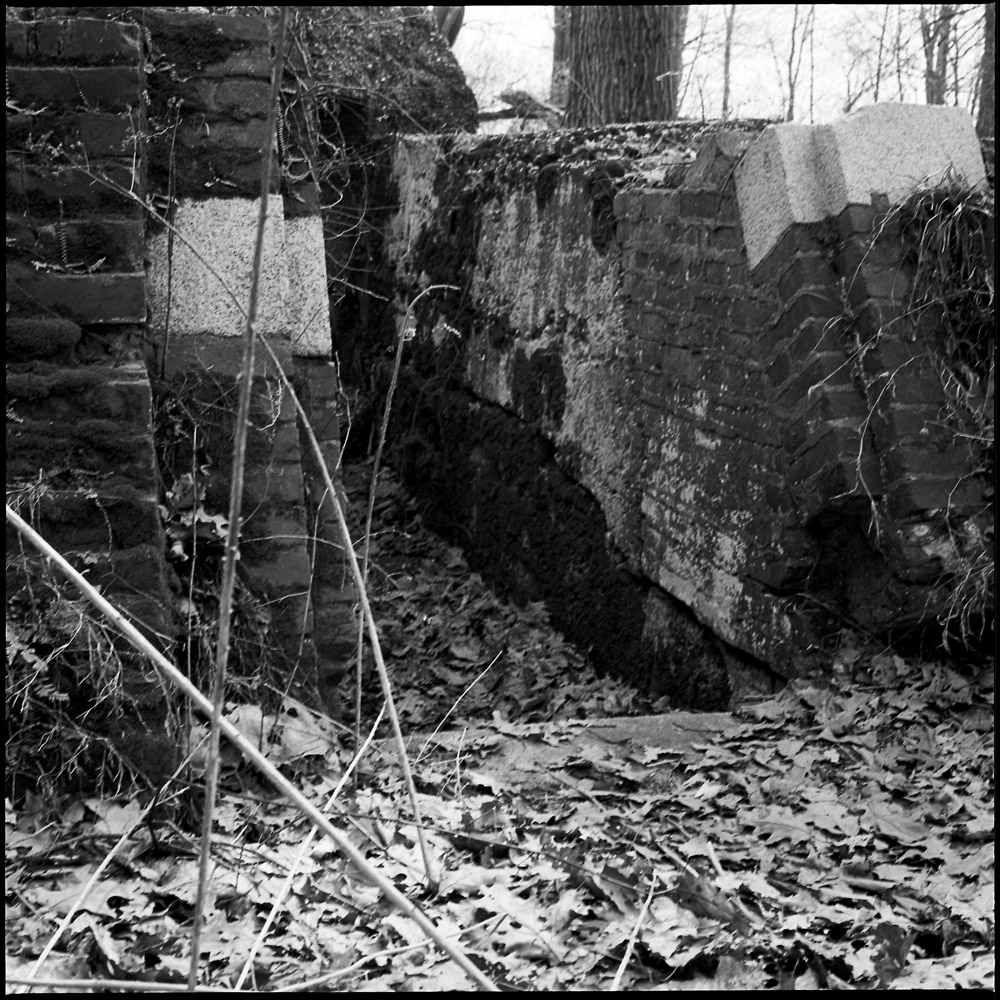
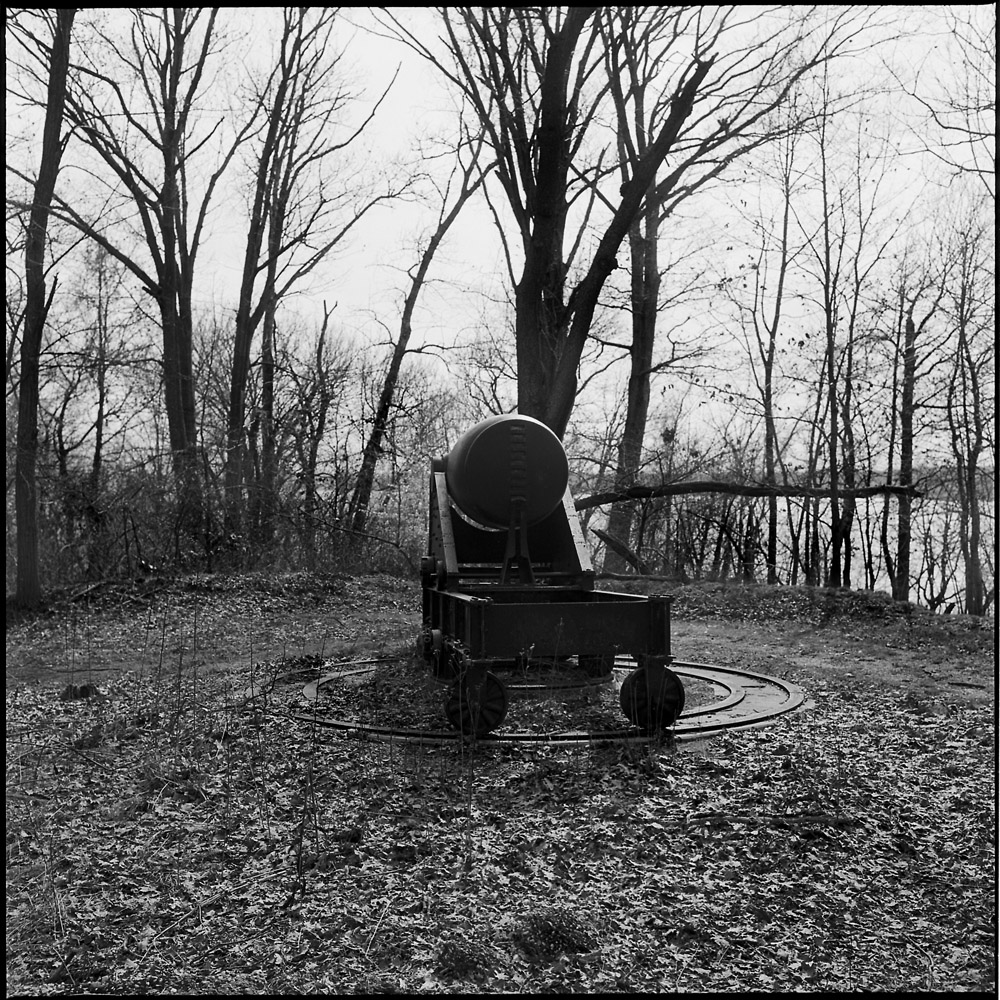
Fort Foote has been spared much of that indignity. Fort Foote (named after a Union admiral who was killed in action in 1863 assaulting Confederate strongholds on the Mississippi river) too is overgrown with forest, but the earthworks remain very much in their original configuration. It owes its survival in part due to the location on a 100 foot tall bluff facing the Potomac river, too awkward a site for proper development. Two of the mighty 15 inch Columbiads (also known as Rodman guns for the man who designed them) remain in situ, and the ammunition vault’s crumbling ruins (also known as a “bombproof”) can be seen and scampered over by enterprising and nimble youth.

Crumbling Bombproof, Fort Foote
Bombproof Entrance, Fort Foote

The Rodman gun was a major innovation in cannon technology. Due to a radical change in forging technique, they could be made much stronger and safer to be fired repeatedly without risk of the powder charge exploding the gun itself. The design was so successful that eventually the United States had nearly 450 of them providing coastal defense. The 15 inch Columbiad version could fire a 200 pound projectile some 5000 yards and penetrate ten-inch steel armor at that range. The guns at Fort Foote were never fired in anger. The smaller 12 inch and 8 inch cannons that topped the earthworks were removed by the end of the 19th century when the fort was decommissioned. Today, only a handful of the 15 inch Rodman guns remain in existence, the majority having been melted down or in some cases entombed in concrete to add support to the improved fortifications they once defended.

Rodman Gun, Front View
Rodman Gun
Rodman Gun

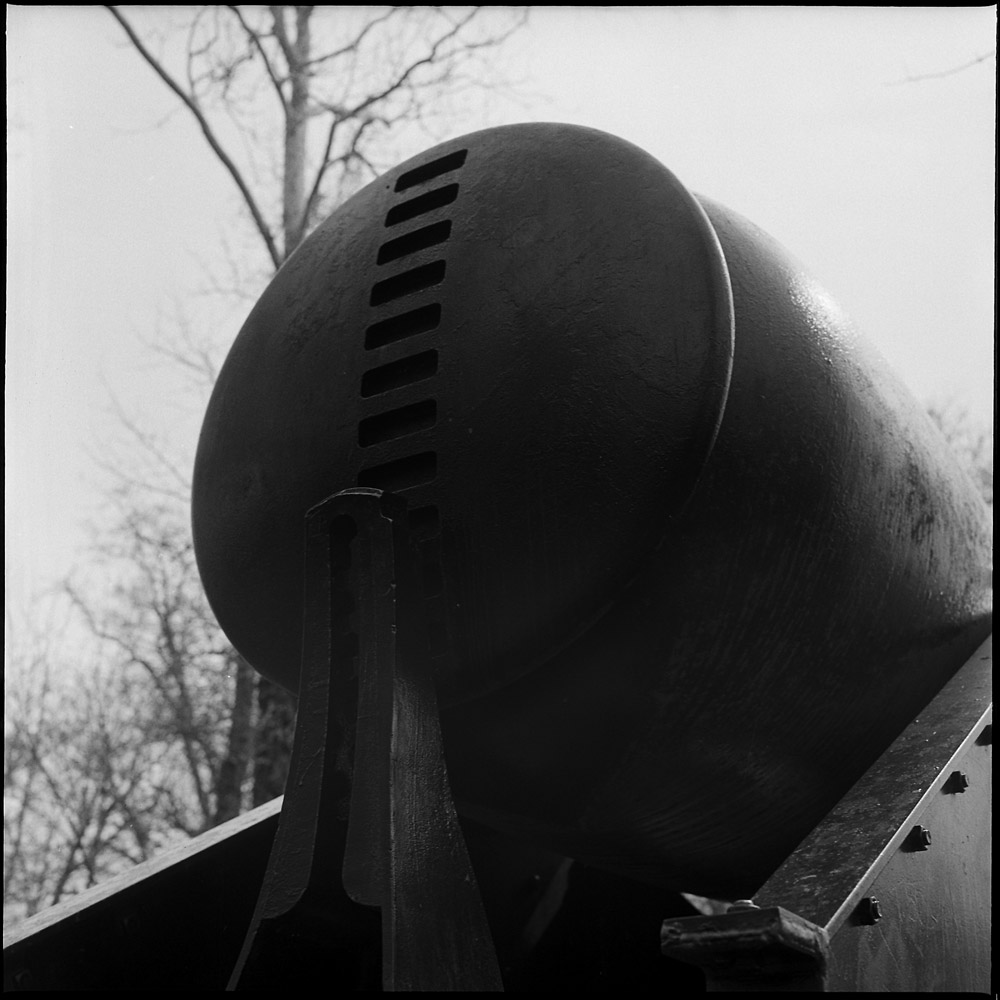
The notches on the back of the Rodman gun, along with the large, relatively flat “knob”, are signatures of the design, and indicative of some of the innovations. By making the “knob” large and flat, it made it much easier to hoist the cannon for moving it and loading and aiming – a common problem with smaller guns that had a much more traditional knob on the rear was that the weight of the gun, when hoisted in the air, would stress the join between the barrel and the knob and it would break, sending the extremely heavy barrel crashing to the ground, crushing anyone below, ruining the gun, and possibly discharging the shot if it were loaded.

Rear, Rodman Gun
Rear, Rodman Gun

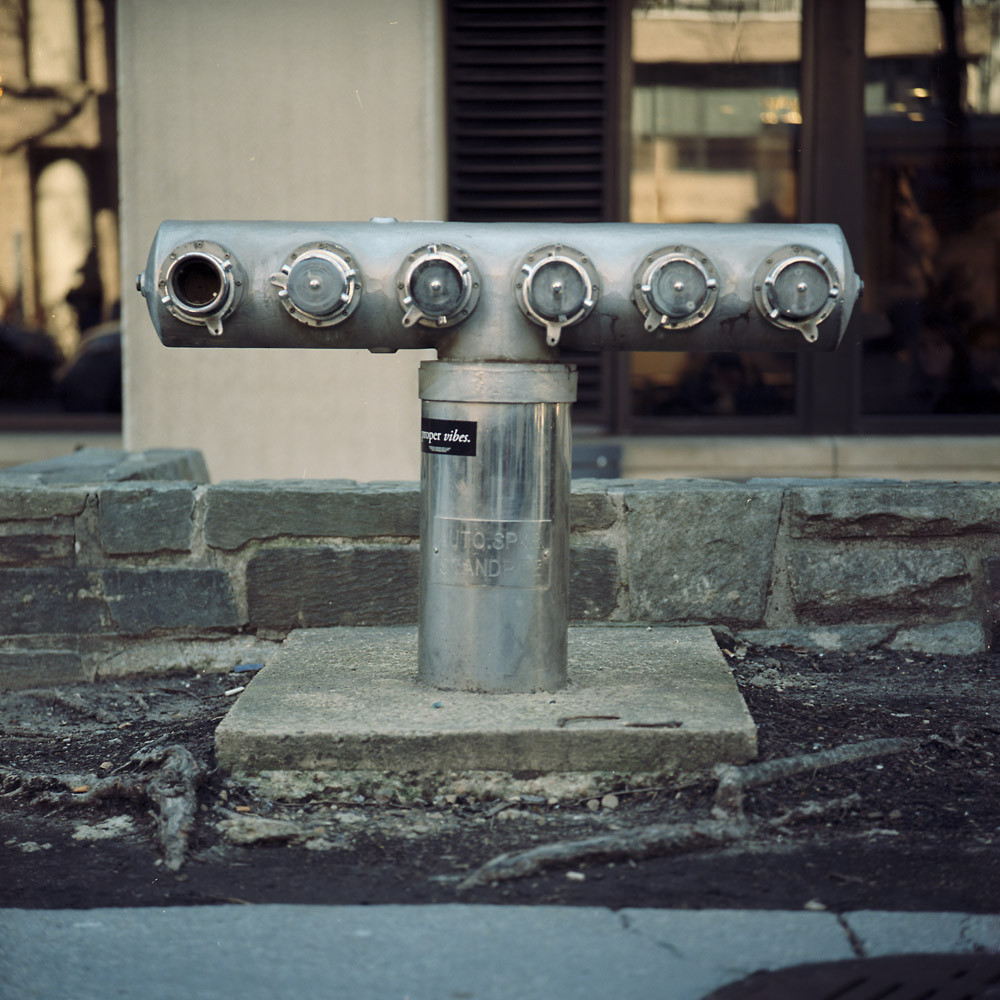
The Rodman cannons were mounted on platforms that would enable them to be withdrawn below the earthworks to be loaded, and then raised when ready to aim and fire, reducing the exposure of the gunnery teams to enemy small arms fire. This wheel with its tubes to take wooden levers would have been used to raise and lower the gun on the pop-up mount.

Elevation wheel, Rodman Gun

Portraits of Ordinary Objects – Multi-hose Connector

I don’t know if I’ve ever seen a fire hose connector with more connections on it than this one, outside the George Washington University library. The location may be key – if the library ever catches fire, that much paper will require a lot of water to keep it all from going up in a ball of flame.

Multi-Hose Connector

Either that or it’s some kind of arcane commentary on the Starbucks Coffee in the library basement immediately behind it.

DC Inaugurates Streetcar Service (50 years after removing it)

I’m a big public transportation junkie, so when I heard they were finally launching the DC Streetcar on H Street Northeast (a public works project over a decade in the making and long overdue – the tracks have been in place for two or three years now), I was so excited I ran over after work last Friday to see it and ride it only to find out I was a day early! So I satisfied my urge and photographed the streetcar at the Union Station end of the line, catching it at sunset. The shiny new car reflected not only the setting sun but the buildings across the street, bringing the surrounding urbanscape out of frame back into the picture.

DC Streetcar, Union Station, Sunset

Here is a different view of the streetcar, waiting at the Union Station end of the line, looking down H Street. H Street was, fifty or so years ago, a thriving business district catering mostly to a middle-class African-American clientele. Then along came the riots after the assassination of Martin Luther King Jr., and then with the 1980s, the cocaine and crack epidemics. H Street was devastated.

Westbound Oklahoma Avenue Streetcar

Obviously now, not so much. It has transformed starting in the early 2000s with the real estate boom. Perhaps the turning point was the creation of a large condominium complex, Senate Square, on the grounds of what was originally a Catholic school and later the Capitol Children’s Museum. Now, pawn shops and lake trout joints are being replaced by artisanal coffee roasters, fancy pubs serving British-Indian fusion cuisine, and cultural outlets like the Atlas Theater and the Rock n’ Roll Hotel (which is not a hotel, but a bar and concert venue). Instead of a Murry’s, the neighborhood is now sporting a Whole Foods.

When finally fully operational (at the moment, the streetcar only runs less than half the length of installed track), the streetcar will connect Union Station and the governmental core of the city to east of the Anacostia River, a long-suffering neighborhood where good jobs and access to quality goods and services have been sorely lacking.

New Camera: Fuji XT-1

As most of you know, I’m a die-hard film shooter. And I’m not about to stop- I seriously love my Rolleiflexes. But there is a real-world place for a good digital camera in my toolkit. 

I was using a Canon 5D mk.1 for a long time- perhaps ten years now. It still does a very good job of doing what it does, but it is BIG, it is HEAVY, and the image quality and technical features of newer cameras have really outstripped what it can do. 

I’ve been investigating alternate options to replace it. One thought was a Canon 6D, which would give me another full-frame chip with higher resolution, better color rendering and low-light performance, and I could keep all my existing lenses. But that would still have been really outside my budget. Even more so a 5D mk.3. Neither one would have solved my issue with weight, which quickly becomes an obstacle to regular use.

I looked at what I use my camera for- mostly events (as in documentary shooting, not commercial event photography), portraits and travel. I wanted something that would give me improved low-light performance, be much smaller and lighter, and give me the quality of glass I was used to with my Canon L lenses. 
I turned to mirrorless cameras, did some looking around, and after getting feedback from some trusted friends, arrived here: 


Fuji X-T1
 
The Fuji X-T1. It has a 16 megapixel APS-C sensor, a line of outstanding lenses in the focal length range I use the most, and as you can see in the photo above, is quite a bit smaller than the 5D. Not to mention quite a bit more affordable. 

Right now I only have the “kit” zoom lens. Calling this a kit lens is a bit like calling the 24-105 L lens with my 5D a kit lens. It’s an 18-55, or the equivalent of a 27-84 in 35mm/full-frame terms. A maximum aperture of f2.8-f4 means for a compact zoom, it’s quite fast. It also has optical image stabilization, a nice plus when shooting hand-held in low light. 


stairwell- hand-held @ 1/8th second
 
Things I like about the lens: image quality is excellent. The range of focal lengths covered is very useful. It does a great job with both near and distant subjects. The out-of-focus rendering is pleasant. 


dogwood bloom, night-time
 
Things I don’t like: switching from autofocus to manual requires a separate switch to be toggled. That switch is small and on the back of the barrel, close to the body, so toggling it requires taking the camera away from your eye. The aperture control ring is not mechanical with defined click-stops, but is instead electronic, making it hard to tell if you’re turning it the right way, and easy to turn it away from your preferred f-stop. 


magnolia blooms
 
This is not a problem with their prime lenses, two of which I will be acquiring soon. 

Also, as you can see, the image quality and color rendition of the image chip in the X-T1 leaves nothing to be desired even at relatively high ISO. The dogwood bloom at night was shot at ISO 6400. It has two extended range ISO settings above that, but I have yet to explore those. 

The camera has a whole host of other options including film emulsion emulation modes (all of these were shot in Astia simulation, which is a little lower in contrast with a slightly less saturated palette for more pleasing portraits). It also has black and white modes, including red filter and yellow filter simulations. 

Some environmental portraits:


Julian
  
Tan
  
Missy
 
A black-and-white shot with the red filter mode on:

Richard

Forlorn Orange, Abandoned in the Gutter

It’s been a while since I’ve posted any of my own images. I was out on a lunch break walkabout near my office and saw this poor little orange (or is it a tangelo?) someone had dropped in the gutter. It cried out to be photographed, so here it is…

Forlorn Orange
Forlorn Orange

The Polaroid 20×24 camera in action

Here’s a video of my friend Tracy Storer talking about the 20×24 polaroid camera. Tracy is the manager of the San Francisco 20×24 studio, and has been working with the cameras since the late 1980s in Boston and New York when Polaroid owned and operated their own studios.

https://vimeo.com/110929999

Among the cool little nuggets from the video:

  • the Polaroid 20×24 operates in vertical only orientation
  • Chuck Close used one to take portraits of President Clinton in the Oval Office. Getting the camera in and out of the White House was quite the undertaking, as the camera and stand combined weigh over 240 lbs.
  • When you rent the Polaroid 20×24, it includes a staffer to operate the camera for you.

Natural Light Portraits – Mom, at ABC Carpet & Home

There’s something to be said for natural light portraiture. I love studio portraits for the creative control you have- there is no light in a studio portrait but what you put there – if you don’t want it, don’t add it. Working with natural, available light, though, can help you be a better studio photographer as well because it teaches you to really see the light in the scene and understand what you’re looking at. To make a great natural light portrait, you need to look at where the light is coming from, how to position your subject in the scene to maximize the light you have, and where is the best quality of light.

Mom at ABC Home, New York

Here I was with my mother at ABC Home, a giant (and I do mean giant- seven floors in two buildings on opposite sides of the block on Broadway, including two restaurants) interior decor store in Manhattan. We were on one of the upper floors of the main store (carpets are in the other building across the street), and there was this beautiful diffuse afternoon light pouring through the giant windows. I positioned her so she was bathed in this light. It’s a very flattering light for anyone, especially for women. The light may have been soft and flattering, but even though we were on the 4th floor, we were indoors and buried in the canyons of Manhattan buildings, so the light was quite dim, forcing me to shoot wide open with my Rolleiflex.

One of the great benefits to the Rolleiflex is that since there is no mirror to get out of the way when taking the exposure, you can easily hand-hold exposures that would otherwise be a challenge – this was maybe 1/30th or even 1/15th of a second. Another trick that’s easy on the Rolleiflex is placing focus at the edge of your depth of field, especially useful when you’ve got a busy background that would be distracting if it were sharp. The reason it’ easy on the Rollei is that when you’re looking through the waist-level finder, you can look to the side at the depth of field scale on the top of the focusing knob and quickly roll the focus point to the far end of the depth of field without having to take your eye away from what’s going on in the viewfinder. You can’t do that easily with an SLR which has the DoF indicator on the top of the lens barrel.

Portraits of Ordinary Objects

A couple more in the Ordinary Objects series.

Trashcan, Columbia Plaza

I’ve noticed that as the series continues, my style of shooting it has evolved, which is a good thing. The photos are becoming more consistent, especially in terms of composition. The camera is placed on a level with the object, which usually means much lower than eye or even sometimes waist level, and more frontally square to the object.

Fire Hydrant, Vero Beach

The hydrant is in a suburban Florida cul-de-sac where the tallest things around it are date palms, and they’re not massed together to form a giant wall, so the lighting is direct sun, not a diffused sky. I’ve been looking at it and trying to decide how well it fits the series – I think it does on the subject matter and the compositional level, but until I shoot more objects in suburban or rural environments it feels weird because the background isn’t walls or windows or passing traffic, but grass and trees.

Portraits and Studio Lighting

Back in November I taught a studio lighting class at Photoworks. This was my first time offering this class, so the curriculum was a bit of a gamble – I started with foundations of studio lighting, working from hot lights on still life setups and a single light source, and built my way up to electronic flash systems with multiple lights. In this case, my students had the burning itch to jump straight to portraiture, as that was their primary interest. I had a wonderful bunch of students in the class and everyone brought something to the table.

The portraits here are taken by me of my students. The portrait of Joe was done to demonstrate side light with a large diffuse light source, and a reflector. For demonstration purposes I moved the reflector in and out to lighten and darken the shadows, and shot it with both high and low contrast. This is my favorite of the bunch – there’s three-dimensional modeling of his face with the light, but the shadowed side of his face is not lost.

Joe P.
Joe P.

Geraldine was lit to show soft, flattering light. This was the classic “butterfly light” with a large diffuse light directly above and in front of the subject, a reflector below to open up the shadows a bit, and then hair light and background light applied to create separation of the subject from the background.

Geraldine W.
Geraldine W.

The shot of Matthew was done to demonstrate that “edge lighting” look you often see in sports photos of young athletes in shoe commercials. Obviously Matthew is no longer a high-school football player, but the look is very masculine and rugged and it works well on him. This was accomplished with two equal-powered heads in soft boxes, placed behind the sitter, at 45 degree angles to the subject-camera axis, and then adding in a little fill in the front so his face wouldn’t get lost.

Matthew F.
Matthew F.

The final photo of the day is our group shot. That’s me in the center, if you’re wondering. My fourth student in the class was Leslie, who is the one hiding behind Matthew’s shoulder.

Studio Lighting Class

All individual portraits were done with a Tele-Rolleiflex and the Rolleinar 0.35 close-up adapter, on Kodak Ektar 100 color film. The two black-and-white images were converted from Photoshop. Ektar is a good portrait film in natural light, I’ve decided, but for studio portraiture, Portra 160 is better.

Panoramas of the Colosseum, Rome

Photographing the Colosseum was one of the primary reasons I brought the Belair X/6-12. I knew already that I wanted to take panoramic shots of the building, as just about anything else aspect ratio-wise was not going to do the place justice. I think (I hope, anyway) that these give you somewhat of a sense of the scale of the building – it sits in a large open plaza and is every bit as large as a modern American Football stadium, seating somewhere in excess of 50,000 people. A testament to its architectural genius is that the entire stadium could be emptied in a matter of minutes.

Colosseum Panorama
Colosseum Panorama

These views depict the outer curtain wall, of which only a fraction remains. In fact, almost 2/3 of the original stadium and its decorations are gone – the columns, marble seats, wooden flooring and doors and bronze and gold decorations are all lost to the ravages of earthquakes, vandals, fires, and architectural re-purposing.

Colosseum Panorama
Colosseum Panorama

An astounding fact about the outer curtain wall – there is NO mortar used in its construction. The entire edifice was assembled and held together by iron bow-tie shaped clamps interconnecting each block.

Colosseum Panorama
Colosseum Panorama