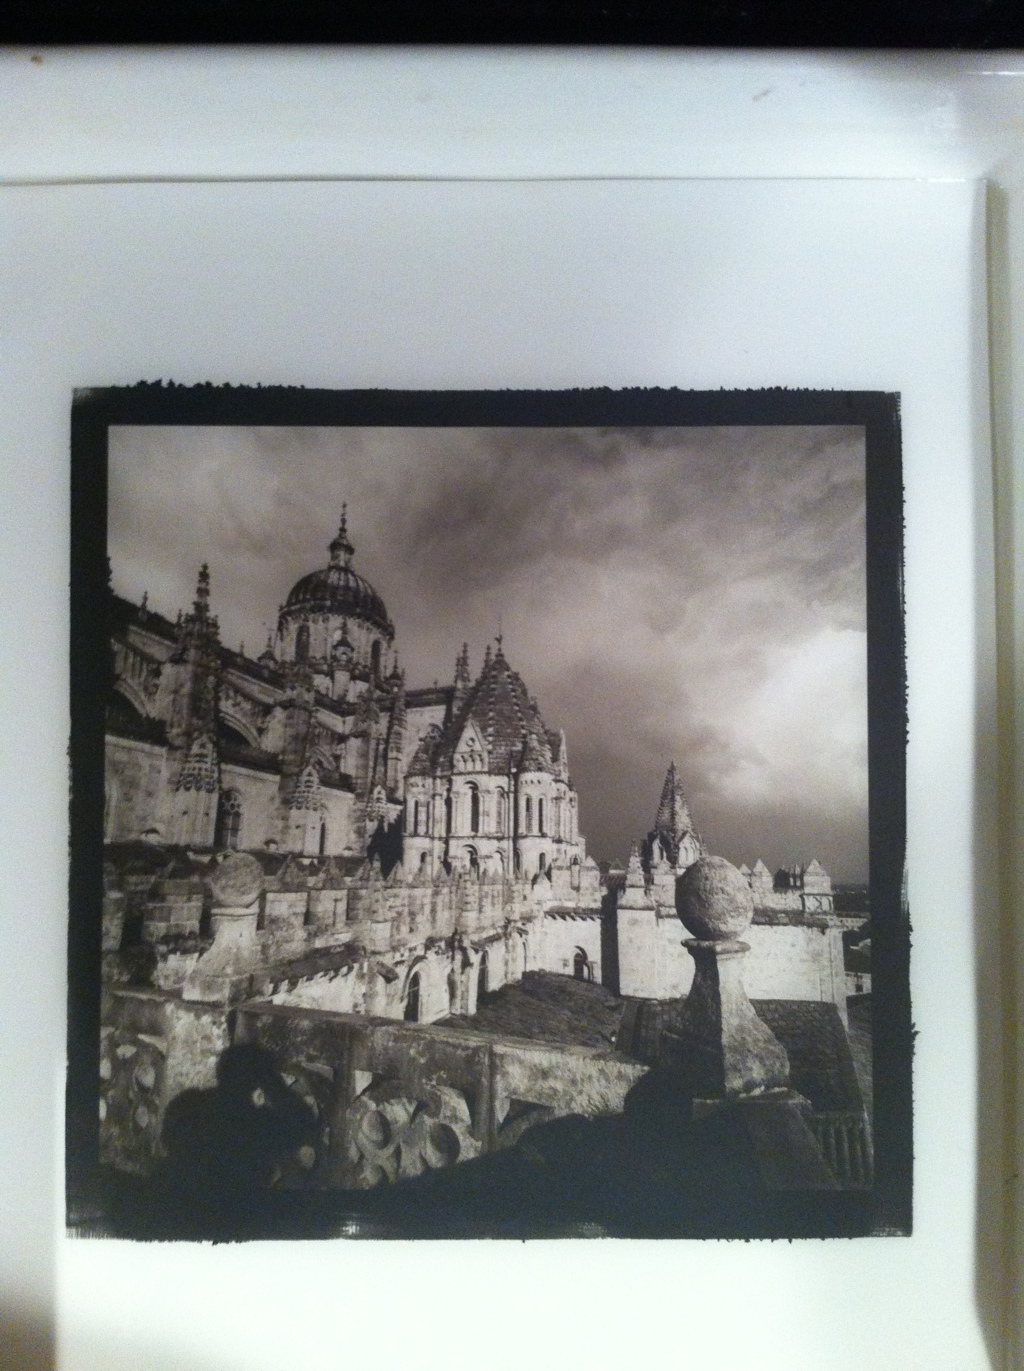
Here is the first print in a series I’m working on. I’m going back through some negatives I made in 2004 with my Hasselblad on a trip to Spain. This shot is the cathedral in Salamanca, or more specifically, both cathedrals – the Romanesque and the Late Gothic/early Baroque, which oddly enough was built into the older cathedral instead of replacing it. I forget the reasoning off the top of my head. After I get a half-dozen or so printed, they will be going to a new gallery in Charlottesville, Virginia called Manu Propria, which specializes in handmade photography. The print is palladium, made on Bergger COT320 pre-treated with fumed silica.
Here is my first print made with fumed silica as a pre-treatment before coating platinum/palladium. I’m seeing a bit of mottling in the lower left corner which I suspect is from uneven coating. This is on Bergger COT320. 50/50 blend of platinum/palladium, 4 drops 5% Ammonium Dichromate for contrast agent.
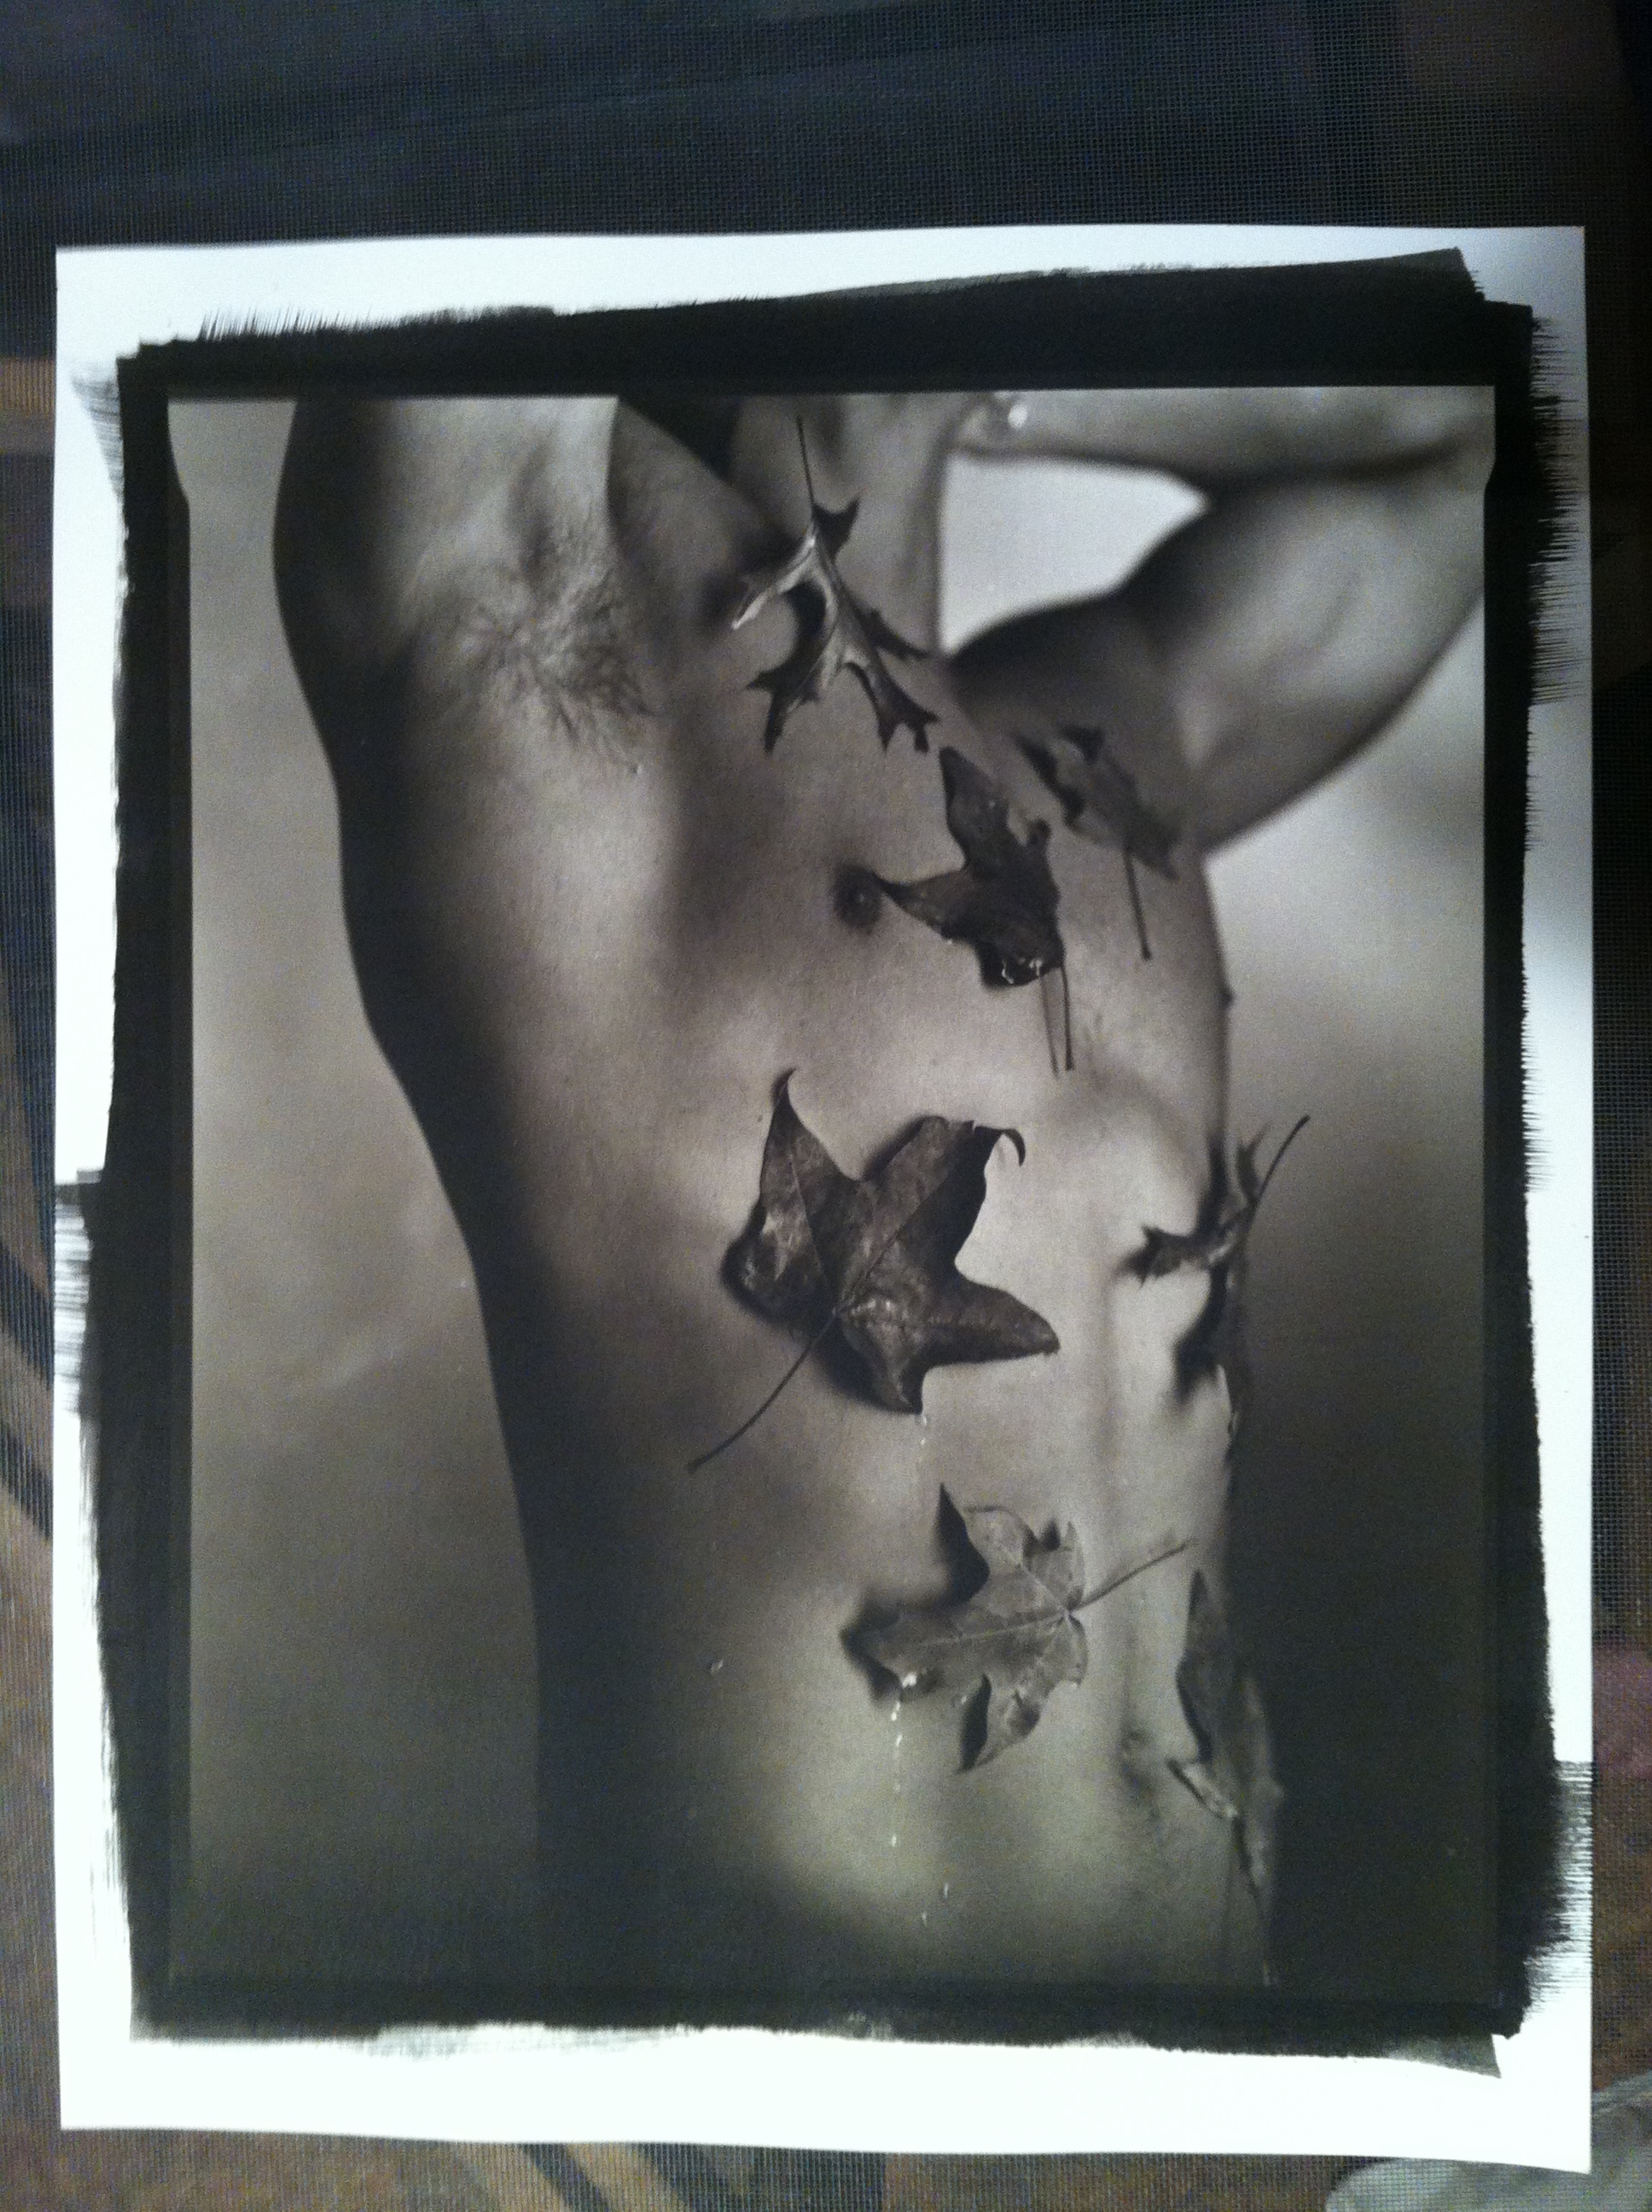
This is a portrait I did of Christian, a friend of mine. He’s a personal trainer and dancer, originally from Argentina. The original print is from a 14×17 inch negative. I had to trim it a little because there is a flaw in the edge of the negative (not sure why exactly, I suspect the edge of the film slipped during development and got blocked by a ridge in the development tank). But that’s the beauty of working with such a giant negative – if you have to trim an inch off the edge, it’s not a big deal.
Ok- I’ve re-photographed the print now and it looks SOOOO much better – much sharper detail.
I finished up my first session of my Intro to Platinum/Palladium Printing class today. I had eight students, all highly motivated and enthusiastic, and it was a big help in making the class succeed. I was a bit nervous as this was my first time running the class, and it was sold out. There was a very diverse audience – about half and half male and female, and age ranges from early 20’s to late 60s (maybe older than that, but it’s not a very polite thing to ask). I was really thrilled that everything went smoothly – on day one, we all talked about the process, shared work and little bios of our artistic backgrounds, and then went out in Glen Echo Park to walk around and shoot some images. We made 10 negatives all told, enough for everyone in the class to own one, with a couple spares. Since platinum/palladium is a contact printing process, we shot all the film with my 5×7. Most of the students had never used a view camera before, so it was an additional learning experience for them. I took the film home with me and developed it that night, so that students would have real live working negatives, properly developed, for the class, and to keep a sample to see what a good negative looks like.
Today, we got in to the darkroom early, set up and went through the process, end to end. I began with a coating demonstration, then exposed the print, developed, cleared, washed and dried it. Then I cut my students loose and let them coat and print away. Students Coating and Printing
We used a combination of artificial UV light source and natural daylight – it was a cloudy overcast day, so actually not a bad day for doing pt/pd prints, but exposure times were LONG outdoors – with some negatives, up to 25 minutes. For a quick-and-dirty portable UV light source, I used a 16-socket PhotoDiox lamp house with black-light compact fluorescent tubes. It worked out great for exposing, if a little slow (the average exposure with it was 12 minutes), but we could only do one at a time with it. We still managed to get two prints done for each student, which is not bad for a single day printing session with so many people trying to use a small facility.
Exposing a Print
We got the chance to try both traditional develop-out palladium prints and printing-out Ziatypes (a variation on the theme but the image if fully formed during exposure and requires only a water wash step instead of development. Here are my students posing with their prints –
Class Photo – May 5-6 Intro To Platinum/Palladium Printing, Photoworks
And here’s a finished print of one of the student images. The print is still wet, and the crappy Olympus digital P&S I was using didn’t white balance well, so my apologies in advance if the shot looks a little yellow –
Well, everything is coming together, on time for once. I just picked up the new hard-copies of my Introduction to Platinum/Palladium Printing manual from FedEx/Kinko’s today. They look very nice. I hope the students will enjoy and appreciate them. It is 29 pages, spiral bound, profusely illustrated and with plenty of white space for note-taking. If anyone wants to buy a copy, email me and I can make the arrangements. They’re $30 each. Class is all set to run on Saturday, and I’ve even met a couple of my students already.
My picture frames for the Artomatic show arrived last night. It was a bit odd because the FedEx Ground guy not only left the packages themselves on the front steps, but he/she ALSO left a hang-tag on the door to tell me that the packages had been left on the front steps. Never you mind that you could barely open the front door to the house for the boxes; somehow I also needed to be reminded that the packages were there and needed to be taken in. Over the weekend I bought the paint for my wall – I got a gallon of flat black interior paint, that SHOULD be enough. My postcards are set to arrive on Friday – I’m getting antsy to see them!
I also had my first faculty meeting at Glen Echo Photoworks last night. It was very productive, and I’m looking forward to being a regular participant there. I’m especially psyched to find out that it is possible to arrange a human figure study workshop – given the general demographic at Glen Echo (there are lots of kids and kids activities there), I was concerned that they’d shoot it down, but if the studio sessions run at night, we should be fine!
I’m re-running the Intro to Platinum class in mid-October, and I’ll be doing the Advanced Platinum class in September. When I have dates finalized, I’ll post them along with a full course description here. Topics will include using digital negatives, printing in Platinum, advanced paper selection and handling, gum-over-platinum, fumed silica treatment and advanced contrast control techniques.
I was tickled that we got mentioned and one of the images by one of our artists was featured in the column, as the WaPo’s Arts section is notoriously unfriendly to local artists.
The evening was a big success – I think we had 50 people come for the artists’ talk and reception, despite the miserable weather all day. My work in the show was some of my 5×7 palladium prints from my trip to Argentina. One thing that I focused on in my artists talk was the story behind each photograph, as opposed to the technical details of its production, which other artists spent a fair bit more time talking about. I know if I went to a gallery talk by a painter, I’d much rather hear them talk about the content of their images than which brush they used. I think it’s a general shortcoming of photographers (I can do it too) to get caught up in the technical details of image production, in part out of a desire to share the knowledge to preserve it, in part to inspire others to try, and in part out of our own fascination and joy at the “wow, I DID this!” factor that is always there (for me at least) every time you successfully produce a print via a chemical process. 20 years on into this passion, I still have that “wow” factor every time I develop a print that works. In the first days of learning, I’d get the “wow” even if the print was crap, just because I made the chemical process work. I’m a little more finicky now and get excited when I see a GOOD print appear in the soup.
Anyway, here I am, talking about my work. You can see one of my prints to my right (your left) in the image. Scott @ Photoworks Alt Visions talk
On a separate note, my platinum/palladium printing class is officially sold out, so I will be offering it again in the fall. Stay tuned for dates/times. I’m very excited about the class, and can’t wait to see how it goes. I’ll also be offering some additional classes in the fall, including a Photo History class (probably) and a one-evening “Collecting and Preserving Antique Images” lecture, where I’ll be trotting out parts of my own collection for people to see real life examples of various antique photographic media.
Ok – frustration time rears its ugly head again. Got all my software updated and connected together, and I even went out yesterday and splurged (there goes the rest of the tax refund!) on an Epson 3880 printer. Now that everything is wired up, I tried doing some scans with the new SilverFast AI8. Reflective scans at medium and even high res (1200 dpi) worked great. Scans from negatives worked up to 2400 dpi. The software allows you to input resolutions beyond 2400 dpi – I wanted to see what would happen at 4800 dpi because I was scanning a large negative (5×7 inch) to have it reproduced at very large size (30×42-ish, maybe even bigger). Well…… SilverFast AI8 choked on the request. The scan completed in a reasonable amount of time (maybe 5 minutes- SOOO much faster than on my old computer), but then took 20+ minutes to “process”, at the end of which, it failed. Again at 3200 dpi – same thing. At 2400 dpi, it worked just fine, so I’ll live with that, as A: technically that’s the optical resolution maximum of the scanner (anything higher is software interpolation I believe), and B: it’s still big enough a file (about 600mb) for the custom lab to work with.
I LOVE Kodak Portra 160nc film after this exercise though – it is VERY easy to scan (with decent software – with craptastic software no film scans easily) and it handles chaotically mixed lighting conditions with ease and aplomb. In the shot I was scanning last night, I had rainbow-colored neon, sodium-vapor streetlights, and fluorescent and incandescent interior lighting, at night, all in the same scene. The only thing I had to color correct for was a minor overall tint caused by sloppy processing at the lab I used at the time. Pretty amazing stuff. Now if they’d only charge less than $350 for a 50 sheet box of the stuff, I’d shoot it more often!
I do have to give SilverFast its props – I tried scanning the same negative with the EpsonScan software that came with the scanner – I had to do MAJOR color correction and density correction with the EpsonScan file. The SilverFast scan was almost dead-on on the first try, and I’ll just need to tweak to my taste, along with some dust and hair removal via the Healing brush. Figuring out how to do this myself saves $80-90 per image in scanning fees at the custom lab every time I want to make a print. Now, to figure out which paper surface(s) and brand(s) I want to use. I got a pack of Epson’s top-of-the-line premium glossy, along with a pack of the Calumet heavy-weight glossy paper to compare; the Calumet paper is dramatically cheaper than the Epson.
I’ve got two news items to announce. I’ll be in an invitational show at Glen Echo Photoworks from April 12-May 7, and I’m teaching my Introduction to Platinum/Palladium Printing class May 5-6 also at Glen Echo Photoworks.
Please come to the opening reception for the show, April 22 – I’ll be speaking briefly about my work. I’ll be showing some selections of my work from Argentina.
April 13-May 7
Alternative Visions – An Alternative Process Photography Exhibition
Scott Barnes, Andrew Currie, Scott Davis, Sheila Galagan, Barbara Maloney, Janet Matthews, Richard Pippin, George Smyth, Grace Taylor
Opening reception and Gallery Talk 6-6:30pm. Sunday April 22 5-7:30
If you are interested in registering for the Intro to Platinum/Palladium, you can find the link on the Photoworks website
The class is a hands-on two day course on the basics of platinum/palladium printing. Topics covered include history, technical basics (chemistry, equipment, paper), major process controls (negatives, exposure, processing), and fine controls (contrast, process variations). This is a film and wet darkroom focused course – I will be providing a 5×7 camera and film, and we will shoot film negatives and make prints from the same. Digital negative making will NOT be covered due to the number of potential variables involved in working from student supplied images.
Please note: As of the date of this announcement, there are only two spaces remaining in the class – don’t hesitate if you are interested. If this class sells out, I will discuss running it again in the fall with the Photoworks staff.
I received great news today – with over a week to go before the wednesday night demo, I have 10 people registered. This is terrific. I’m really looking forward to the event, and I can’t wait to meet all the people interested in the process. There’s still room to sign up if anyone is interested, so please head over to the Photoworks website and sign up.