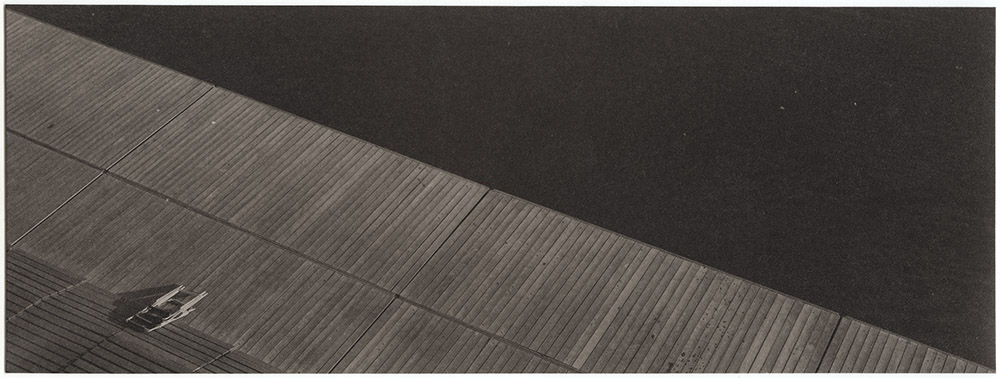
I was up on the old abutment for the C&O Canal viaduct that connected the canal from Georgetown to Alexandria over the Potomac River and looked down to the boat dock for the Georgetown Boat House and caught this composition. I had been photographing Key Bridge with my 5×12 (previously described here) when I looked down and saw this scene which cried out to be shot in the format.
Boathouse Dock, Georgetown
The simple geometry and the contrast between the rigid lines of the dock broken up by the deck chair contrasted with the smooth water of the river really makes the image. Without the deck chair, it would actually be pretty boring. But adding that one small compositional element makes it go from so what to interesting.
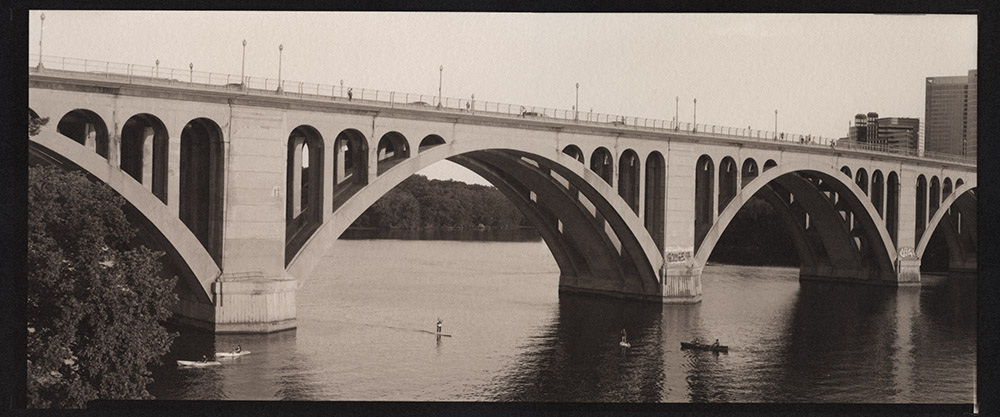
Another print I made this weekend – Key Bridge, in palladium. This is a 5×12 negative from my Canham. For the technically minded, I used a circa 1949 Kodak Commercial Ektar 12″ lens for the shot. It’s a very sharp lens with pleasant rendering, and a good match for the subject matter. I also want to talk for a second about the printing – this is a pure palladium print, with a touch of NA2 added for contrast. Sodium Platinum (NA2 for short) is a contrast agent you can add to a palladium print to boost the contrast if required. NA2 is very powerful stuff – a tiny bit goes a long way. In this case, I needed just one drop of 2.5% NA2 added to the 12 drops of Palladium and 12 drops of Ferric Oxalate sensitizer. NA2 comes from the manufacturer in a 5% strength solution, so you can see how little was needed to give the print some snap.
If you are using blended platinum and palladium, or trying to do a pure platinum print, and are in need of a contrast boost, you cannot use NA2 as a contrast agent – the platinum in it binds with platinum in your paper and what ends up happening is you reduce your highlights, blowing out detail, without actually increasing contrast. If you are using a blend, or pure platinum, you have several options – you can boost the contrast with a different additive, such as gold chloride, you can pre-coat your paper with fumed silica, or you can use a dichromate infused developer. I prefer adding a contrast agent into the emulsion rather than in the developer, because to do the infused developer route, you’ll need to have six or eight bottles of developers with different concentrations of contrast agent, and then you’ll have to play with chemistry to mix up replenisher for each developer concentration as it gets used. That realistically means keeping twelve to sixteen bottles of developer around. The downside to additives to the emulsion is that most of them will alter the color of the print. Gold Chloride will do anything from slightly cooler gray tones to eggplant/aubergine tones, depending on how much of it you use. Sodium Tungstate will actually reduce contrast in the print, and give you reddish brown tones. You can use dichromate in the emulsion as an alternative to the developer, but you must be careful in handling the undeveloped print as dichromate is toxic.
Don’t worry- I’m not abandoning lensed photography with high-acutance, high-precision cameras. I love my Rolleiflex! What I am doing, though, is exploring pinhole photography and other forms of lo-fi photography (my previous post with the Lomo Belair triptychs for example). I find it quite liberating in many ways – you have to quit worrying about precision, and just make images. Live with the serendipitous. Like this first image. I’m absolutely blown away by what I pulled off with it – it’s actually a double-exposure. I’m going to play around more with the idea of multiple exposures on pinhole.
Foggy Bottom Metro, Waiting
Pinholes, although they are very slow in many ways, have some major advantages – because there is no glass to distort the image, they are absolutely rectilinear. Straight lines will always be straight lines. There’s no shutter or aperture to set with one – the pinhole is the aperture, and in the case of my pinhole camera, it’s f/208, which means that even in full sunlight I’m getting roughly 1 second – 2 seconds for exposure times. The shutter in this case is just the body cap – take it off, count one one thousand, put it back on. It doesn’t get simpler than that. Of course, this has a different downside – hand-holding exposures is not realistic, ever, unless you really really really love motion blur.
Pan-American Health Organization HQ
I like motion blur well enough, but I like it applied selectively – I like the contrast between sharp, static and moving, blurred. I like how using long time exposures captures a third dimension to a photograph, time, that we perceive as non-existent in “typical” photography where time is condensed/extracted to 1/500th of a second. Playing with time in a camera really does in a way turn the camera into a time machine. It also shows us that our concept of time is artificial. Things exist not IN time but rather THROUGH time.
Here’s a video of my friend Tracy Storer talking about the 20×24 polaroid camera. Tracy is the manager of the San Francisco 20×24 studio, and has been working with the cameras since the late 1980s in Boston and New York when Polaroid owned and operated their own studios.
the Polaroid 20×24 operates in vertical only orientation
Chuck Close used one to take portraits of President Clinton in the Oval Office. Getting the camera in and out of the White House was quite the undertaking, as the camera and stand combined weigh over 240 lbs.
When you rent the Polaroid 20×24, it includes a staffer to operate the camera for you.
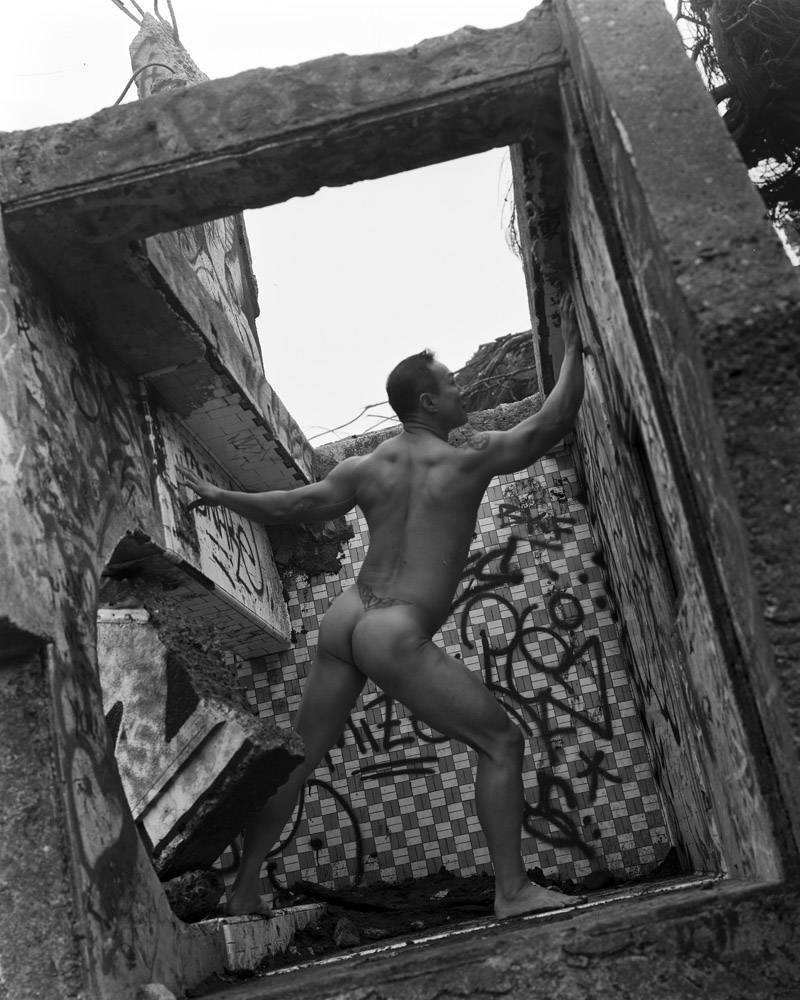
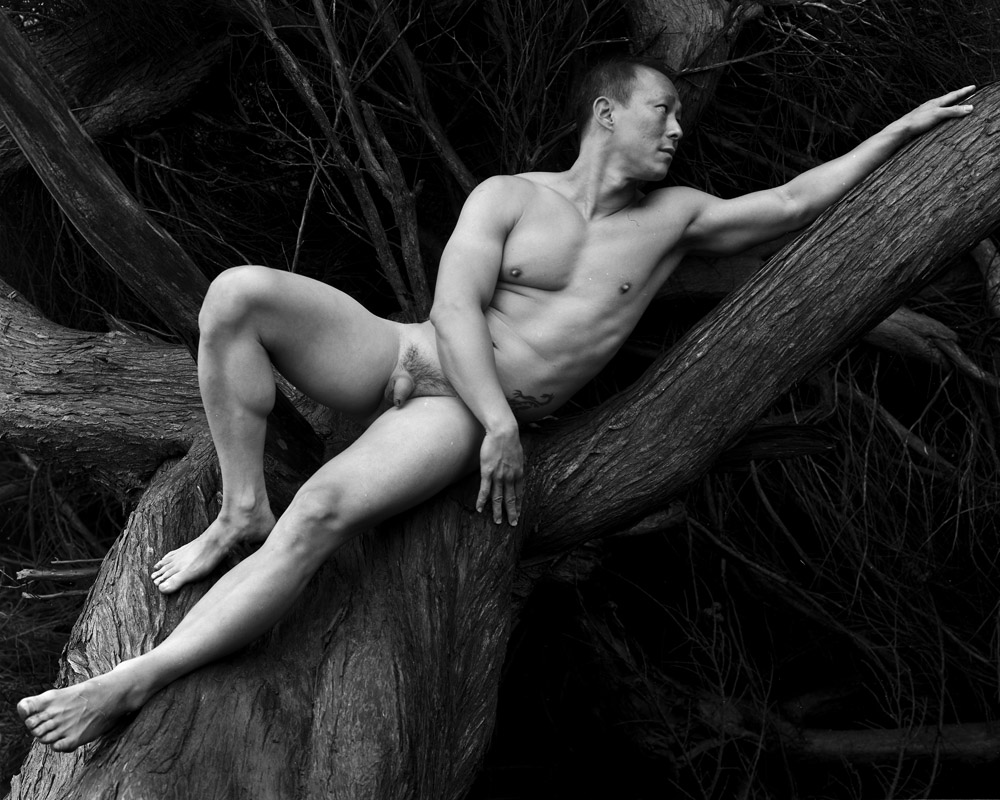
Four more images from my series with K.T. at Land’s End. It’s funny how when you’re shooting, sometimes you’re so in the moment of doing it, you don’t realize the parallels you’re creating. In this first pair, the parallel is obvious.
K.T., Front, FoyerK.T., Back, Foyer
We had an interesting space to work in, so I had him turn and repeat his pose both front and back. I was thinking of exploiting the cubic volume of the collapsed structure, and contrasting the rectilinear forms of the structure with the organic ones of the body.
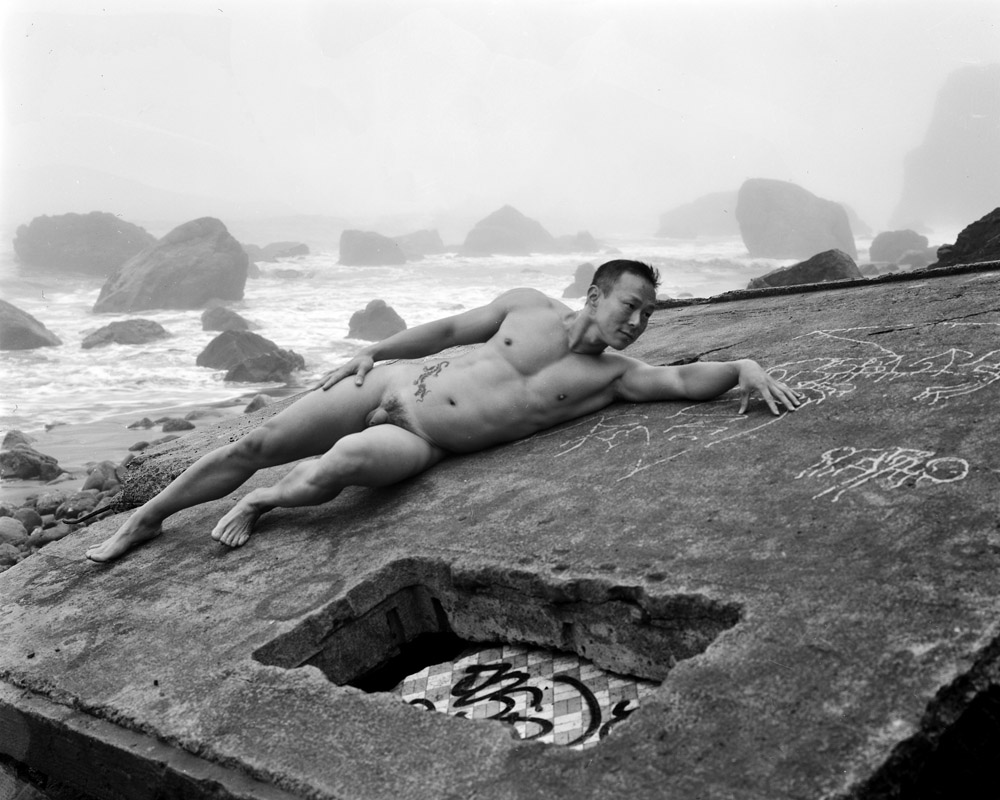
The reclining poses are similar as well, but in a less obvious way because the backgrounds are different, as is the placement/emphasis on the figure. In the tree figure, the human form is front-and-center, definitely the main subject of the image. The coarseness of the bark and the wild gnarls of the branches contrast with the contained, orderly, smooth human body draped over them. In the surfside image, the human figure is very much present, and the focal point around which the image is structured, but it blends in to the scene both tonally and formally.
K.T., Reclining, Wall, SurfK.T., Reclining, Tree
Last but not least, I thought I’d make a diptych out of the two foyer shots, since they so harmonize with each other. I know I wasn’t thinking “Gee, let’s make a diptych out of this!”, or at least not like THIS, when I took them. Back when I took these, I thought almost exclusively as a single-image shooter. Each image was a discreet entity, even if part of a narrative series. So I certainly shot them to be a pair, but I would have envisioned hanging them side by side in separate frames. Funny how serendipity works, isn’t it?
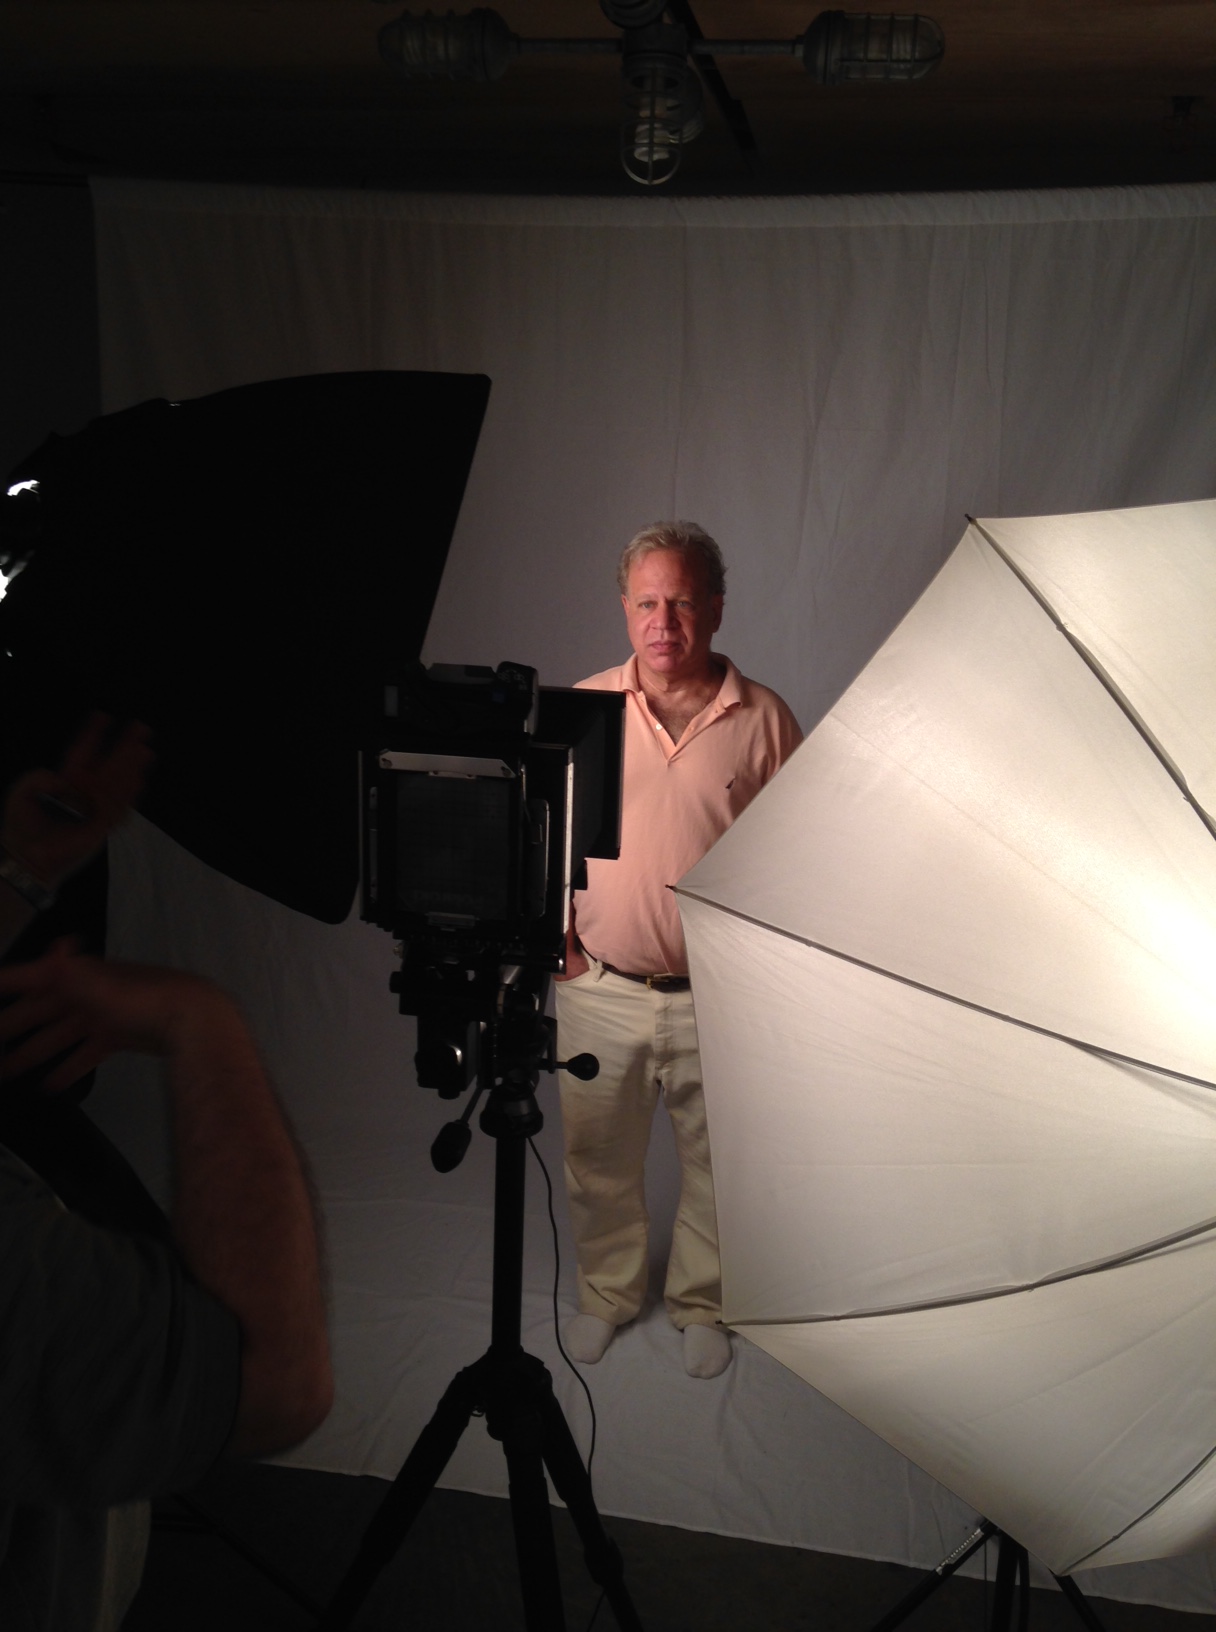
This weekend was the next-to-last session of the Intro to Large Format Photography class I’m teaching at Glen Echo. As a treat, I broke out some of the last remaining sheets of Polaroid Type 55 I have in my personal stash. We had a lot of fun setting up portraits and posing for each other. One of my students even brought along his 6×17 panoramic camera and took a couple frames of all of us in the studio together – a couple were serious, and one was very silly (I gave someone next to me bunny-ears).
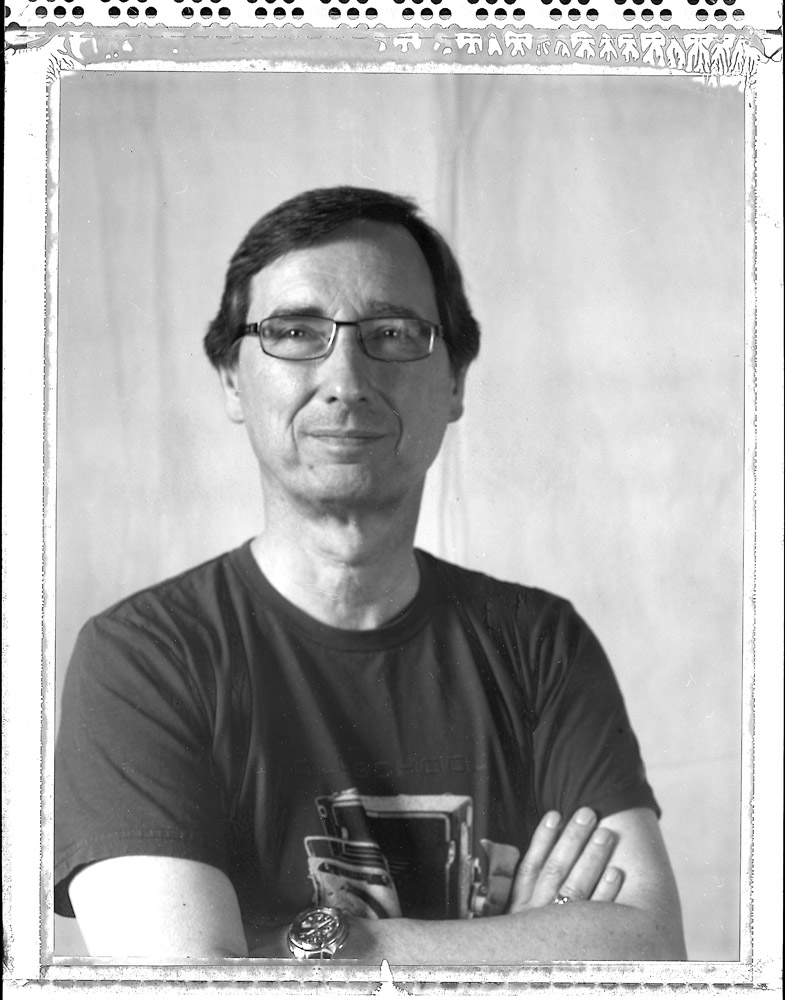
Sean L.
We covered the fundamentals of not only how to use a view camera for portraiture (movements – not many – focusing, bellows extension factor, lens selection) but also basic studio lighting. Given that we were limited on time and had lesson objectives to cover, I dictated the lighting setup with just a main and a fill, driven off my Calumet Elite 2400 W/S unit. It’s a lot of power for just 4×5, but I wanted to give people a real studio experience (that and the moonlights I would have used that are at the school are at the moment buried in the storage closet under dozens of boxes from the exhibits currently hanging in the gallery space).
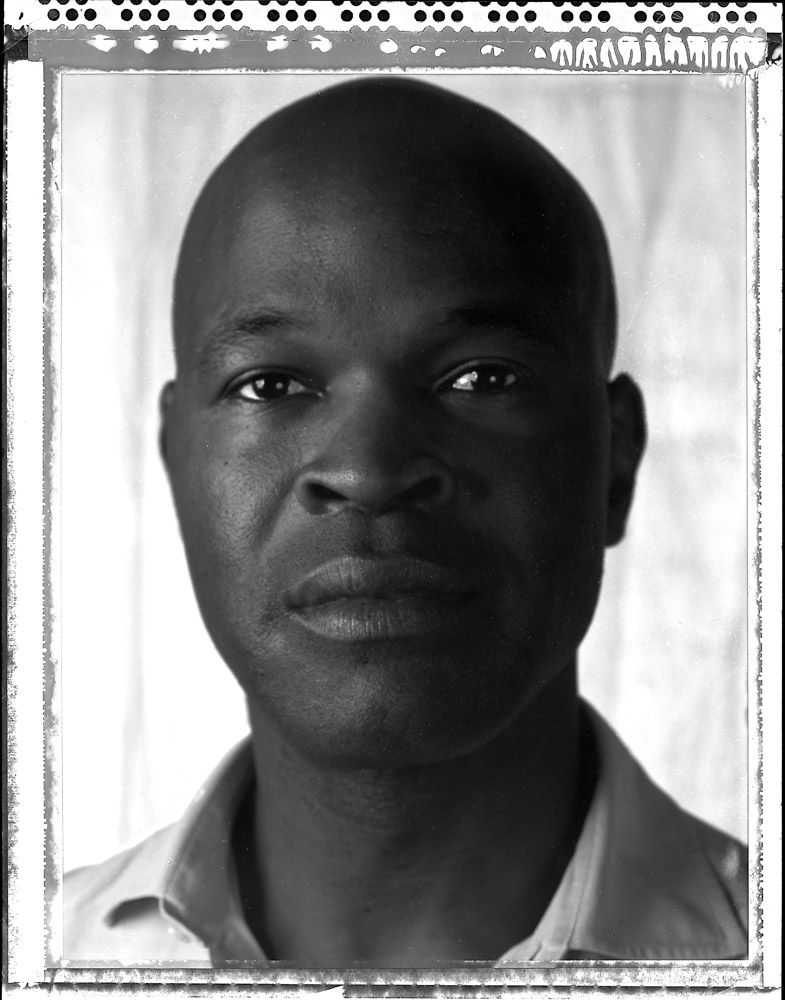
Dean M.
We rigged a softbox on the main light and an umbrella on the fill. The softbox was camera left, and the fill was beside the camera. I used a 240mm Docter Optics f9 Apo-Germinar as my lens because the focal length is a nice one for studio portraiture (not too long, but not too wide either), it’s mounted on a lens board to fit my Sinar (some of my other portrait lenses are on different lens boards), and the shutter has good working flash sync (some of my other portrait lenses are in archaic shutters that don’t have reliable flash syncs – and yes, I’ve had them overhauled but they still don’t work 100% of the time). f9 is a bit dim for a traditional portrait lens, but I think this one produced outstanding results (further confirmation that that lens was a phenomenal buy and well worth every penny).
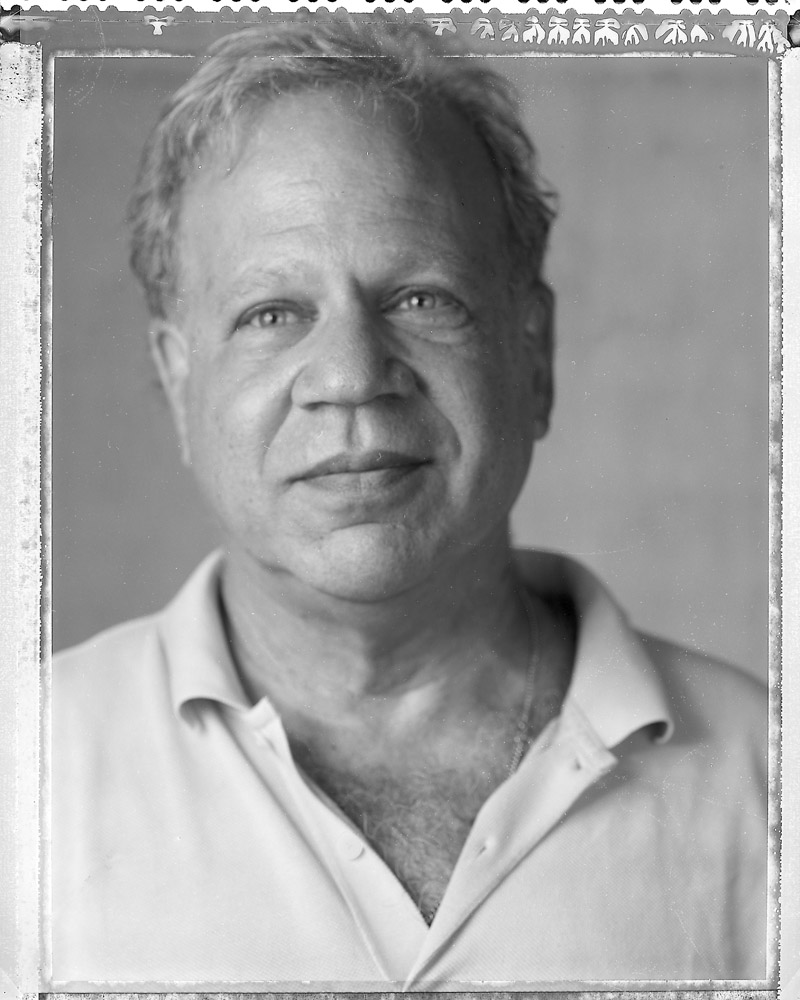
Anthony R.
Polaroid Type 55, for those who are unfamiliar, was an instant film that produced both a positive print and a re-useable negative. Artists have loved the negatives not only for the incredibly fine grain and sharp detail, but for the artifacts at the edges that the Polaroid process produced. It hasn’t been made since 2008, so any Type 55 anyone is using is old stock. There is hope on the horizon for a replacement as a group called “New55” is creating their own improved version. One of the challenges of the original Polaroid Type 55 was that the negative film and the print were not equally sensitive, so you had to decide if you wanted a good print or a good negative – a good print gave you an underexposed negative and a good negative gave you a washed-out print. New55 will have one advantage over the old stuff – the instant print and the negative will be speed-matched so you won’t have to expose for either a good print or a good negative.
Ari G.
I can tell from the negatives that my Type 55, which outdated in 2006, is starting to get a little long in the tooth, as they have begun to lose some contrast. I’ve tweaked it a fair bit in Photoshop to get these negative scans to look good. I’ll try printing them in the darkroom and see what I can do with them – they may print much better than they scan.
Glen Echo Intern
Here are some behind-the-scenes shots, taken by one of my students.
I have to toot my own horn a little today – my spring session of Introduction to Large Format Photography is sold out! I’m even adding three additional seats today to accommodate the folks who contacted me yesterday about registering. The class will cover the basics of how to use a large format camera. We’ll get an understanding of the camera itself – the various types of large format camera, the components of the camera, how to use it, and especially in this digital day and age, WHY to use it. To paraphrase Edward Weston’s comment about color photography: “There are things you can say in large format that you can’t say in anything smaller”. We’ll have specific lessons on film handling and processing for large format, portraiture, studio/tabletop photography, and architecture.
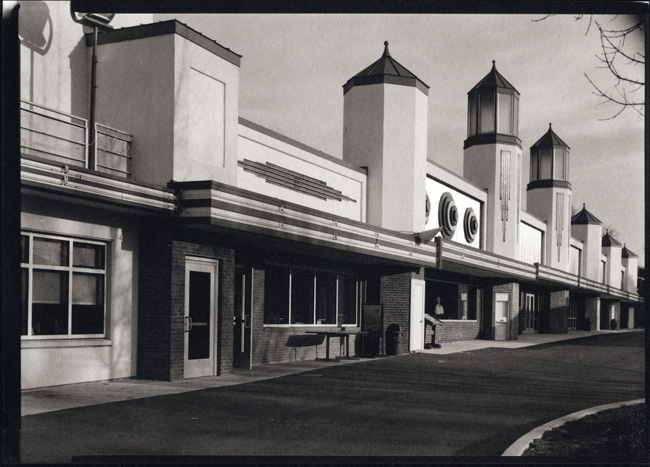
Glen Echo Midway
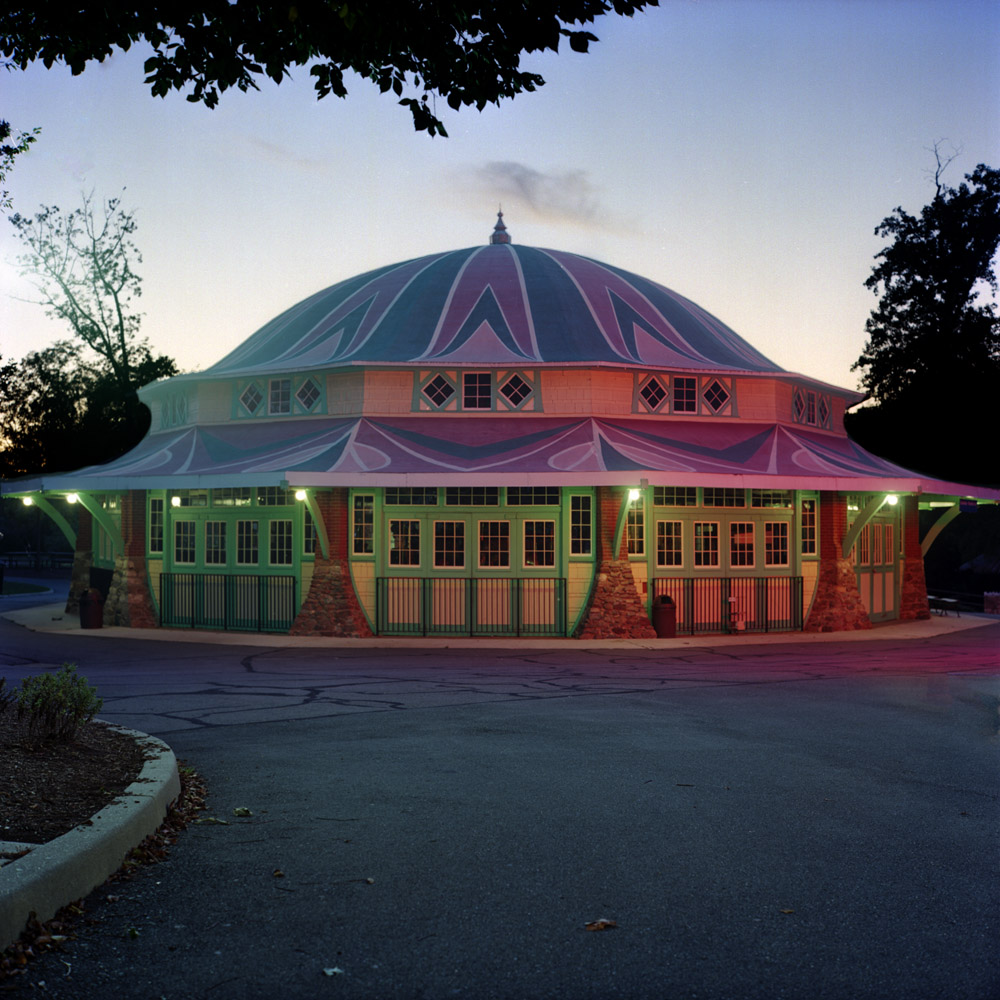
I teach at Photoworks Glen Echo, a non-profit photography education center in Glen Echo Park, which is operated by the National Park Service. Glen Echo Park is a former amusement park a few miles away from downtown DC in Glen Echo, Maryland on the banks of the Potomac River. Originally envisioned as a suburban housing development for the elite of Washington at the end of the 19th century, the only resident to ever build and take up residence was Clara Barton. It became a Chataqua meeting center, and then in the early years of the 20th century, an amusement park. It rose to its peak by being at the terminus of a street car line running out from Georgetown (a neighborhood in DC and formerly a separate incorporated city in itself). The park endured changing demographics and evolving tastes, but closed up shop in 1970. The US Park Service took over and converted it into a community art center where people can come to learn pottery, glassblowing, cast and fused glass, stone carving, photography, painting. There is a children’s dance theater and puppet theater, and the 1902 Spanish Ballroom has square, contra, ballroom, and swing dancing events practically every night of the week. The centerpiece of the park is now and has been since its installation in the 1920s, the Dentzel Carousel which is freshly restored and fully operational. The carousel offers rides daily from May to October.
Dentzel Carousel, Glen Echo, Sunset
Photoworks is the photography center, located in the Main Arcade building. This year marks their 40th anniversary. They offer a full range of classes from introductory photography for children and teens to advanced classes on topics such as The Long-Term Photo Project, iPhone Fun (getting the most of mobile device photography), Photographic Editing and Presentation, and Platinum/Palladium Printing. Photoworks has a full wet darkroom for film processing and black-and-white printing up to 16×20 inches, a fully equipped digital darkroom with Macintosh workstations, Epson flatbed scanner and Nikon 35mm dedicated film scanner, and Epson printers for up to 24″ wide prints.
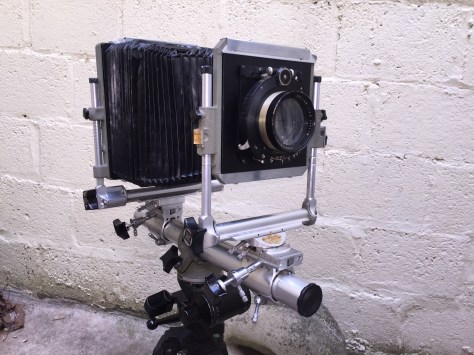
not much to say, really- it’s camera porn, pure and simple. I got a steal on a Sinar Norma 5×7, which I plan to use in the studio (it’s a heavy beast!). Here she is in her glory: Edit
To pretty her up a little I put my Voigtlander Heliar 240mm f4.5 on the front, and used my Sinar pan-tilt head to get her on the tripod.
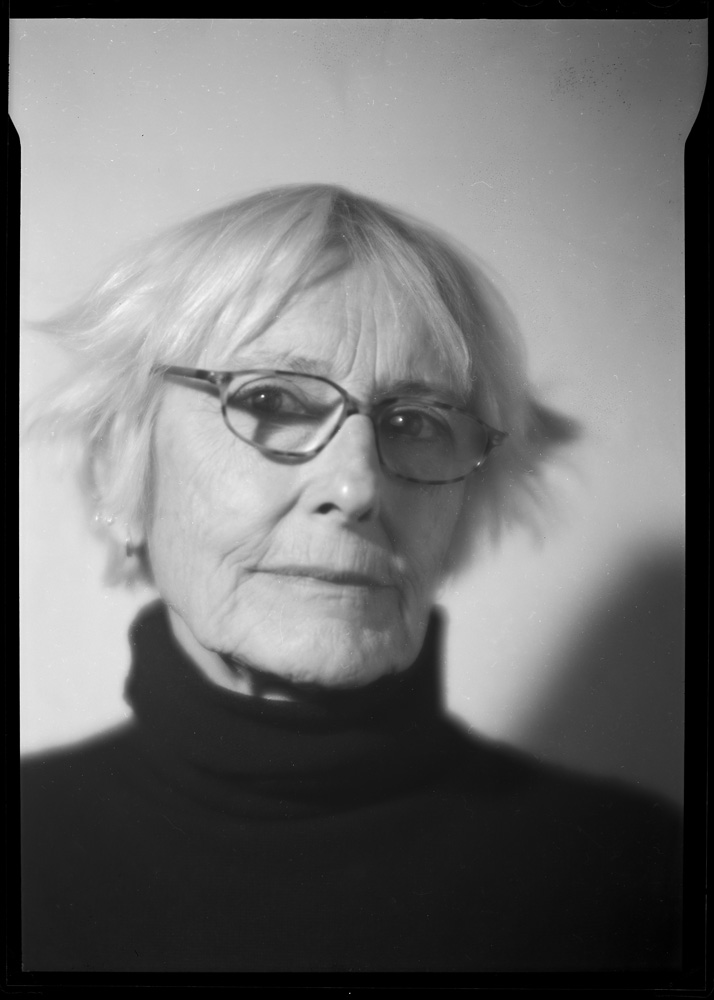
I’m running a quick impromptu by-the-seat-of-the-pants version of my Intro to Platinum/Palladium printing class this weekend. It’s a bit of a hash because we had scheduling conflicts of varying types to deal with, but we did manage to meet today. My normal plan with students is to take them out into Glen Echo park and have them shoot a bunch of negatives with my 5×7, then come back and process them. WELL… today, the daytime high was still below freezing, so we scratched that idea. Instead, we shot some self-portraits indoors using my Hermagis Eidoscope soft-focus portrait lens, a 1000-watt hot light (a VERY welcome hot light given the weather today!) and an improvised guillotine shutter composed of a pair of dark slides, held in a V-formation. The “shutter” starts with the lower dark slide completely covering the lens, and to allow exposure to happen, the pair are swung past the lens so that the gap between them briefly allows light to strike the film. Exposures can be a little variable, but these are forgiving media.
Here is one shot of one of my students:
Barbara, Hermagis #1
and here are two of me:
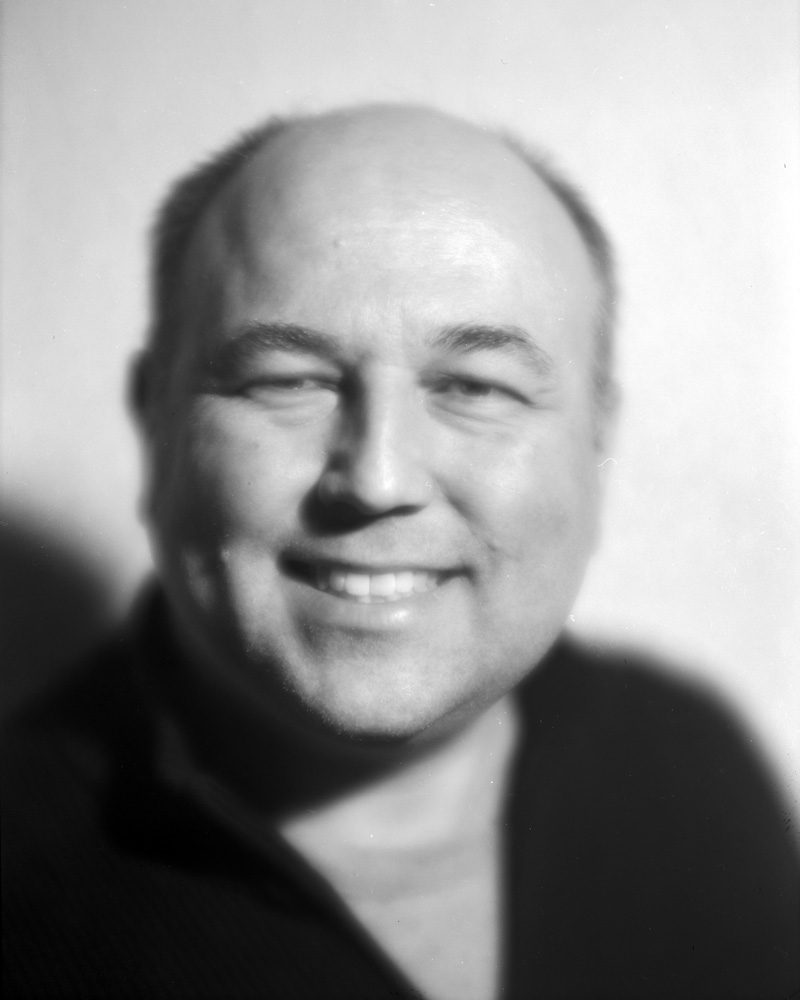
Scott, Hermagis #2Scott, Hermagis #1
I brought the Hermagis to class to give the students a little something special to play around with, since they both had past experience in working with large format, and I think the soft-focus lens fits very well with the alternative process print look.
Of the two of me, which do you all prefer? I know which one I like better, but I’ll wait to get some feedback before I offer my opinion. All three of these are scans from the negatives, not from prints. We will be meeting again tomorrow to do the actual printing.
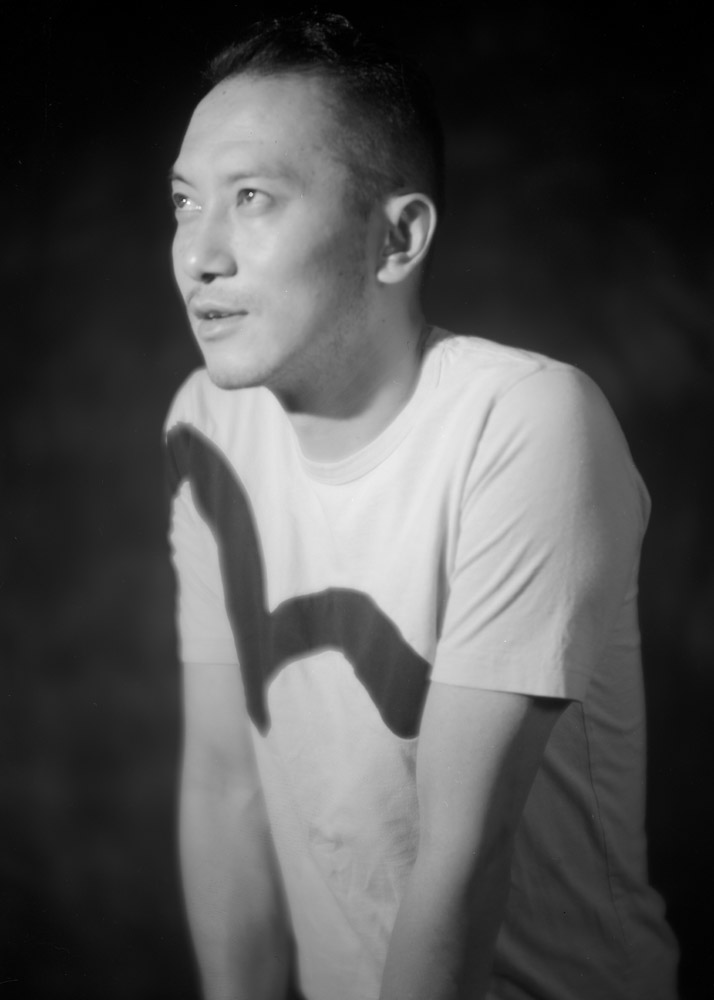
Five more from the shoot. Wanchuk is a fun subject because he always brings a creative energy to a shoot that brings out the best in both photographer and subject.
Wanchuk, T-shirtWanchuk, Profile“Girl With a Pearl Earring” Pose
I call that last one “Girl With a Pearl Earring” because the pose reminds me a bit of the Vermeer painting.
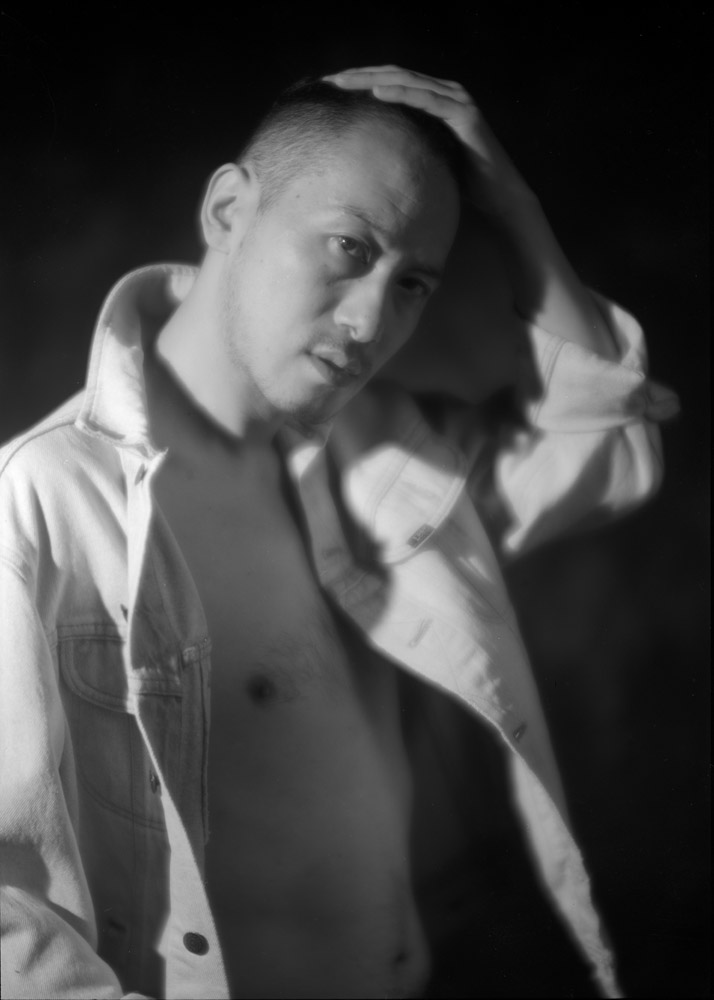
After doing a series of more serious poses, we decided to get a little funky and play around with faces and gestures.
Wanchuk, Denim Jacket
This last one is not typical of what I’d expect someone to use a soft-focus lens to shoot, expression-wise. I think it works, in spite of or perhaps because of the contrast between the content and the image style.